Page
7
!
The battery terminals are well recessed inside the printer. Do not
allow them to contact conductive material since this may create a
short circuit which could cause injury or start a fire.
!
When using the wall mounted charger ensure the socket outlet is close
to the printer and easily accessible during the battery recharging
process. Either switch the socket off (if supplied with a socket switch)
or pull out the charger from the socket or disconnect the plug from the
printer in the event of any problems.
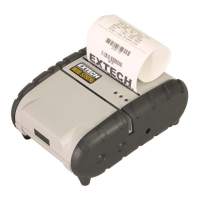
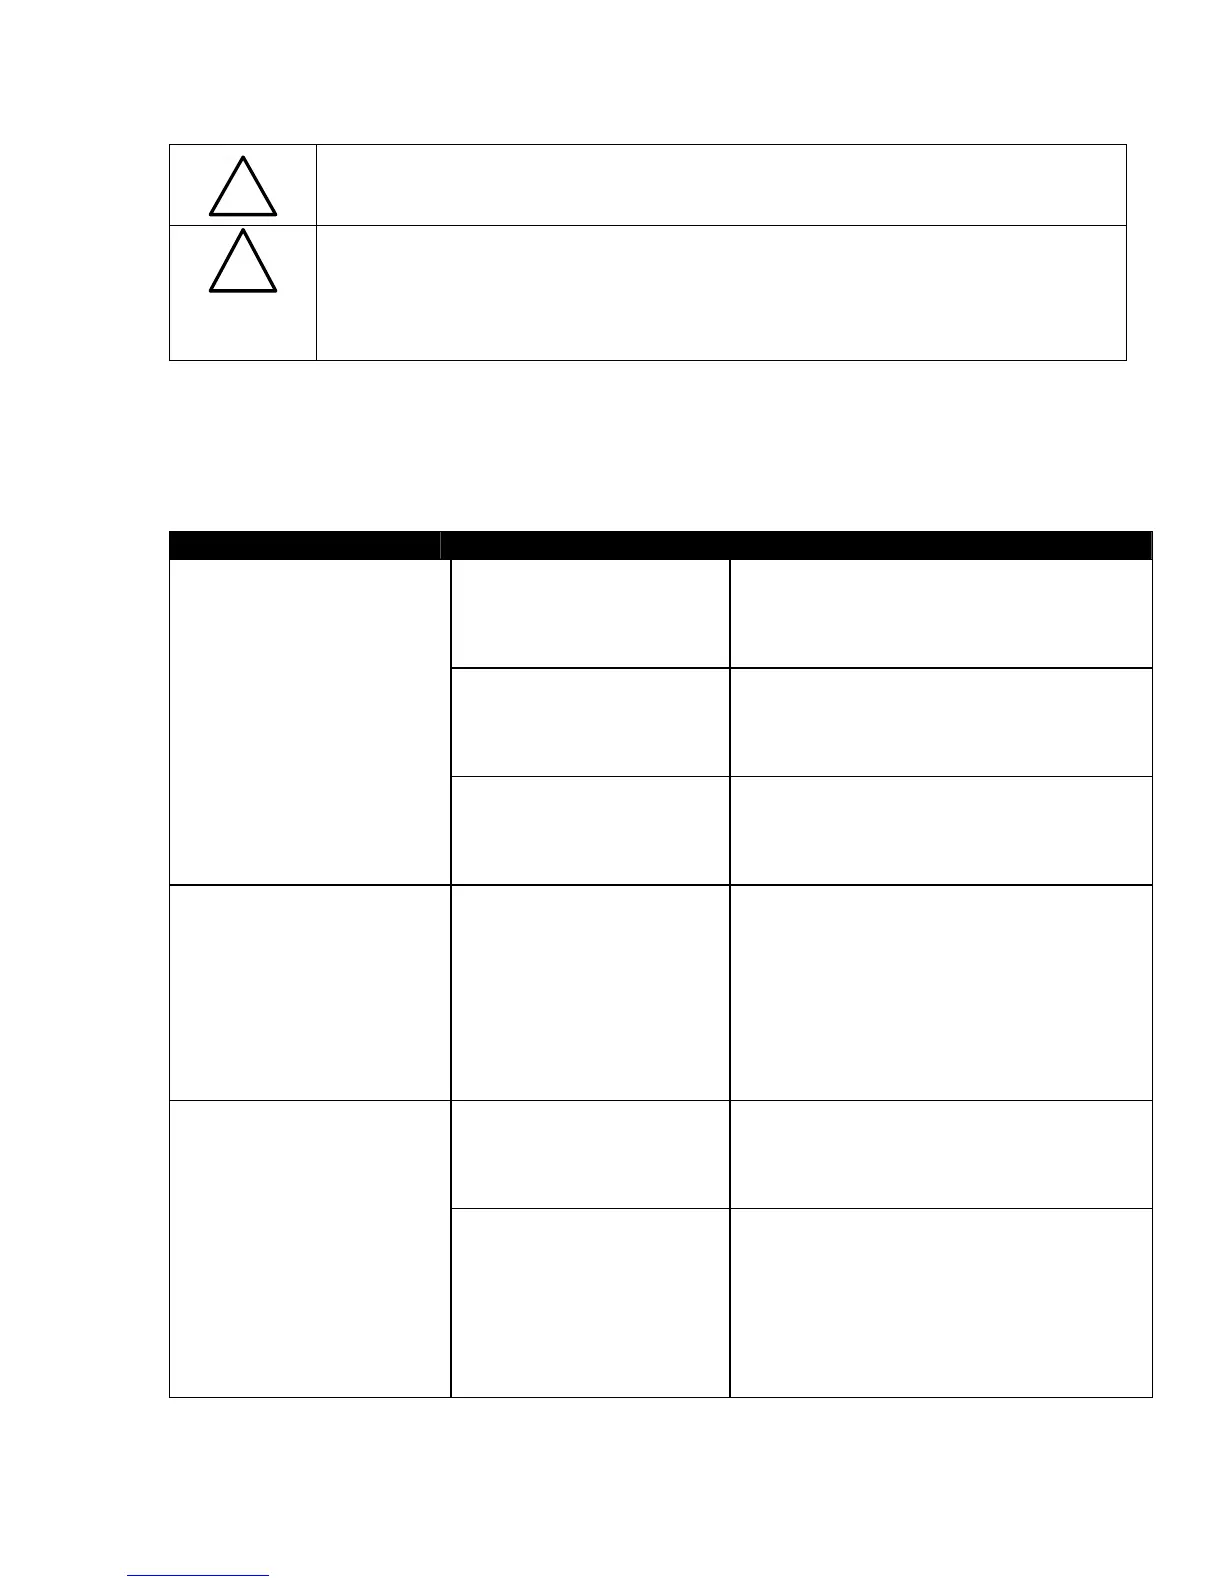
1.3 Reading the LED Status:
This table explains the LED indicator status. Refer to Figure 1 for the locations
described for ON/OFF and FEED pushbutton switches and AC adaptor socket
.
LED Indicator State Status
ON – PURPLE OR
ORANGE
LOW POWER MODE ( If in
BT/80.11b mode the LED is purple ,
If in RS 232 mode the LED Is
orange)
ON - GREEN
If the LED’s Color is Green it
indicates that Power is ON and that
the printer is in RS232 or IrDA
mode
LED # 1
ON - BLUE
If the LED’s Color is Blue it
indicates that Power is ON and that
the printer is in Bluetooth or
802.11b mode
LED # 2 ON - YELLOW The battery charger is charging the
battery at a fast rate. If the battery
is below 5V, the battery is being
“trickle” charged until the battery
voltage reaches 5V, and then the
fast charge rate is started. The LED
will turn off when the battery is
fully charged.
ON -GREEN Indicates that MCR is ready to
accept data.
Indicates that SCR is ready to
accept data.
LED # 3
ON - RED Indicates a fault condition or a
printer error. The printer is not
ready to accept data.
Printer is out-of-paper
Note: Refer to the troubleshooting
guide to determine error or fault
condition.
Table 1 - Reading the LED Status