GAMBREL DETAIL
5V ROOF PANEL
OUTSIDE CLOSURE
FLASH AT-2
BUTYL SEALANT TAPE
TOP & BOTTOM
OF CLOSURE
#14 x 1 1/2" SCREW
(12" O.C.)
BUTYL SEALANT TAPE
TOP & BOTTOM
OF CLOSURE
INSIDE CLOSURE
#14 SCREW PER
EAVE FASTENING PATTERN
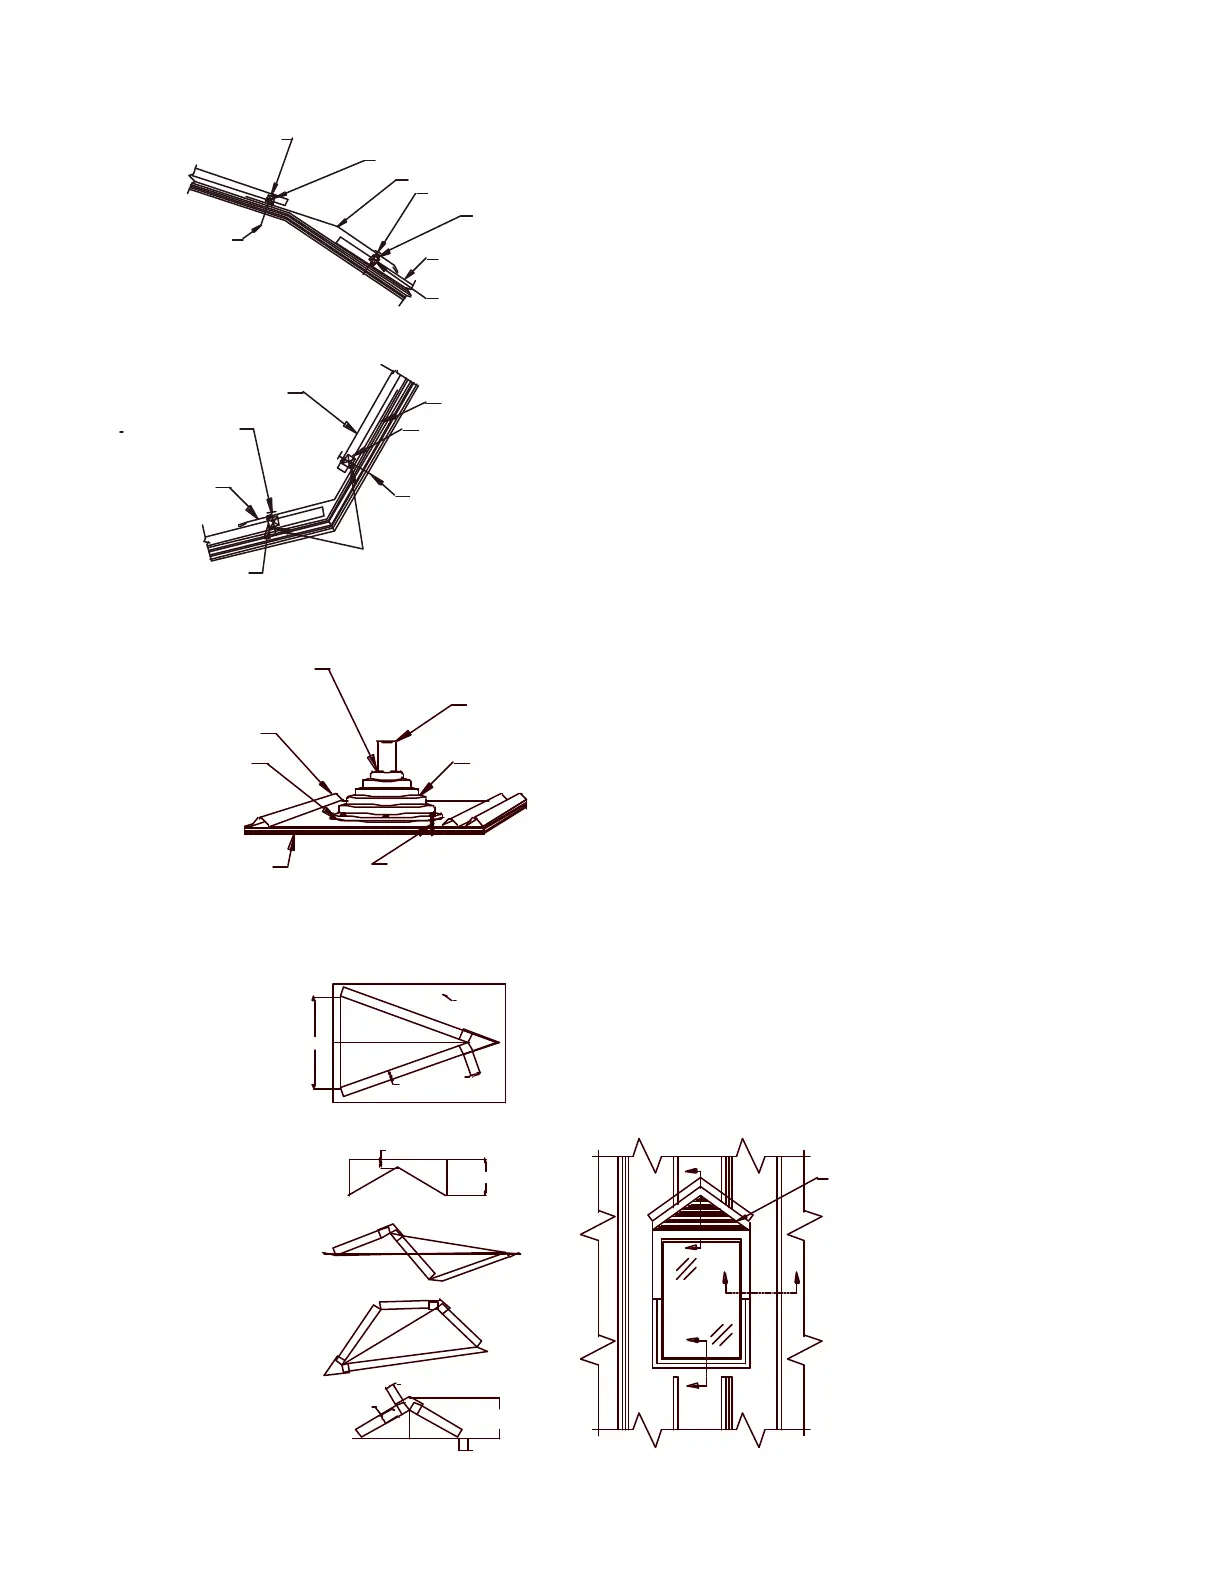
SLOPE TRANSITION (WOOD FRAMING)
1
1
2
" LONG FASTENER
AT EVERY RIB
(12" O.C.)
OUTSIDE CLOSURE
BUTYL TAPE
TOP & BOTTOM
OF CLOSURE
5V ROOF PANEL
FLASH AT-1
INSIDE CLOSURE
30# ROOFING FELT
#14 SCREW PER
EAVE FASTENING PATTERN
Notes:
1. Bottom panels of the slope transition must
be installed first.
2. Mark the location of the foam closure and place
a bead of butyl sealant tape on the panels. Install
the closures and a second bead of sealant on top
of the closures.
3. Install Slope Transition trim using #14x1½” MP
screws to each main rib of the bottom transition
panels.
4. Install closures, sealants, and top panels as shown
above.
PIPE FLASHING
SCREWS SPACED 2" TO 3" MAX
AROUND BASE TO SECURE
PLYWOOD DECK
(OPTIONAL) SILICONE
SEALANT AROUND
CUT OF BOOT
BUTYL SEALANT TAPE
UNDER BASE OF
PIPE BOOT
ROOF PANEL
PIPE BOOT
VENTILATION
PIPE
Notes:
1. Cut the hole in the flashing 20% smaller than the
pipe diameter.
2. Slide the flashing down the pipe.
3. Form the flashing base to conform to the roof
profile.
4. Apply sealant around the perimeter of the
underside of the flashing base and fasten to the
roof using #14 x 1” MP screw fastener.
FIELD-FORMED CRICKET OF DIVERTER
-USE FOR CHIMNEYS AND LARGE OR GANGED SKYLIGHTS
FLANGE CAP
2" MIN.
VERTICAL
UNIT
WIDTH
OVERALL HEIGHT TO BE
MIDWAY PLUS ON HEAD
JAMB
VERTICAL
FLANGE
2" MIN.
FLANGE CAP
2" MIN.
2" MIN
2" MIN
BEND
2" MIN.
RIDGE
UNIT
HEIGHT
FLAT
STOCK
C
C
CRICKET FIELD
FORMED
B
A A
B
PROCEDURE FOR THE INSTALLATION OF SKYLIGHT FLASHING