EN
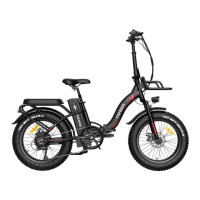
Step 4: Pedal installation.
Note the markings on the pedal screws and on the crank arms. Stamp with "L" is the left pedal, stamp
with "R" is the right pedal, the right pedal is installed on the side of the sprocket.
NOTE: The right pedal (pedal with "R" sticker label) is threaded so that it is tightened by turning
clockwise. The left pedal (pedal with "L" sticker label) is reverse-threaded and tightens counterclockwise.
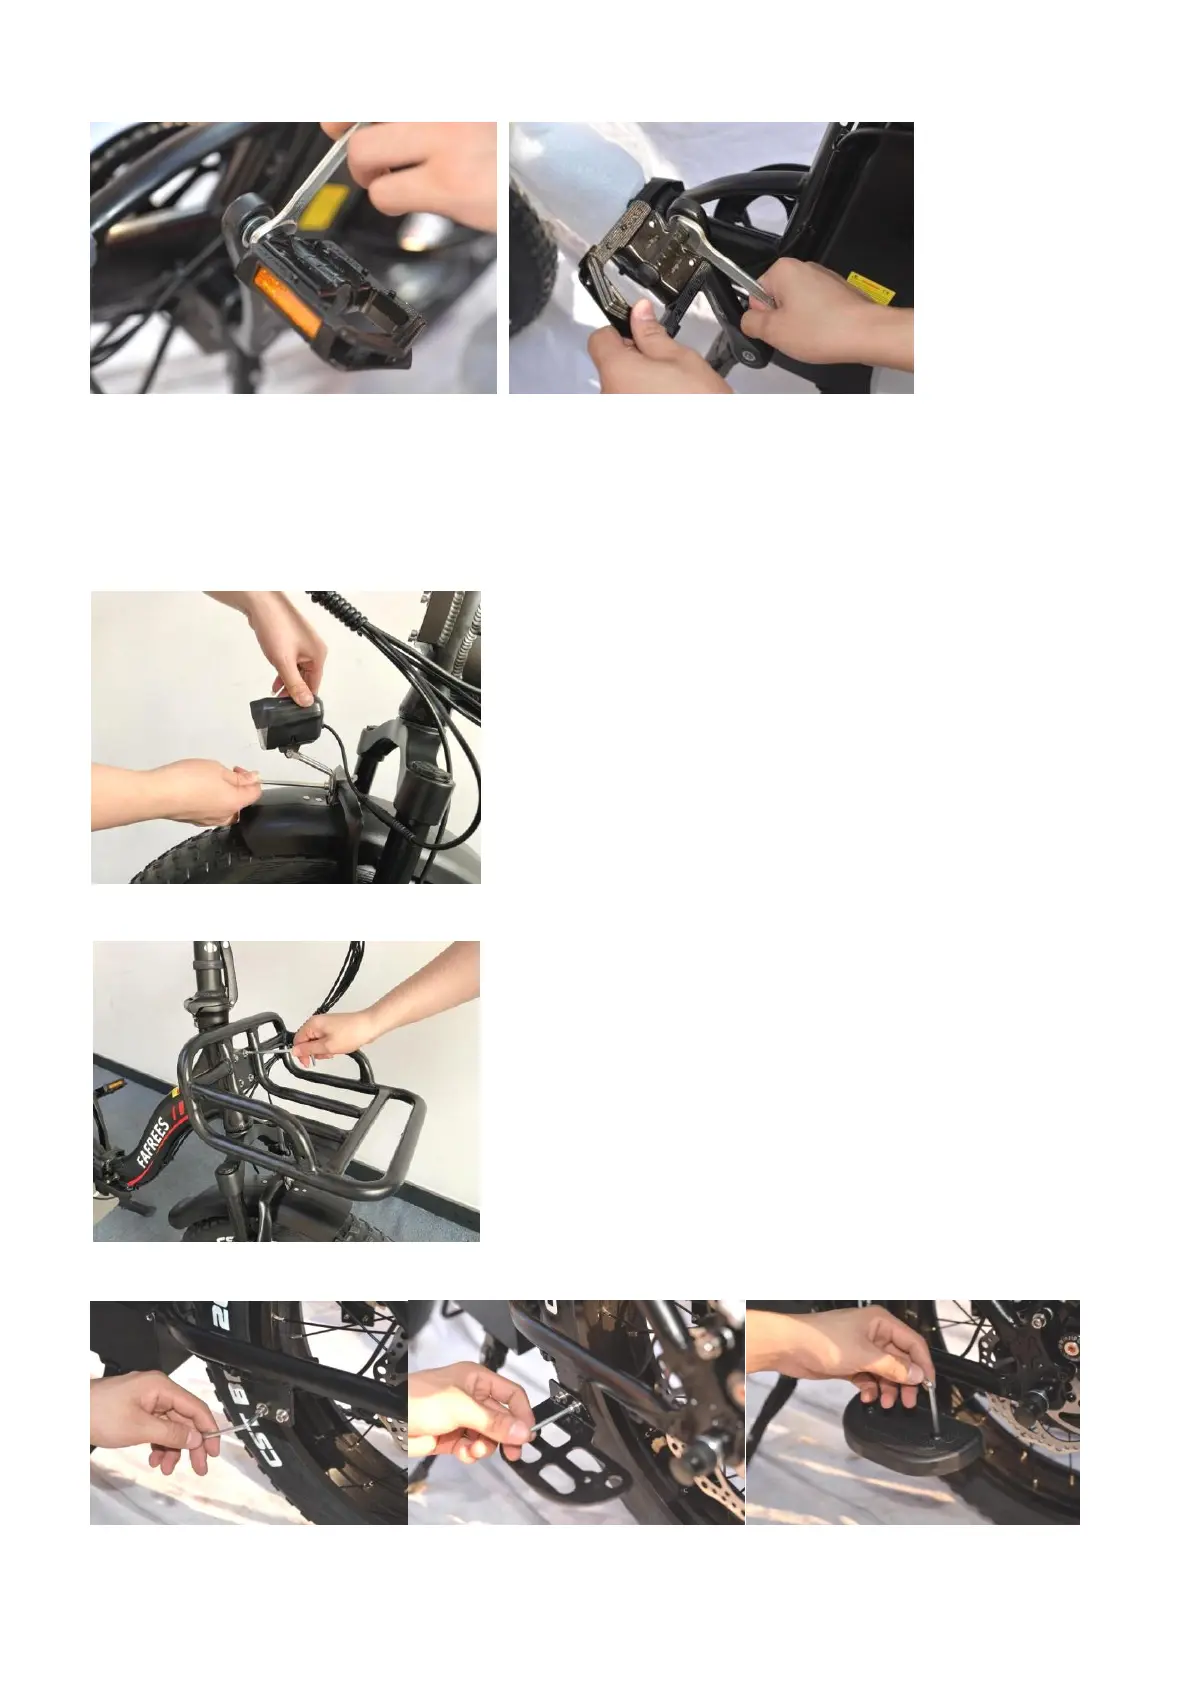
Step 5: Head light installation.
Loosen the front light fixing screw on the front fork. Adjust the
head light to desired position, tighten the screw with a hex key
and a wrench.
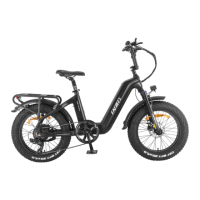
Step 6: Front shelf installation.
Loosen the front light fixing screw on the front fork. Adjust the
head light to desired position, tighten the screw with a hex key
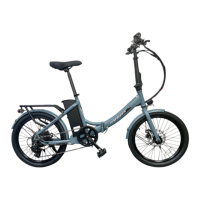
Step 7: Footrest installation.