EasyManua.ls Logo

Faller HORREM User Manual

Faller HORREM
28 pages
To Next Page IconTo Next Page
Page #1 background imageLoading...
Page #1 background image
BAHNHOF »HORREM«
»HORREM« STATION
GARE DE »HORREM«
STATION »HORREM«
Art. Nr. 110130
Sa. Nr. 110 130 1
Inhalt Spritzlinge
Contents Sprues
Contenu Moulages
Inhoud Gietstukken
7 A I
1
x
7 A II
1
x
7 A III
1
x
7 A IV
3
x
7 B
2
x
7 AC I
1
x
7 C
1
x
8 A
1
x
8
1
x
13
1
x
14
1
x
9
1
x
10
1
x
12
1
x
Inhalt Spritzlinge
Contents Sprues
Contenu Moulages
Inhoud Gietstukken
1 B
1
x
1 B
1
x
2 A
1
x
2 B
1
x
3ABCX
1
x
3ABCY
1
x
4 C
1
x
4 C
1
x
6 A
4
x
6 BC
4
x
6 C
4
x
Expert Art. Nr. 170494 für Lasercut-Teile und Lasercut/Kunststoff-Verbindungen verwenden.
Use Expert adhesive Art. no. 170494 for laser-cut parts and their bonding to plastic parts.
Utiliser l’Expert Art. n°170494 pour les pièces découpées au laser et leurs assemblages avec des pièces en plastique.
Expert artikelnummer 170494 voor de laser-cut onderdelen gebruiken
Machen Sie sich bitte vor Beginn des Bastelns mit dem Bausatzinhalt und der Anleitung vertraut und prüfen Sie die Vollständigkeit.
Im Reklamationsfall gilt die gesetzliche Gewährleistungspflicht. Sollte ein Teil fehlen, übersenden Sie bitte den Teilewunsch und den
Kaufbeleg an: Gebr. FALLER GmbH, Kundendienst, Kreuzstraße 9, D-78148 Gütenbach, kundendienst@faller.de. Sollten Sie einmal
weitere Ersatzteile benötigen, senden wir Ihnen den benötigten Spritzling, bei Verfügbarkeit, gerne kostenpflichtig zu.
Bitte beachten Sie, dass produktionsbedingt Einzelteile übrig bleiben können.
Before building your model, please familiarize yourself with the contents of the kit and the instructions for use, also checking whether
the set of parts is complete. In case of any complaint, the legal guarantee obligation shall apply. Should a part be missing, please
send the designation of the part required and the receipt documenting your purchase to: Gebr. FALLER GmbH, Kundendienst,
Kreuzstraße 9, D-78148 Gütenbach, kundendienst@faller.de.
Should you require further spare parts one day, we shall be pleased to send you, with costs, the required sprue, if it is available.
Please note that, on grounds of the production process, some single injection molded parts may be superfluous.
Avant de commencer votre modèle, veuillez vous familiariser avec le contenu du kit et la notice d’emploi, et contrôlez que le lot de
pièces est complet. En cas de réclamation, il s’appliquera l’obligation de garantie légale. Au cas où une pièce manquerait, veuillez
envoyer la désignation de la pièce souhaitée et le bon d’achat à: Gebr. FALLER GmbH, Kundendienst, Kreuzstraße 9,
D-78148 Gütenbach, kundendienst@faller.de. Au cas où vous auriez besoin un jour d’autres pièces détachées, nous vous enverrons
volontiers la grappe requise, si elle est disponible, contre paiement.
Veuillez noter que, pour des raisons de production, il se peut que des pièces détachées soient superflues.
Maak uzelf vóór het bouwen vertrouwd met de inhoud van het bouwpakket en met de handleiding en controleer de volledigheid.
In geval van reclamatie geldt de wettelijke garantieverplichting. Mocht er een onderdeel ontbreken, stuur het verzoek om he
gewenste onderdeel en het aankoopbewijs dan naar: Gebr. FALLER GmbH, klantenservice, Kreuzstraße 9, D-78148 Gütenbach,
kundendienst@faller.de.
Als u ooit meer reserveonderdelen nodig hebt, sturen wij het benodigde gietstuk, indien beschikbaar, graag tegen betaling naar u op.
Let op: om productieredenen kunnen losse onderdelen overblijven.
D
F
GB
NL
Art. Nr. 170688
SPEZIAL-SEITENSCHNEIDER
zum gratfreien Abtrennen von feinsten
Spritzteilen.
Nur für Polystyrol geeignet.
Special side cutter for cutting off ultra-fine
moulded parts without burrs.
Only suitable for polystyrene.
Pince coupante spéciale pour couper sans bavure
les pièces miniatures moulées par
injection. Convient uniquement au polystyrène.
Speciale zijkniptang voor het braamloos
afknippen van de fijnste gietstukdelen.
Alleen geschikt voor polystyrol.
Für den Zusammenbau des Modells empfehlen wir folgende FALLER-Artikel (sind nicht im Bausatz enthalten):
For the assembly of the kit we recommend following FALLER products (not included in the kit):
Pour l’assemblage du modèle, nous vous recommandons les articles FALLER suivants (non inclus dans le kit):
Om dit model te bouwen adviseren wij de volgende FALLER producten (maken geen deel uit van deze bouwset):
Art. Nr. 170492
FALLER-EXPERT
Flüssigkleber in Plastikflasche mit Spezialkanüle
für feinste Klebstoffdosierung.
Liquid cement in plastic bottle with canule
for very fine dosage.
Colle liquide en bouteille plastique
avec bec verseur pour un dosage précis.
Vloeibare lijm in plastic-flacon met doseerbuisje
om nauwkeurig te lijmen.
Question and Answer IconNeed help?

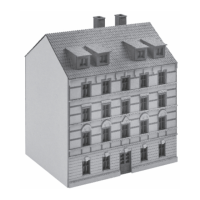
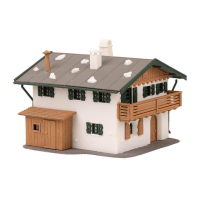
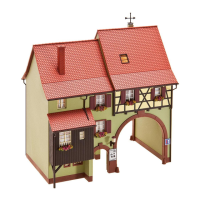
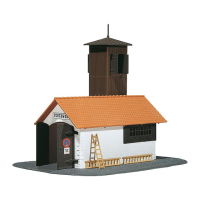
Do you have a question about the Faller HORREM and is the answer not in the manual?

Faller HORREM Specifications

General IconGeneral
BrandFaller
ModelHORREM
CategoryToy
LanguageEnglish

Summary

Horrem Station Model Kit Overview

Product Contents and Parts List

Lists all sprues and their quantities included in the kit.

Recommended Tools for Assembly

Lists essential tools like liquid cement and specialized cutters for model building.

General Usage and Guarantee Information

Provides instructions for model building and warranty information in multiple languages.

Initial Assembly Steps

Applying Mask and Laser-Cut Adhesive

Instructions for using masking paper and laser-cut glue in the initial assembly phase.

Assembling Top Frame and Non-Bonding Areas

Guides on attaching the top frame and identifying areas where glue should not be applied.

Decorative Elements for Station Area

Details on applying decorative elements to enhance the model's appearance.

Further Assembly Stages

Applying Glue to Specific Points

Highlights precise gluing locations to ensure correct assembly of components.

Detailing Interior and Exterior Frames

Installing Interior Door Frames

Instructions for fitting the internal door frames to complete the building's interior.

Attaching Exterior Window Frames

Guidance on mounting the external window frames for the building's facade.

Constructing Wall Sections

Assembling Wall Panels (I & J)

Step-by-step guide to joining the main wall panels for the building structure.

Adding Decorative Strips to Walls (K & L)

Instructions for affixing decorative strips to the assembled wall sections.

Window Foil Preparation

Cutting Window Foil to Size

Detailed instructions and dimensions for cutting various window foils for the model.

Applying Decals and Window Films

Applying Decorative Decals (Deco 2 & 3)

Guidance on applying decorative decals and window films to the model's exterior.

Removing Masking Material

Instructions for removing masking material after certain assembly steps are completed.

Interior Detailing and Furnishings

Installing Interior Shelving Units (Q, R, S)

Steps for assembling and placing various shelving units inside the building.

Adding Decorative Items (T, U, V, W)

Instructions for placing small decorative items and furniture within the model.

Further Interior Decorations

Attaching Small Decorative Features (a-e)

Installing various small decorative parts and accessories inside the model.

Assembling Seating Areas (f-i)

Guide to assembling and placing seating arrangements within the station.

Window Displays and Signage

Installing Window Display Units (j, k, l)

Steps for fitting window display units into the model.

Applying Signage and Decals (m, n, o)

Instructions for applying signs and decals to the exterior and interior.

Exterior Features and Kiosks

Assembling Kiosks and Stands (p, q, r, s)

Guide to building kiosk structures and stands for the station area.

Attaching Building Facade Elements (t, u, v, w, x)

Instructions for attaching facade elements and completing the building's exterior.

Window Foil Cutting and Application

Preparing Window Foils (A4 & A5)

Instructions for cutting specific window foils (A4 and A5) accurately using adhesive tape.

Additional Window Foil Preparation

Cutting and Applying Window Foil

Detailed steps for cutting window foil accurately using a ruler and knife.

Note on Included/Excluded Accessories

Information regarding accessories that are not included with the kit.

Model Base Preparation

Preparing the Base Structure (D & E)

Instructions for preparing the main base structure of the model.

Removing Specific Sections (F)

Guidance on carefully removing designated sections from the base material.

Laser-Cut Component Assembly

Assembling Laser-Cut Parts (F & G)

Steps for assembling components made with laser-cut technology.

Removing Sections from Laser-Cut Sheets (H)

Instructions for carefully detaching specific parts from laser-cut sheets.

Connecting Laser-Cut Layers

Joining Upper Laser-Cut Layers (G & H)

Guides the user in joining the upper layers of laser-cut components.

Securing Lower Laser-Cut Layers (I & J)

Instructions for securing the lower layers of laser-cut parts to the structure.

Detailing with Laser-Cut Strips

Attaching Laser-Cut Strips (K)

Steps for attaching various laser-cut strips to the model.

Adding Small Laser-Cut Elements (L)

Instructions for adding smaller, detailed laser-cut elements.

Completing Laser-Cut Assemblies

Finalizing Laser-Cut Connections (M)

Guidance on making final connections for laser-cut parts.

Securing Laser-Cut Components (N)

Instructions for securing the last laser-cut components into place.

Lighting Installation Considerations

Precise Light Strip Placement

Emphasizes exact positioning for breaking and placing the light strip.

Note on Included Illumination Kit

Informs the user that the illumination kit is not included with the main model.

Roof Detailing with Light Strip

Fixing Sanded Foil to Roof

Instructions for attaching the sanded plastic sheet to the roof using double-sided tape.

Attaching Light Strip Components (O & P)

Guides the user in attaching the light strip and related components to the roof.

Building Facade and Masking

Applying Front and Outer Frames

Instructions for fitting the front and outer frames of the building.

Using Masking Material (M2)

Guidance on using masking paper (M2) for painting or detailing.

Final Assembly and Finishing Touches

Joining Roof Sections (U & V)

Steps for assembling the roof sections and attaching them to the building.

Final Model Placement (P & W)

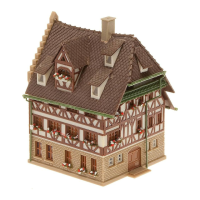
Guidance on placing the completed model and its surroundings.

Base Frame Assembly

Preparing the Base Structure (a)

Instructions for preparing the main base structure.

Attaching Bottom Frame Elements (b)

Guidance on attaching the bottom frame elements to the base.

Model Variants and Decoration

Applying Plexiglas and Variant Cover (a, b, c)

Instructions for applying plexiglass and variant covers to the model.

Adding Decorative Elements (d, e)

Steps for adding specific decorative elements and clock details.

Solar Panel Installation

Assembling Solar Panel Units (f, g)

Instructions for assembling the solar panel modules for the roof.

Attaching Solar Panels to Roof (h, i)

Guidance on mounting the assembled solar panels onto the building's roof.

Exterior Details and Signage

Adding Station Signage (d, k)

Instructions for attaching station signs and logos.

Installing Lighting Poles (j, l, m, n)

Guidance on installing street lights and supporting poles.

Final Model Presentation

Placing Signposts (n)

Instructions for positioning the decorative signposts.

Finalizing Station Details (o, m, k)

Completing the model by adding final exterior details and signage.

Related product manuals