Mi 2472 12
ITALIANOENGLISHFRANÇAISESPAÑOLPORTUGUÊSDEUTSCH
- Editing a User
- Select the user you want to edit and press .
- Select “Edit” and press .
To delete or edit the contact you can overwrite the new
text on the existing one or delete it completely and then re-
write the new contact.
a) Overwriting. To change the contact (or individual
characters), position the cursor on the first character to be
changed and proceed as described in paragraph “Entering
a new user”.
b) Deleting. Place the cursor at the bottom of the text (or on
the character next to the one to be deleted) and press 4 to
delete the previous characters. Rewrite the new text as
described in paragraph “Entering a new user”.
At the end of procedure, press to confirm, the display
shows the user’s address.
Make any changes to the address (by pressing to delete
it and rewriting the new address) and press to confirm
the changes made.
- Editing an alias
To change the Alias code, you must:
- elect the user to whom you want to associate the alias and
press ;
- select “Edit Alias” and press ;
- dial the numeric code (press to delete any previously
code programmed) and press to confirm.
- Deleting a user
- Select the contact and press .
- Select “Delete” and press .
- Select No to exit without deleting the user or Yes to
permanently delete the user, after a short wait the list of
users is again displayed.
- Sort order
Allows you to set the sort order of the list of contacts from the
directory.
- Select “Sorting type” and press , the display shows:
Name, Address, Alias.
- Select:
- Name to sort the contacts in alphabetical order (from A to
Z);
- Address to sort the contacts according to the relevant
address (from 1 to 250);
- Alias to sort the contacts according to the alias address
(from 0 to 9999).
- Deleting all contacts in the directory
- Select “Delete ALL” and press .
- Select No to exit without making any changes or Yes to
delete all the contacts in the directory.
- Restore all your contacts in the directory
- Select “Recovery ALL” and press .
- Select No to exit without recovering or Yes to restore the
contacts mistakenly deleted.
Loading contacts by PC
You can load names directly from your PC.
Load the user-names on the PC using the Farfisa software
application (supplied on demand).
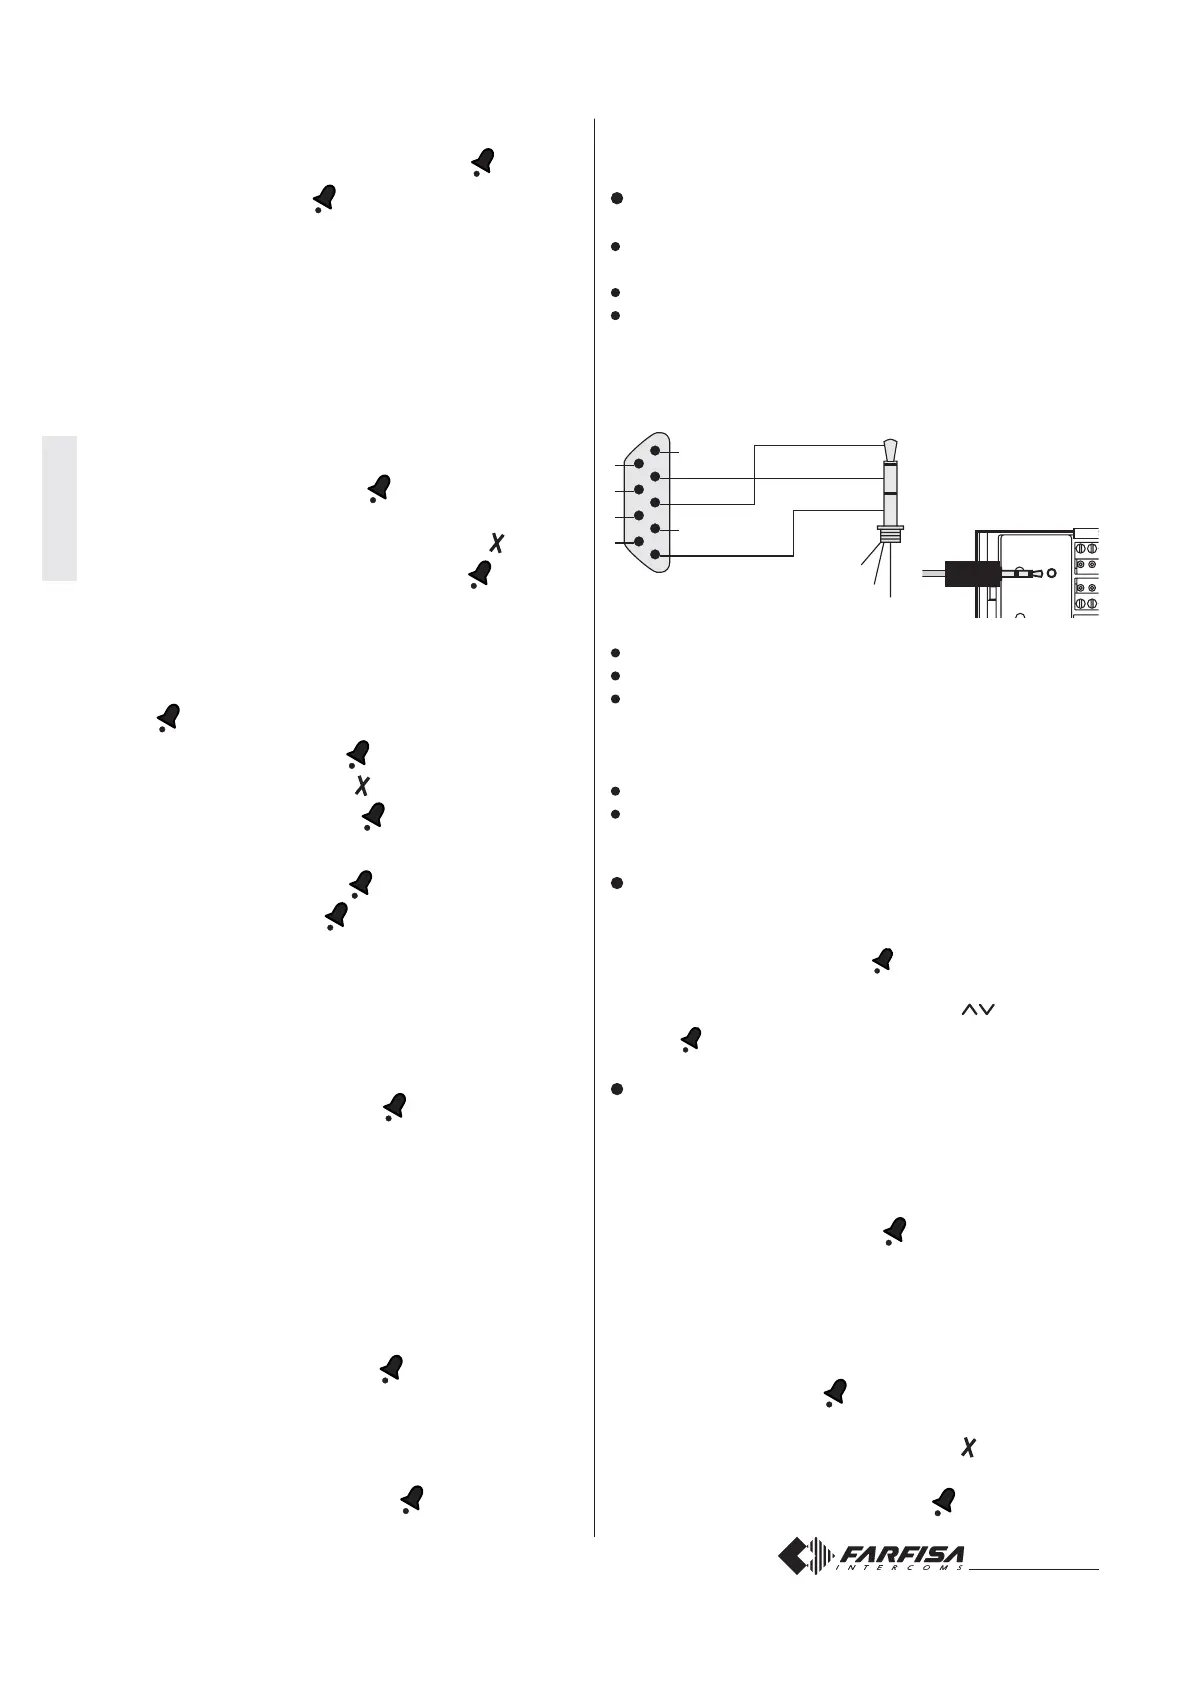
Turn OFF the push-button panel and the PC.
Connect the PC serial port to the stereo jack on the back
of the push-button panel with a cable as shown in the figure
below.
1
2
3
4
5
6
7
8
9
3
2
5
5
2
3
Ø = 2,5mm
PC serial port
Stereo jack
Turn on the PC and then the push-button panel.
Follow the instructions provided with the software.
Check the download progress by accessing the display
mode of the directory on the TD6100PL keyboard.
When the contacts are all transferred the keyboard will
delete any contacts previously entered.
Turn off the push-button panel and then the PC.
Disconnect the cable from the PC and the push-button
panel.
Language choice
- Access the programming mode as described in the sec-
tion “Enter the programming mode”.
- Select “Language” and press , the display will show the
list of available languages.
- Select your preferred language with the buttons and
press .
P1 and EC Addresses
With this program mode you can assign the addresses to
the terminals EC and P1.
To program one or both addresses, you must:
- Access the programming mode as described in the section
“Enter the programming mode”.
- Select “Addresses” and press , the display shows P1
and EC.
- P1 address
By connecting a button to terminals P1 you can make a call
directly to an internal user. To associate the address of the
user to be called to the button P1, you must:
- select “P1” and press ; the previously programmed
address or an empty box are displayed;
- delete the existing address by pressing ;
- enter the address of the extension you want to call with the
button P1 (from 1 to 250) and press .
S1S2
PC
TD6100PL
 Loading...