CAUTION:
•
Use only AAA or IEC R03 1.5V batteries.
• Remove the batteries if the remote control will not be used for
a month or longer.
•
Do not attempt to r
echarge the supplied batteries.
• All batteries should be replaced at the same time.
• Do not dispose of the batteries in a fire as they may explode.
•
Do not mix old and new batteries.
• Do not mix alkaline, standard (carbon - zinc), or rechargeable
(nickel-cadmium) batteries.
•
Do not install the batteries with the polarity (+/–) r
eversed.
• Keep batteries and other objects that could be swallowed away
fr
om young childr
en. Contact a doctor immediately if an object
is swallowed.
10
D
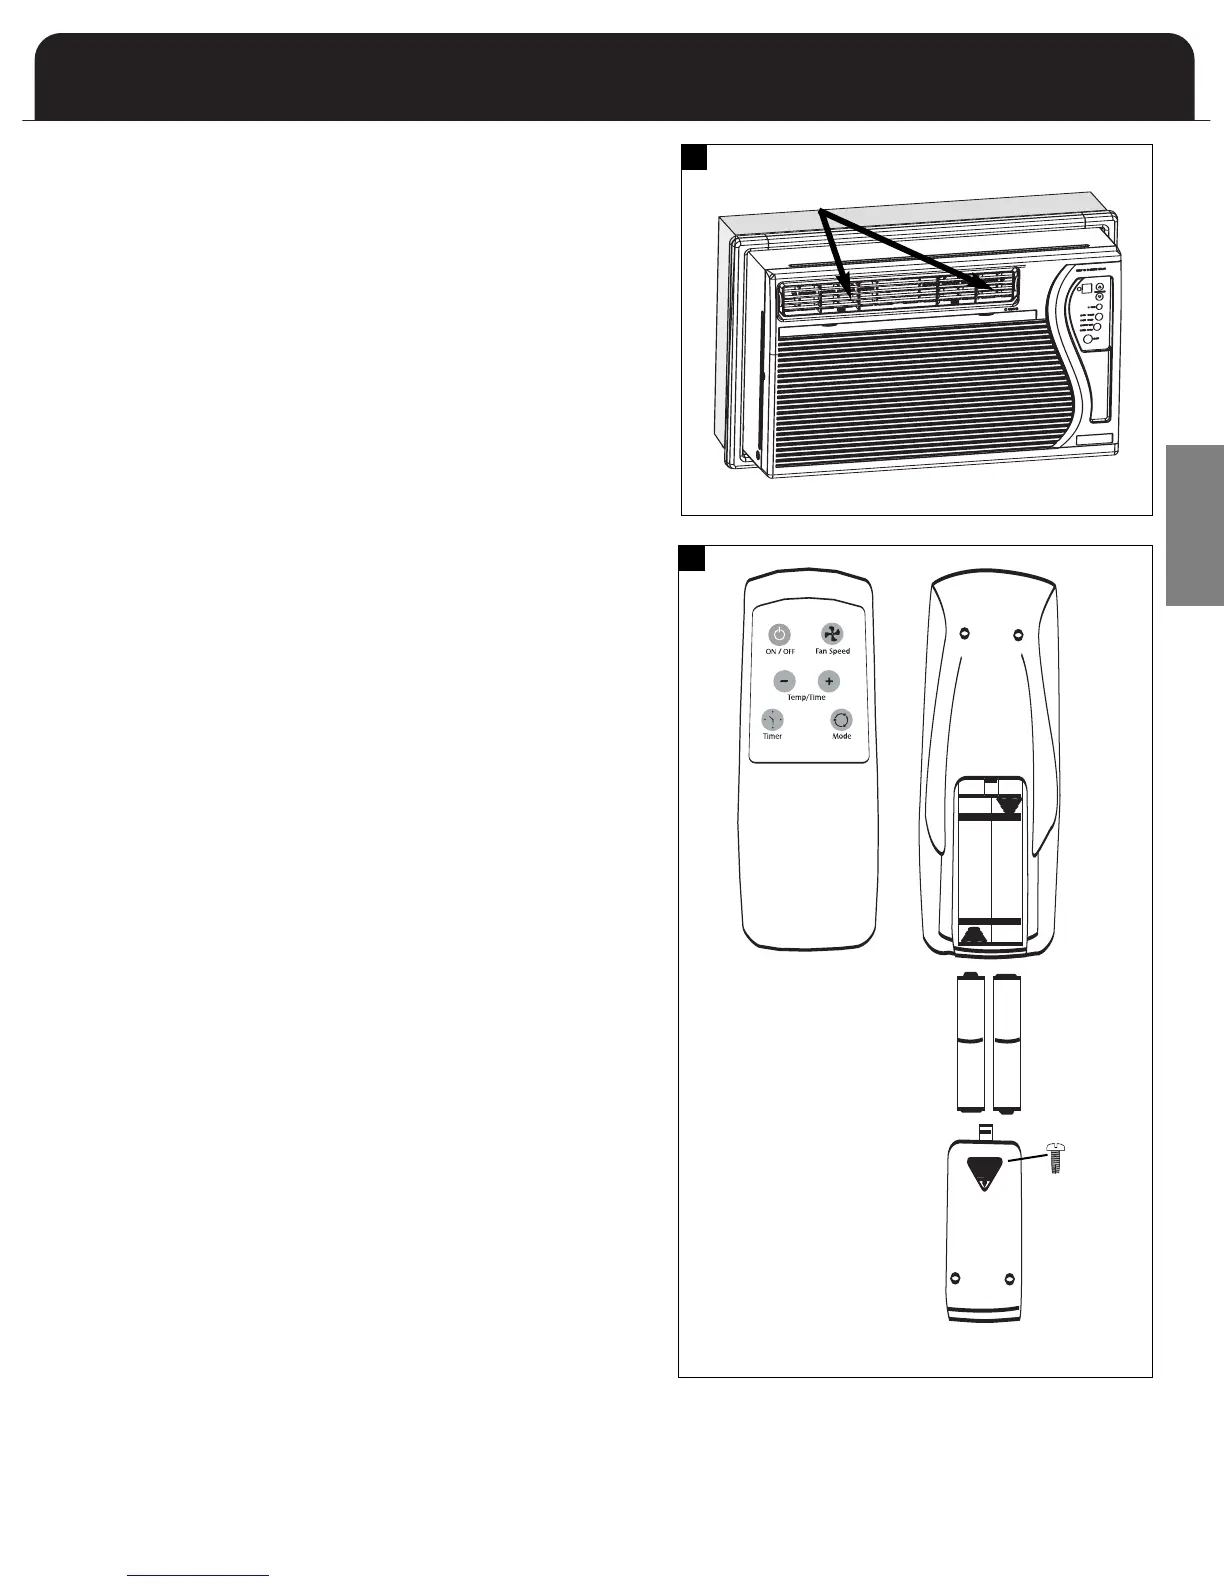
irecting Airflow
(Unit with adjustable louvers)
The unit includes adjustable louvers to direct discharge airflow.
Louvers are manually adjusted by moving the levers in the direction
of desired airflow. (Fig. 13)
Adjustable louver
Air Conditioner Remote Control
AAA
IEC R031.5V
+
-
AAA
IEC R03
1.5V
AAA
IEC R031.5V
+
-
AAA
IEC R03
1.5V
The functions on the remote control work the same as your air
conditioner’s touch controls. For a full explanation of these controls
please see the previous page .
On/Off
The On/Off button is used to turn the unit on or off.
Temp/Time
The Time/Temp buttons are used to raise or lower the set
temperature. These buttons are also used to set the timer.
Mode
The Mode button changes the operational mode. Available modes
are: Fan, Cool, Heat (Heat models only), and Energy Save.
Fan Speed
Each time the button is depressed it changes the fan speed setting.
Available fan speeds are High, Low, and Auto.
Timer
The timer button accesses the timer function which can be set to
either turn the unit on or off.
OPERATION
T
&
SAFETY PRECAUTIONS
I
ELECTRICAL REQUIREMENTS
& SAFETY PRECAUTIONS
INSTALLATION
TROUBLESHOOTING
TROUBLESHOOTING
ELECTRONIC CONTROLS
WARRANTY
MAINTENANCE
OPERATION
INSTALLATION
INSTALLATION
INSTALLATION
MAINTENANCE
13
14
Battery replacement:
Remove the cover
on the back of the
remote control and
insert the batteries
with the (+) and (-)
poles pointing in the
proper direction.
Screwdriver required
to remove battery
cover
.
E
N
G
L
I
S
H
 Loading...