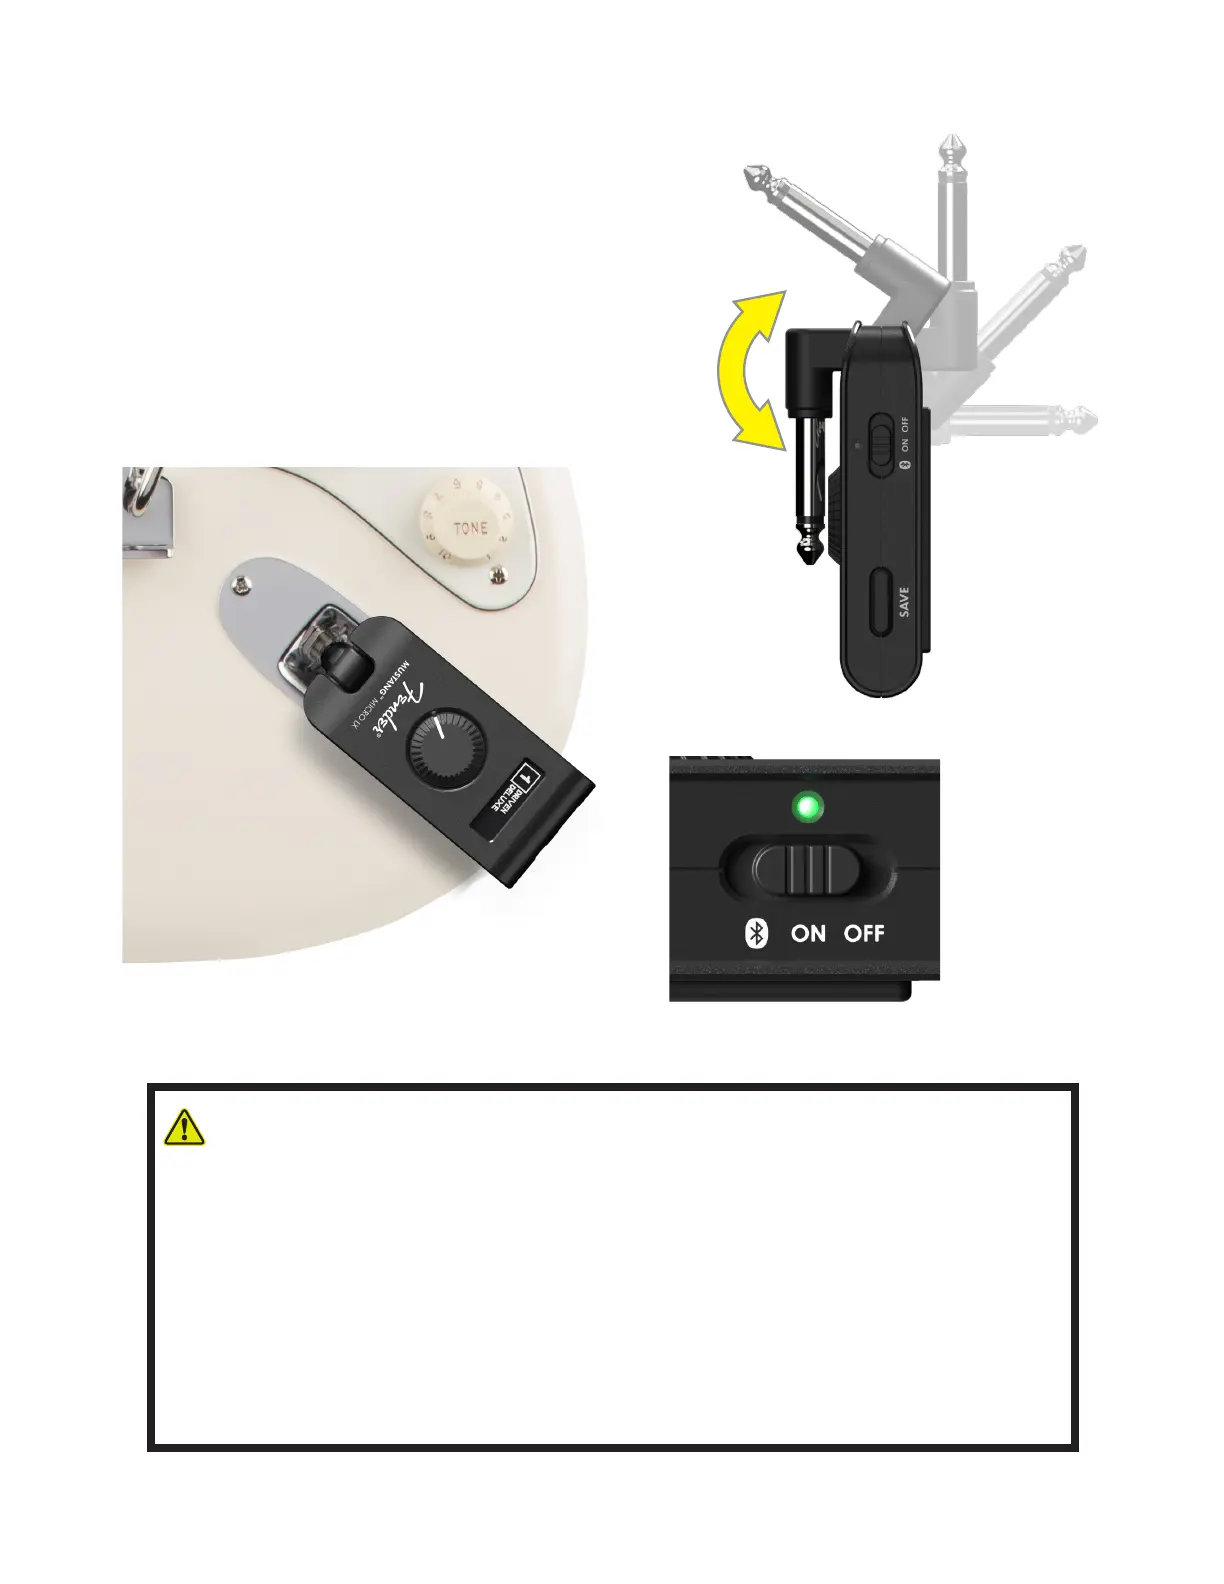
Connecting Mustang Micro Plus to your guitar couldn’t be easier—
simply rotate the 1/4” input plug out from the unit and plug it into
the guitar’s input jack.
Slide the power switch to the center ON position; the power LED
will illuminate green and then extinguish, indicating that Mustang
Micro Plus is on and charged (dierent LED colors indicate dif-
ferent charging status; see page 8). You’re now ready to choose a
preset, adjust volume and EQ, tune up and start playing.
INSTRUMENT CONNECTION AND POWERING UP
WARNING: Connecting Mustang Micro Plus to your instrument, disconnecting it or touching the
end of the device’s plug may cause a loud noise. To avoid hearing damage when wearing
heaphones/earbuds, follow these steps to ensure safe operation of your device:
• When connecting/disconnecting Mustang Micro Plus, remove headphones/earbuds, ensure
that the device is turned o, or ensure that the device’s MASTER VOLUME control is set to zero.
• Turn the device on with MASTER VOLUME set to zero, then gradually adjust volume to reach
a comfortable listening level.
When wearing headphones/earbuds, connecting/disconnecting Mustang Micro Plus or touching
its exposed plug while unit is on and MASTER VOLUME is up is similar to plugging an instrument
cable into a live amplier with volume up or to touching the exposed end of a live instrument cable.
3