17
© Ferno-Washington, Inc 234-3396-00 January 2011
KED® Pro Using the KED® Pro
5.5 Placing the KED® Pro Behind the Patient
1. One operator continues to hold the patient’s head and
neck in neutral alignment as the KED
®
Pro is applied.
2. The second operator feels behind the lower torso and buttocks
area of the patient and removes any articles (wallet, belt, etc.)
that could interfere with sliding the KED
®
Pro between the
patient and the vehicle seat.
3. With the buckles toward the seat, grasp the KED
®
Pro at the
topoftheheadapandthetopcornerofthetorsoapclosest
to the patient. Ensure the leg straps are on the patient side of
the KED
®
Pro. Do not loosen the leg straps before placing the
KED
®
Pro behind the patient.
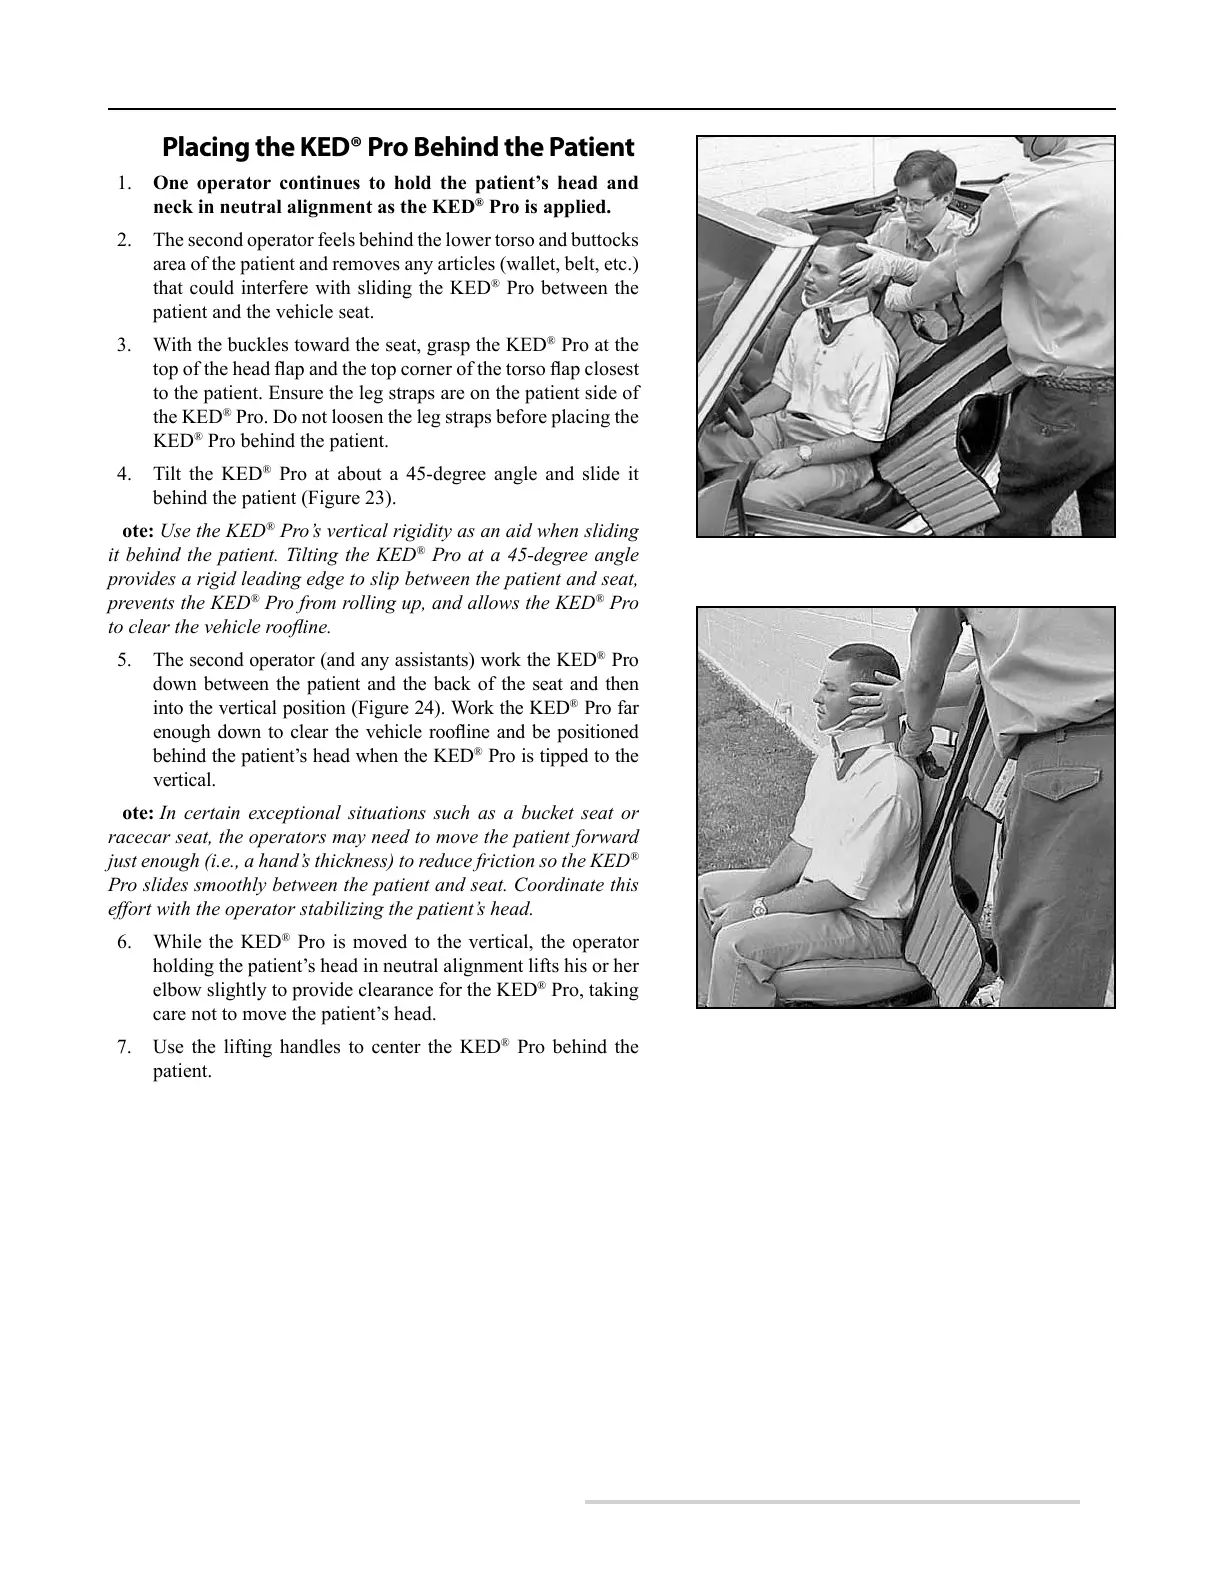
4. Tilt the KED
®
Pro at about a 45-degree angle and slide it
behind the patient (Figure 23).
Note: Use the KED
®
Pro’s vertical rigidity as an aid when sliding
it behind the patient. Tilting the KED
®
Pro at a 45-degree angle
provides a rigid leading edge to slip between the patient and seat,
prevents the KED
®
Pro from rolling up, and allows the KED
®
Pro
to clear the vehicle rooine.
5. The second operator (and any assistants) work the KED
®
Pro
down between the patient and the back of the seat and then
into the vertical position (Figure 24). Work the KED
®
Pro far
enoughdownto clear the vehiclerooineandbe positioned
behind the patient’s head when the KED
®
Pro is tipped to the
vertical.
Note: In certain exceptional situations such as a bucket seat or
racecar seat, the operators may need to move the patient forward
just enough (i.e., a hand’s thickness) to reduce friction so the KED
®
Pro slides smoothly between the patient and seat. Coordinate this
effort with the operator stabilizing the patient’s head.
6. While the KED
®
Pro is moved to the vertical, the operator
holding the patient’s head in neutral alignment lifts his or her
elbow slightly to provide clearance for the KED
®
Pro, taking
care not to move the patient’s head.
7. Use the lifting handles to center the KED
®
Pro behind the
patient.
Figure 23 - Sliding the KED® Pro At an Angle
Figure 24 - Centering the KED® Pro
 Loading...