14 15
Assembly / Before commissioningTechnical data / Unpacking / Assembly / Before commissioning
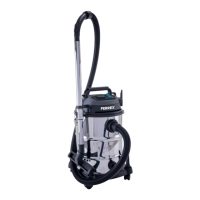
head (2) with the locking hooks (4). When fitting the machine head (2), ensure that
the locking hooks (4) latch into place correctly.
m ATTENTION!
Never use the device without filter! Always ensure that the filters are correctly fitted.
Fitting the foam filter (b) (Fig. 6)
• Fitting the foam filter (b): For wet vacuuming, slide the foam filter (b) provided over
the filter basket with safety float valve (14).
Installing the paper filter bag (c) (Fig. 7)
It is recommended to use an additional paper filter bag (c) when vacuuming fine, dry
dirt.
• Slide the paper filter bag (c) over the suction opening in the stainless steel container
(8). The paper filter bag (c) is only suitable for dry vacuuming. The paper filter bag (c)
makes it easier to dispose of the dust collected.
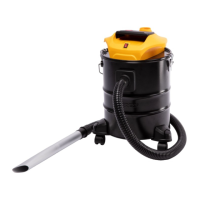
Fitting the suction hose (a) (Fig. 8, 9)
Connect the suction hose (a) to the corresponding port, depending on the desired
use, on the wet and dry vacuum.
Wet and dry vacuuming (Fig. 8)
Connect the suction hose (a) to the suction connection (9). To do so, slide the end of the
suction hose (a) with the two nipples into the suction connection (9) (A). Insert the two
nipples into the recesses. Once the suction hose (a) is fully inserted, turn it clockwise
(B).
Blowing (Fig. 9)
Connect the suction hose (a) to the connection for blower function (13). Slide the end
of the suction hose (a) with the two nipples into the connection for blower function
(13). Insert the two nipples into the recesses. Once the suction hose (a) is fully inserted,
turn it clockwise (B).
Fit the extension tube (f), suction hose (a) and nozzles (d/e) (Fig. 10, 11)
• Connect the extension tube (f) to the curved end of the suction hose (a).
• Fit the floor nozzle (d) or crevice nozzle (e) to the other end of the extension tube (f).
• Push the slide piece forwards (A) to change the length of the extension tube (f).
7. Unpacking
Open the packaging and carefully remove the device.
Remove the packaging material, as well as the packaging and transport safety devic-
es (if present).
Check whether the scope of delivery is complete.
Check the device and accessory parts for transport damage. In the event of complaints
the carrier must be informed immediately. Later claims will not be recognised.
If possible, keep the packaging until the expiry of the warranty period.
Familiarise yourself with the device by means of the operating manual before using
for the first time.
With accessories as well as wearing parts and replacement parts use only original
parts. Spare parts can be obtained from your specialist dealer.
When ordering please provide our article number as well as type and year of manu-
facture for your equipment.
m ATTENTION!
The device and the packaging material are not children‘s toys! Do not let chil-
dren play with plastic bags, films or small parts! There is a danger of choking or
suffocating!
8. Assembly / Before commissioning
m ATTENTION!
Prior to use, ensure that the device has been correctly and fully assembled.
Unpacking (Fig. 1, 2, 5)
• Release the locking hooks (4) and remove the machine head (2). The accessories are
located inside the stainless steel container (8).
Installing the castors (5) (Fig. 4)
• Set the stainless steel container (8) on the upside. (The machine head (2) must be
removed beforehand).
• Press the four castors (5) into the holes in the castor mounting plate (6).
Installing the machine head (2) (Fig. 5)
• Place the machine head (2) on the stainless steel container (8). Secure the machine
 Loading...