16 17
Start up / Cleaning / Storage and transportAssembly / Before commissioning / Start up
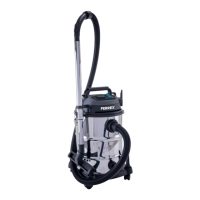
Water drain plug (Fig. 14)
The stainless steel container (8) is equipped with a water drain plug (7) in order to
make it easier to drain. Open the water drain plug (7) by turning it counter-clockwise
and drain out the liquid.
10. Cleaning
m WARNING!
Pull out the mains plug before carrying out any setting, servicing or repair work!
It is recommended to clean the device after each use. Do not spray the device with wa-
ter or clean it under running water. This can result in electric shocks and can damage
the device.
Empty the stainless steel container (8) after each use: After opening the water drain
plug (7), the liquid collected can be drained out. Residual liquid remains in the stain-
less steel container (8). To remove residual liquid, take off the machine head (2) by re-
leasing the locking hooks (4) from the stainless steel container (8). Pour out the liquid
residue. Clean the container with a damp cloth.
• Always keep the device clean. Do not use cleaning agents or solvents.
• Keep the ventilation slots clean and free of dirt and dust.
• Clean the device only with a soft brush or a damp cloth.
• Clean the foam filter (b) with a little soap and running water and then leave it to air dry.
11. Storage and transport
Store the device and its accessories in a dark, dry and frost-free place that is inacces-
sible to children. The optimum storage temperature is between 5 and 30˚C.
Store the power tool in its original packaging.
Cover the power tool to protect it from dust or moisture.
Store the operating manual with the power tool.
• Wrap the mains cable (3) around the cable holders (12) (two options). (Fig. 15)
• There are four recesses on the top side of the castor mounting plate (6) for storage of
the floor nozzle (d), the crevice nozzle (e) and the extension tube (f) (Fig. 17).
• The remaining accessories can be stored in the stainless steel container (8).
• Pull the tube to the desired length (B). Ensure that the slide lock latches into place.
9. Start up
m ATTENTION!
Always make sure the device is fully assembled before commissioning!
m WARNING!
Switch the device off if liquid or foam emerges with the exhaust air during wet vacu-
uming.
Switching on/off/automatic (Fig. 12, 13)
The on/off switch (11) has two settings:
1. Switch setting 0: Off
2. Switch setting I: On
- Press the on/off switch to the “I” position to switch on.
- Push the ON/OFF switch (11) into position “0” to switch the device off.
• Plug your electrical tool’s cable into the automatic socket (10) (Fig. 13).
• Connect the suction hose (a) to the suction connection on your electrical tool. Check
that the connection is secure and airtight. The suction hose (a) cannot be connected
to the connection for blower function (13).
• Set the switch on the vacuum system to position “I”.
Dry vacuuming (fig. 7)
Use the paper filter bag (c) for dry vacuuming.
Ensure that the filter bag (c) is correctly fitted.
Wet vacuuming (fig. 6)
Use the foam filter (b) for wet vacuuming. Ensure that the foam filter (b) is correctly
fitted.
If the stainless steel container (8) is full, the safety float valve (14) closes the suction
port and suction operation is interrupted.
m Attention!
The device is not suitable for vacuuming flammable liquids. For wet vacuuming, use
the only the foam filter (b) provided.
 Loading...