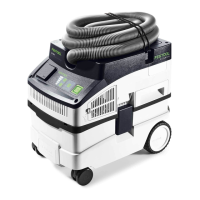
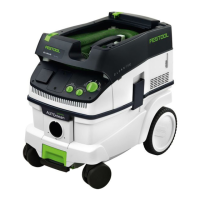
6.2 Connecting a mobile dust extractor
WARNING
Risk of injury from tools starting up unex
pectedly
► Before setting the switch to the "AUTO" or
"MAN" position, make sure that the con
nected tool is switched off.
The switch [1-8] serves as an on/off switch.
"0" switch position
Appliance socket [1-3] is disconnected from the
power, mobile dust extractor is switched off.
"MAN" switch position
Appliance socket [1-3] is connected to the pow
er, the mobile dust extractor starts.
"Auto" switch position
Appliance socket [1-3] is connected to the pow
er, the mobile dust extractor starts when the
connected power tool or air tool is switched on.
► Insert the mains plug into an earthed sock
et.
Pull the plug from the socket when not in
use and before performing any cleaning
and maintenance work.
6.3 Connecting power tools
WARNING
Risk of injury
► Observe the maximum electrical outlet
module connected load (see "Technical da
ta" section).
► Switch off the power tool.
► Connect the power tool to the electrical out
let module
[1-3].
Characteristics of the electrical outlet module
– SD E/A: Electrical outlet module with auto
matic switch-on for using two power tools:
E.g. two sanders, one jigsaw and one sand
er
– SD: Electrical outlet module with perma
nent power supply for use as an extension
cable: E.g. charger, light, etc.
6.4 Connecting a compressed-air tool
WARNING
Risk of injury
► Switch off the compressed-air tool.
Automatic switch-on for compressed-air tools
on mobile dust extractors
with compressed-air module in the module
slot [1-2].
6.5 Special features of the CTL 36 E AC-
LHS
To use the mobile dust extractor in combination
with the
PLANEX:
► Use kink-resistant suction hose D 36 mm x
3.5 m-AS.
► Use a special suction sleeve for connecting
the PLANEX.
► Use closing slide CT-VS between the intake
opening [1-1] and suction hose.
► Attach the tool holder.
► Always use with a disposal bag!
Bypass function
In tasks that require a low extraction setting
(e.g. on soft surfaces).
► Activate bypass function on special extrac
tion sleeve [1A].
7 Settings
7.1 Adjusting the suction power
► at the rotary knob [1-9].
7.2 Connecting sleeve
The bypass function of the connecting sleeve
prevents strong suction from sanding machines
and floor nozzles on smooth surfaces.
Open
► Turn the adjusting ring to the "OPEN" posi
tion.
Close
► Turn the adjusting ring to the "CLOSE" posi
tion.
7.3 Applying the brake
Folding out the black brake lever [1-13] pre
vents the mobile dust extractor from rolling. To
achieve this, lift the front end of the mobile dust
extractor slightly and push the black brake lev
er downwards until it latches into place. Push
the green lever to release.
7.4 Temperature cut-out
A temperature cut-out switches the mobile dust
extractor off when it reaches a critical tempera
ture to prevent overheating.
► Switch off the mobile dust extractor, allow
to cool for about 5 minutes then switch on
again.
English
17


 To Next Page
 Loading...