4/4
Our example for use is a recommendation tried and tested in practice. However the
actual conditions pertaining in each situation are completely outside of our control.
We therefore do not provide any form of guarantee. Any legal claims arising out of
this are not to be made against Festool. Please observe without fail the safety and
operating instructions included with the product.
www.festool.com
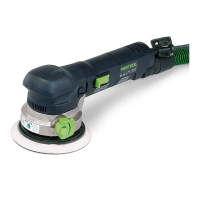
Pad change for the RO 125 FEQ
Disconnect the tool from the power supply. •
Remove the protector if this is mounted. •
Set the switch on the cap to coarse sanding (rotary mode). •
Press the lock button, which is located at the rear of the machine •
(this must be pulled out slightly for pressing).
Remove the sanding pad (anti-clockwise). •
Now put the other sanding pad in its retainer and secure it firmly •
into place (in clockwise direction).
601/1!
601/12
601/13
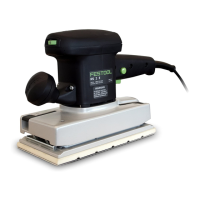
Positioning the protector
The protector prevents the sanding pad coming into contact with its •
other side (e.g. when sanding along a wall) and thus a kick-back of the
machine.
For assembly place the edge protection on the machine until you hear •
it lock in to place.
For removal pull out or press the protector on one end and then push •
it out from the guide.
Pad change for the RO 150 FEQ
Proceed as for RO 125. •
The lock button is located at the front of the machine at the side on the •
RO 150.
Also here the button must be pulled up slightly so that it can be pressed. •
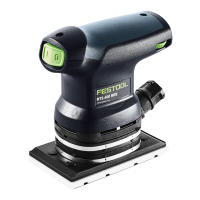
Remove extraction channel (RO 150 FEQ)
As dust extraction is not required for polishing the extraction channel if
connected is removed as it may be an obstruction.
To do so the green button in the handle area must be pressed in the •
direction of the extractor connector. At the same time pull the extraction
channel to the back.
601/14