Supplemental Owner’s Manual 17
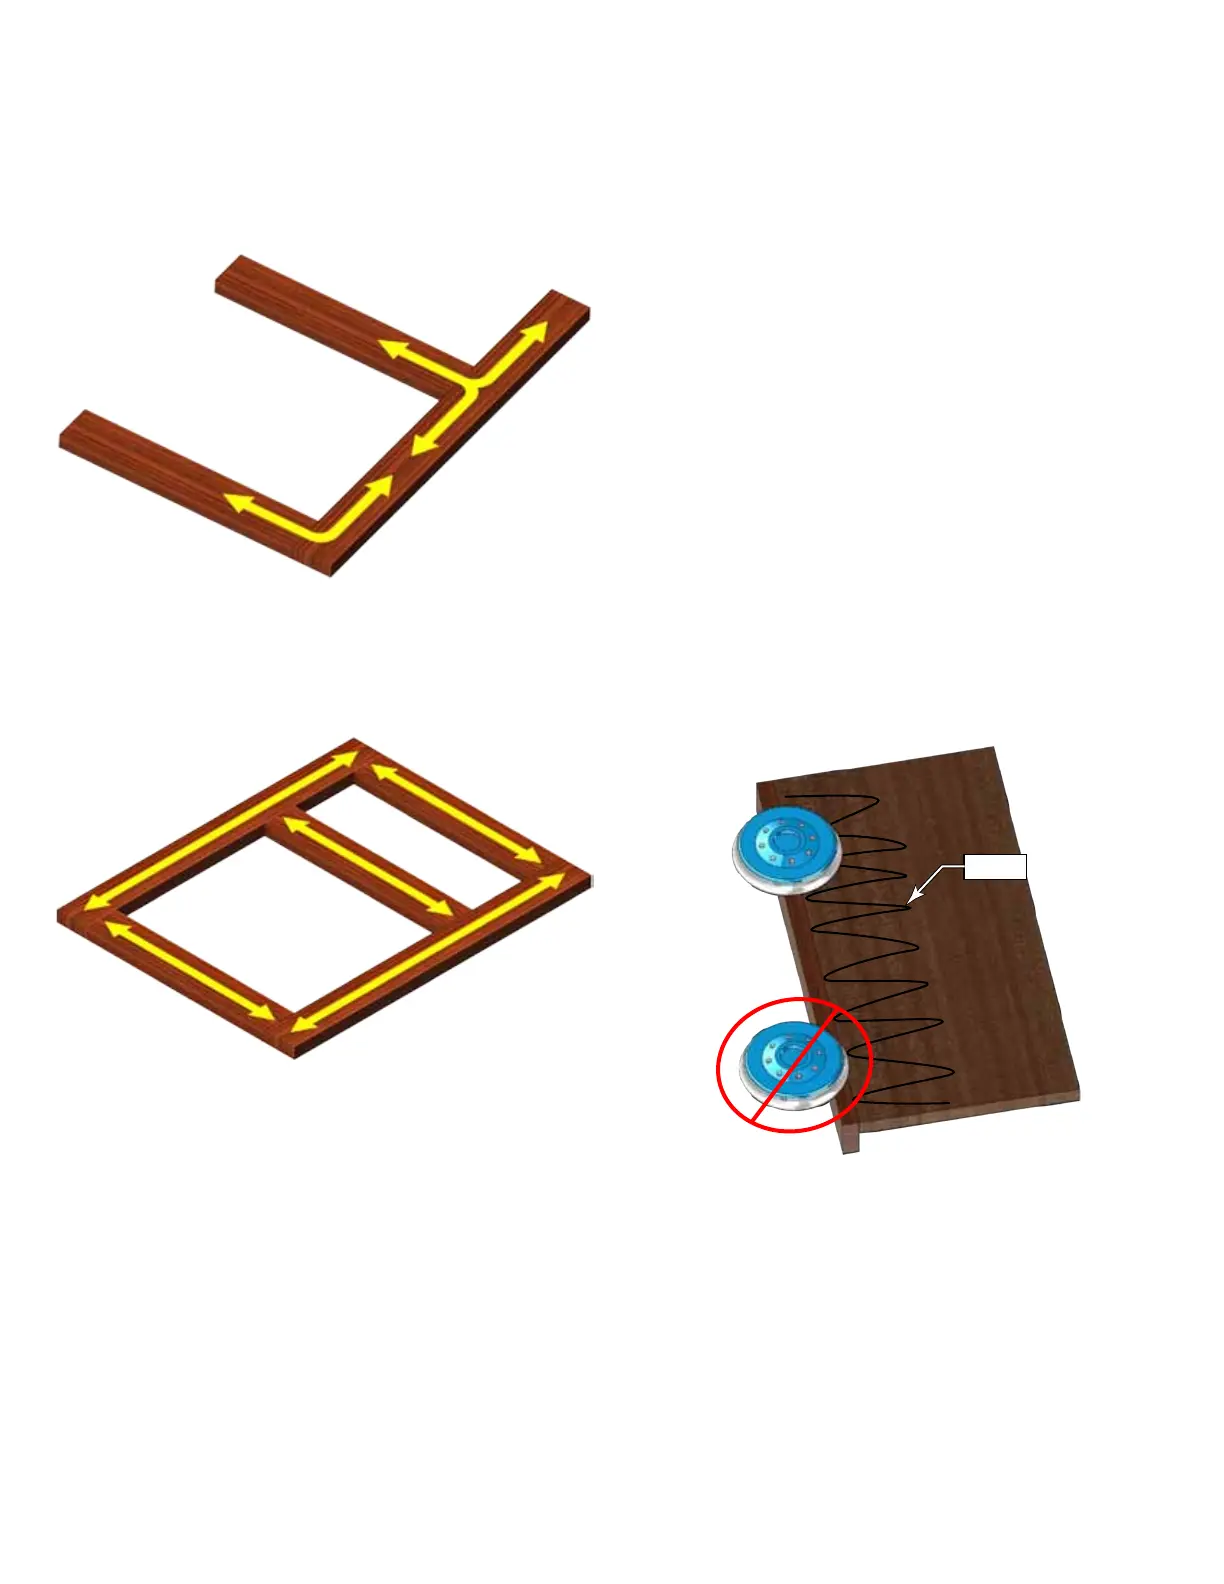
Example, Faceframe Leveling:
While the temptation may be to focus sanding directly over
a frame’s joint, this should be avoided. To reduce the chance
of a depression at the corner, a general L-shaped pattern
should be used extending well beyond the joint. For more
emphasis at the joint, a mixture of both short and long
strokes should be used, but never just stationary over the
joint.
Once the joints are leveled, the entire frame should be
sanded, but this too should have a pattern. While not as
critical, the general approach is to sand those frame mem-
bers which are captive between other frame members rst.
In other words, sand the horizontal rails rst, followed by
the vertical stiles.
Example, Frame to Carcase Leveling:
Leveling the joint between a solid wood frame and a ply-
wood veneer carcase is one of the most precarious sanding
operations due to the likelihood of sanding through the thin
veneer. The key is to evenly remove enough of the solid
wood frame without sanding into the veneer.
While the temptation may be to sand the frame with only
the edge of the sanding pad, this will invariably result in a
slight bevel to the frame. Instead, keep the center of the
pad centered over the frame, but held as perfectly parallel
to the surface as possible. Sand the frame ush, and then
begin working out into the veneer surface. Here are some
tips to safely achieving ush joints:
► Using a soft, wide-lead pencil, scribble across the veneer
near the joint. As long as the pencil lines remain, you will
not be sanding through the veneer.
► Use the rmest sanding pad available to avoid rounding
the edge of the frame.
► Avoid using too coarse of a disk, as the veneer can be
damaged too quickly if you tilt the sander.
► Operate the sander with authority and rm pressure to
maintain maximum control, but reduce the pressure as
the joint gets closer to ush.
► Avoid the tendency to tilt the sander away from the
veneer, as this will create a bevel on the frame.
► As the joint gets close to ush, expand your strokes to
include more of the veneer surface, and continue sanding
until the pencil marks are gone.
Pencil