20 Rotex Series Dual Mode Sanders
RO 150 Motor Brushes
WARNING! To avoid the risk of electrical shock,
make sure the sander is unplugged from power.
1. Unplug the sander from power.
2. Remove the dust port as described on page 12.
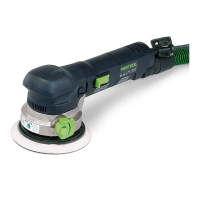
3. Remove the T15 Torx screw that secures the brush cover,
and slide the cover off the back of the sander handle.
Brush
Cover
Mounting
Screw
Sander
Handle
Upper
Brush
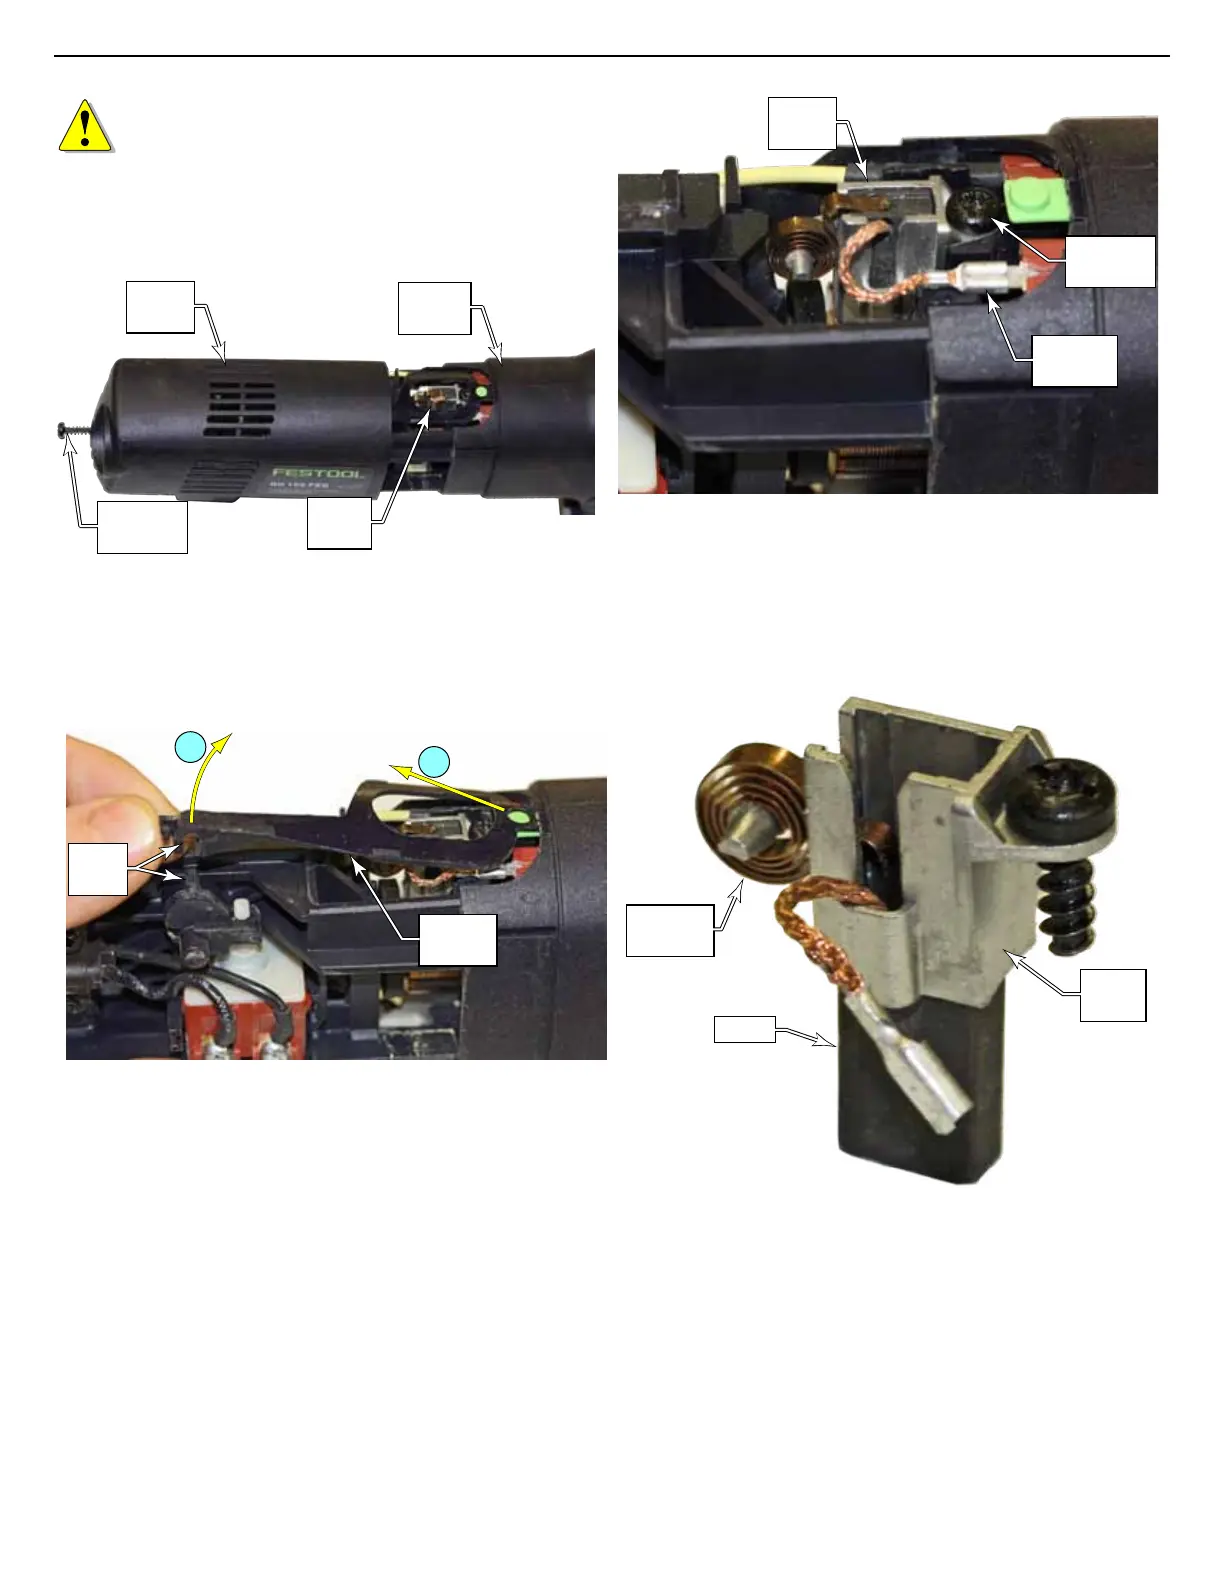
4. Remove the switch linkage that connects the green
power switch to the electrical switch inside the sander.
a. Lift the linkage yoke off the pin on the electrical
switch.
b. Tilt the linkage as shown, and slide it off the green pin
on the power switch.
A
B
Switch
Linkage
Yoke
& Pin
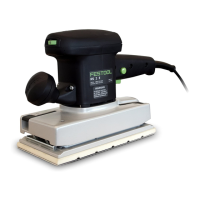
5. Using tweezers or needle nose pliers, carefully remove
the wire terminal from the spade lug.
6. Using a T15 Torx driver, remove the mounting screw that
secures the brush holder to the motor housing.
7. Lift the brush and brush holder out of the sander.
8. Repeat for the second brush and brush holder on the
underside of the motor.
Brush
Holder
Mounting
Screw
Wire
Terminal
9. If the replacement brushes do not come pre-mounted in
brush holders, install the brushes in the existing brush
holders as shown.
► Make sure the wire passes through the body of the
brush holder.
► Make sure the pressure spring is pressing against the
top of the brush.
Brush
Brush
Holder
Pressure
Spring