10
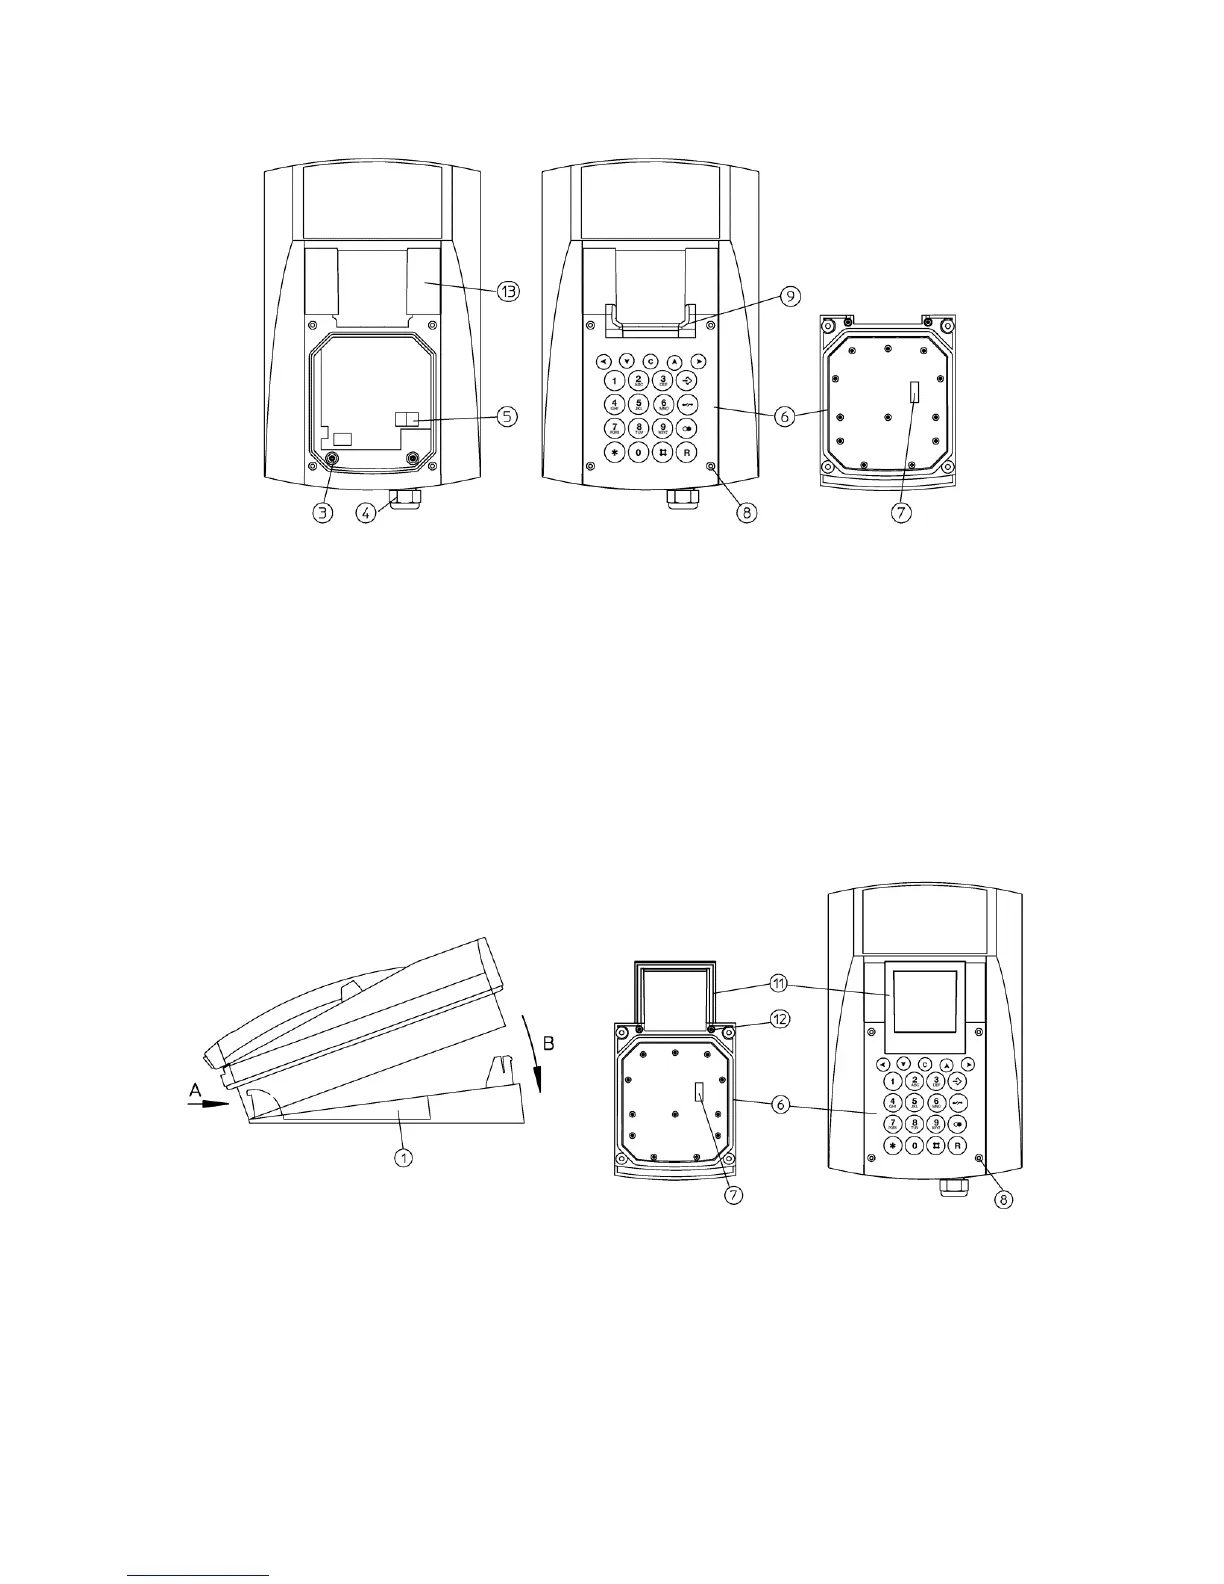
Plug the ribbon cable onto the pin contact strip (7) of the keypad plate.
Tighten the keypad plate (6) using four screws (8).
Table version
Place the telephone in the lower latches (A), swing it backwards until the upper latches
audibly engage (B).
Pull the telephone line through the cable gland (4) and connect it with terminal (5) TCP/La -
TCP/Lb.
Use cables with a sheath diameter of 5 to 9 mm only, otherwise the IP65 degree of
protection can not be guaranteed.
The standard handset accommodation (for the wall version) (9) can be replaced for the table
version.
After loosening the two screws (12) on the bottom of the keypad plate you can remove the
standard handset accommodation.
Fasten the table version handset accommodation (11) to the keypad plate by using the
included screws (12).
Plug the ribbon cable onto the pin contact strip (7) of the keypad plate. Tighten the keypad
plate (6) using four screws (8).
Lay the telephone cord according to the instructions, in order to prevent accidents.