5
4. MIC/LINE GAIN 1: Control the volume of the XLR interface. When the Level Indicator
Light shows green, the sound quality is normal; When the Level Indicator Light
shows yellow, it means the sound quality close to distortion; When the Level
Indicator Light shows red, that indicates the sound quality has been distorted.
5. INST GAIN 2: Control the volume of the port INST. 2. When the Level Indicator Light
shows green, the sound quality is normal; When the Level Indicator Light shows
yellow, it means the sound quality close to distortion; When the Level Indicator
Light shows red, that indicates the sound quality has been distorted.
6. OUTPUT: Control the volume of the morning speaker.
7. MIC/LINE 1: Microphone interface which appropriate for XLR port and 6:35mm jack.
8. 48V: Turn it on when using a condenser microphone. Note: It also needs to be
turned on if 48V is specified when using dynamic microphone.
9. Recording/Instruments Switch: When the button is pressed, the two channels in the
computer record the sound of the microphone. When the button is ejected, one
channel records the sound of the microphone, and the other channel records the
sound of instrument.
10. INST 2: Instrument interface which should be plugged 6.35mm to 6.35mm audio
cable.
11. Headphone Jack: Separate headphone potentiometer controls the volume of the
monitoring headphone with 6.35mm to 6.35mm audio cable.
12. DIRECT MONITOR: When pressed the button, the microphone should be turn off and
just can hear the computer sound. When the button is ejected, both the computer
and the microphone sound can be heard.
Guidelines for use
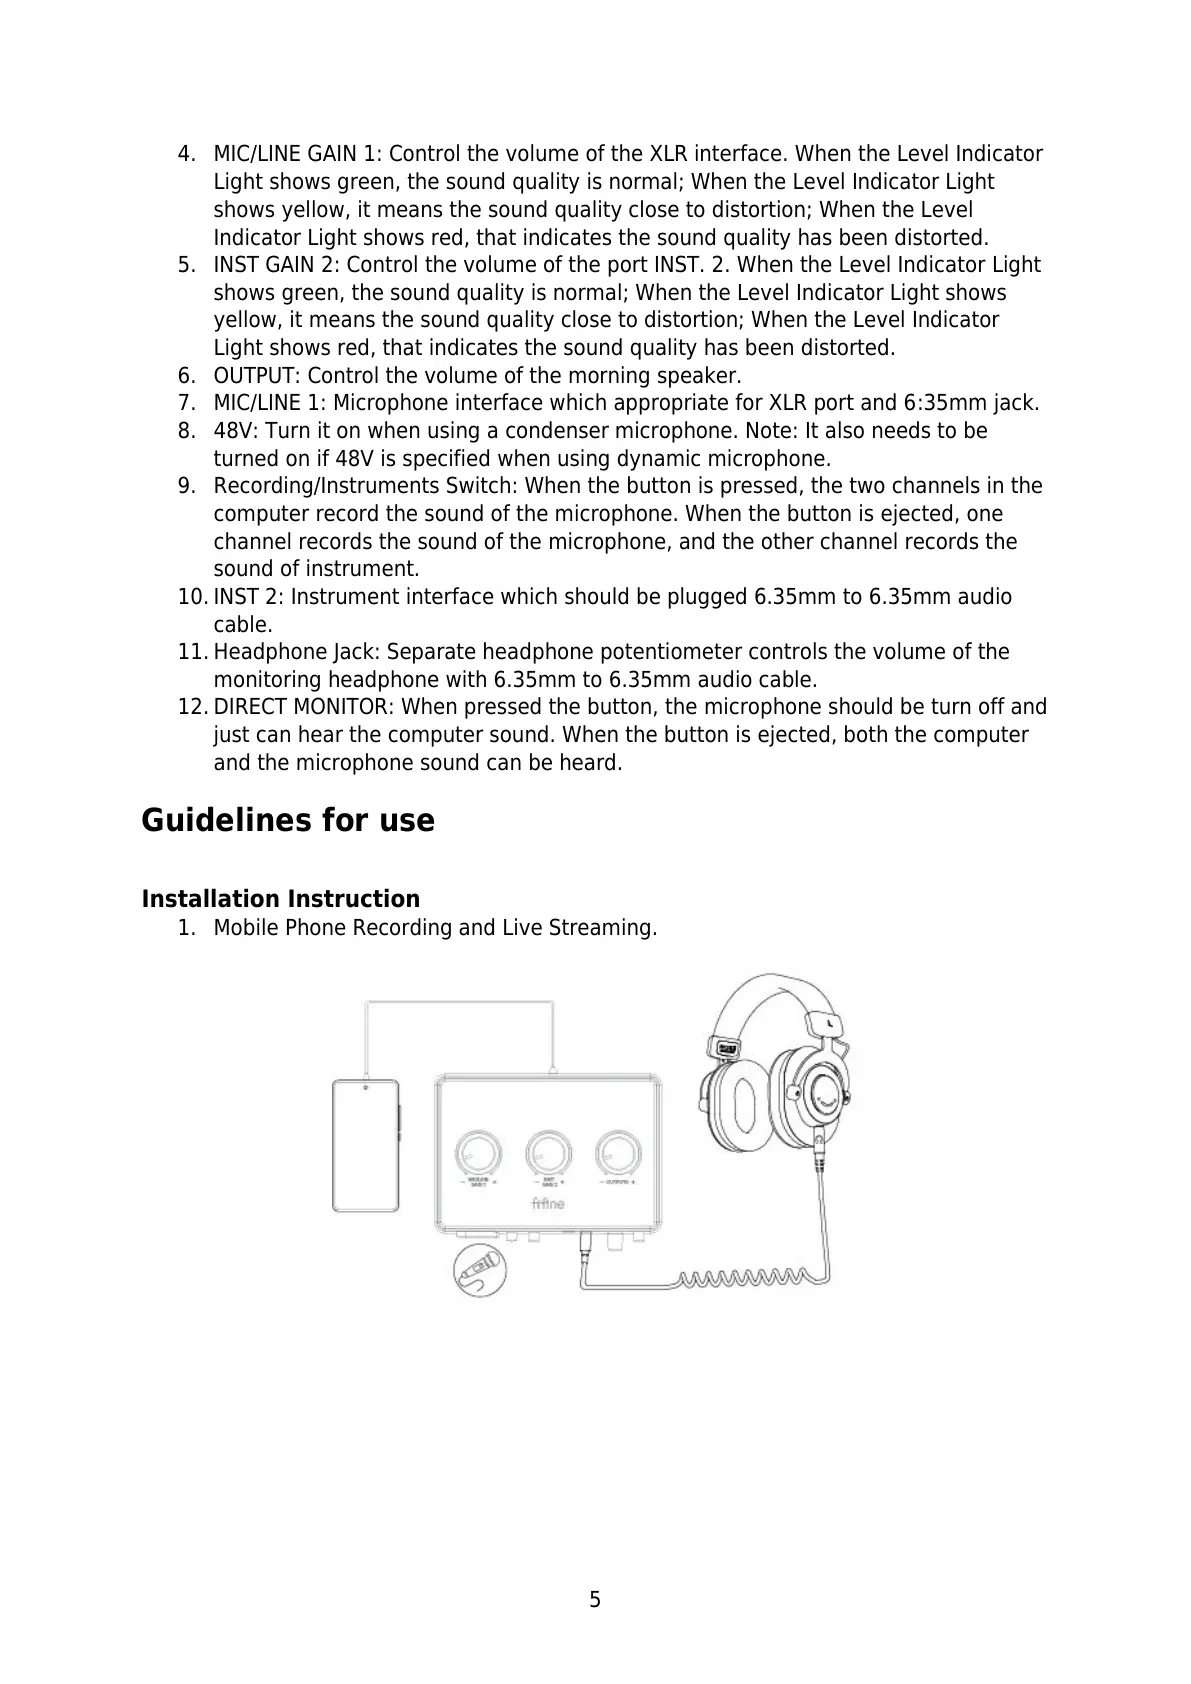
Installation Instruction
1. Mobile Phone Recording and Live Streaming.