Do you have a question about the FingerTec R3 and is the answer not in the manual?
Access the user guide online via a provided URL or from the terminal package.
Details the essential accessories provided with the terminal for installation and operation.
Overview of FingerTec's product line and the R3 terminal's basic features and purpose.
Diagrams and descriptions of the terminal's physical components and their functions.
Step-by-step guide for enrolling fingerprints, cards, or passwords for users.
Explanation of 1:1 and 1:N verification methods for user authentication.
Basic steps for physically installing the terminal, including wall mounting instructions.
Diagrams illustrating connection points for power and various communication interfaces.
Configuration options for Threshold, Date Format, Sound, Voice, Algorithm Version, and Log Alert.
Procedure to adjust the terminal's date and time based on the local time zone.
How to enable and configure Daylight Savings Time (DLST) settings.
Explains the role and importance of USB connectivity for data transfer.
Information on USB flash disk compatibility with FingerTec terminals.
Steps to download transaction logs and user information to a USB drive.
Steps to upload user information and screensavers from a USB drive to the terminal.
How to upload images for display as advertisements or screensavers.
Guidance on who can perform auto tests and recommendations for support.
Procedure for testing the terminal's touch screen panel for quality and sensitivity.
Procedure for testing the terminal's audio output for clarity and functionality.
Procedure to check the condition and functionality of the terminal's keyboard.
Procedure to test the fingerprint optical scanner's performance.
Procedure to test the terminal's Real-Time Clock (RTC) for accuracy.
How to view specific user records by ID and date range directly on the terminal.
Displays system information including storage, user counts, and template usage.
Shows detailed device information such as serial number, MAC address, and firmware version.
Troubleshooting steps for resolving connection issues between the terminal and a computer.
Explanation for the 'Admin Affirm' message and resolution steps.
Common causes and solutions for poor fingerprint scanning performance.
Interpreting LED status lights for terminal operational status and potential issues.
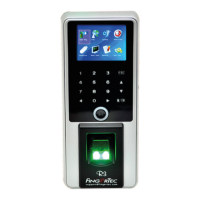
The FingerTec R3 is a sophisticated fingerprint color door access and time attendance terminal designed for modern office and home automation, as well as security applications. It integrates biometric authentication with time attendance tracking, offering a comprehensive solution for managing access and employee records.
The FingerTec R3 serves as a master terminal for both door access and time attendance. It utilizes a powerful microprocessor to accurately process biometric data for personal identification and to collect precise data for time attendance activities. The device supports various verification methods, including fingerprint, RFID card, and password, providing flexibility and enhanced security.
For door access, the terminal can be connected to a 12V door lock, push button, 12V alarm, door sensor, and 12V door bell, allowing for controlled entry and exit. It supports both Normally Closed (NC) and Normally Open (NO) door lock systems, making it adaptable to different security setups. The terminal can also integrate with third-party controllers via Wiegand output for broader system compatibility.
In terms of time attendance, the R3 records transaction logs that include terminal ID, date, time, user ID, and transaction activity. This data is crucial for generating accurate attendance reports and can be managed through the bundled Ingress software. The terminal's RTC battery ensures that the clock remains accurate, even during power outages.
Communication with a PC or network is facilitated through multiple options, including LAN (TCP/IP), RS232, RS485, and USB. This allows for seamless upload and download of user information, transaction logs, and other data, ensuring efficient data management and system updates.
The FingerTec R3 boasts a user-friendly interface with a touch panel keypad and a 2.5-inch 65k color display screen, enhancing convenience and visual appeal. The LCD screen displays the terminal's status, day, date, and time. The keypad allows for inputting instructions and configuring settings.
User enrollment is a core feature, allowing administrators to register fingerprints, RFID cards, and passwords for individual users. It is recommended to enroll two fingerprints per user ID for backup and to ensure high-quality fingerprint reads by properly positioning the finger on the scanner. The terminal provides voice instructions during enrollment to guide users. For card enrollment, users simply wave their RFID card at the scanning area. Password enrollment supports up to 8-digit passwords.
Verification can be performed in two modes: 1:1 (one-to-one) and 1:N (one-to-many). In 1:1 mode, users input their User ID followed by their biometric feature (fingerprint, card, or password). In 1:N mode, users simply place their finger on the scanner for verification without needing to input an ID. The terminal provides clear voice messages such as "Verified," "Try again please," and "Admin Affirm" to indicate verification status and guide users.
The terminal offers various system settings to customize its operation. Users can adjust the fingerprint scanner's sensitivity (threshold) for both 1:1 and 1:N verification methods, set the date format, and control voice and keypad sound levels. The "Recheck Min" feature allows for adjusting attendance times, providing a leeway period for users. The "Log Alert" feature notifies administrators when log storage reaches a certain level, preventing underperformance.
Data management is streamlined through the terminal's menu, allowing administrators to search for users, view records, edit user information, and delete users or data. The Ingress software is recommended for comprehensive data management and synchronization.
The R3 also supports USB flash disk connectivity for remote data transfer, which is particularly useful when the terminal is installed far from a PC or in case of connection problems. Users can download transaction logs, user information, and short messages to a USB disk, or upload user information, messages, and screensaver pictures from a USB disk to the terminal. The terminal can display advertisements or pictures on the screen during idle periods, with a supported picture size of 320 x 240 resolution.
For diagnostic purposes, the "Auto Test" feature allows administrators to check the terminal's components, including the TFT screen, audio, keyboard, fingerprint sensor, and real-time clock (RTC). This helps in identifying and troubleshooting potential issues.
Maintaining the FingerTec R3 involves simple cleaning and troubleshooting steps to ensure optimal performance and longevity.
The fingerprint sensor, a critical component, requires occasional cleaning with a microfiber cloth to maintain its performance. Users are advised not to scratch the surface, expose it to heat, or press hard during fingerprint placement. For silicon-coated prisms, cellophane tape can be used for cleaning, while non-coated prisms should be cleaned with a microfiber cloth. A video guide on cleaning the fingerprint prism is available online.
The terminal's body should be cleaned with a dry cloth. Harsh liquids, household cleaners, aerosol sprays, solvents, alcohol, ammonia, and abrasive solutions should be avoided as they can damage the device.
In case of functionality issues, the terminal can be restarted by pushing the On/Off button. If problems persist, a reset can be performed through the system menu. The reset function allows users to restore all default settings, keyboard settings, or other parameters. However, users are cautioned to back up important data before performing a reset, as it will revert all settings to their original factory configuration.
The RTC battery, which maintains the terminal's clock, may need replacement if the clock consistently reverts to 00:00 after restarting. Information on compatible accessories, including external power supplies like Mini UPS, is available online.
Troubleshooting common issues is supported by the manual. For instance, if "UNABLE TO CONNECT" appears, users are directed to check communication settings (LAN, RS232, RS485, USB). If "ADMIN AFFIRM" appears, it indicates that a normal user is attempting to access the menu, which is restricted to administrators. Difficulties in reading fingerprints are addressed by checking enrollment quality, terminal location (avoiding bright light), finger placement, scanner cleanliness, and any recent finger injuries. A blinking green LED indicates standby mode, while a blinking red LED signals a potential problem requiring consultation with a reseller. Issues with RFID card response are resolved by ensuring the card is registered and assigned to a verification group that supports RFID. If there is no sound, users are advised to check the voice control settings and, if the problem persists, run an audio test to check for speaker damage.
The manual also provides contact information for support, directing users to email or visit the FingerTec website for further assistance and troubleshooting guides.
| Fingerprint Capacity | 3, 000 |
|---|---|
| Access Methods | Fingerprint, Card, Password |
| Card Capacity | 10, 000 |
| Authentication Method | Multi-factor Authentication |
| Log Capacity | 100, 000 Logs |
| Type | Fingerprint Door Lock |
| Transaction Capacity | 100, 000 |
| Communication | USB |
| Power Supply | DC 12V |
| Sensor | Optical |
| Humidity | 20% - 80% |
| Lock Type | Electric Lock |
| User Capacity | 3, 000 |