Do you have a question about the FingerTip Pulse Oximeter and is the answer not in the manual?
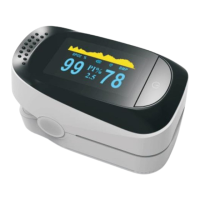
Diagram illustrating key components of the fingertip pulse oximeter, including display elements and physical parts.
Key steps for operating the oximeter, including battery check, preparation, and finger positioning.
Instructions for entering and navigating the oximeter's measurement settings mode.
How to access the data analysis mode and initiate a new measurement analysis.
Steps to start a new data recording and analysis session, including data deletion prompts.
Information on minimum/maximum measurement times and how to view recorded results.
How to select and view detailed analysis results, including elapsed time, min/max SpO2, and PR.
This document is a quick start guide for a Fingertip Pulse Oximeter. The device is designed to measure human hemoglobin saturation (SpO2) and heart rate (Pulse Rate, PR) by inserting a finger into the device. It is suitable for a variety of settings, including family use, clinical environments, hospitals, oxygen bars, and sports medicine.
The Fingertip Pulse Oximeter operates by non-invasively measuring two key physiological parameters: blood oxygen saturation (SpO2) and pulse rate (PR). SpO2 indicates the percentage of hemoglobin in the blood that is saturated with oxygen, providing an estimate of the oxygen level in the blood. The pulse rate, measured in beats per minute (BPM), reflects the number of times the heart beats per minute. The device also displays a plethysmogram, which is a graphical representation of the blood flow, and a perfusion index (PI%), which indicates the strength of the pulse at the measurement site. A battery indicator is also present on the display to show the remaining power.
The oximeter is designed for ease of use with a straightforward operation. To begin, ensure that working batteries are installed in the unit. Before each use, it is recommended to clean the patient's finger and the rubber surface inside the oximeter with a rubbing alcohol-soaked pad or cotton ball to maintain hygiene and accuracy.
For measurement, the user inserts one finger into the rubber opening of the oximeter, making sure that the nail faces upwards, towards the display screen. Once the finger is properly positioned, the clamp is released. The device automatically turns on when a finger is inserted and the power button is pressed, and it will automatically turn off after 8 seconds of inactivity to conserve battery life.
The measurement results, including SpO2 percentage, pulse rate (BPM), and perfusion index (PI%), are displayed on the screen. The device also features a power button that serves multiple functions: turning the device on, entering parameter setup mode, and navigating through settings and data analysis modes.
To enter parameter setup mode, the user presses the power button. An asterisk (*) on the display indicates parameters that can be changed. Pressing the power button again allows entry into the specific menu for a highlighted parameter. Subsequent presses of the power button toggle between menu options or increase/decrease the chosen parameter's value.
The oximeter includes a measurement settings mode, accessible by holding down the power button. This mode displays various settings across multiple pages (e.g., Page 1/3, Page 2/3, Page 3/3). Users can scroll between these pages by continuing to hold down the power button. Settings include options for alarms (Alm Hi/Lo for SpO2 and PR), beep sounds, and restoring default settings. To change a setting, the user presses and holds the power button while the desired setting is highlighted. For numerical settings, selecting "+/-" and holding the power button will increase (+) or decrease (-) the number.
The device offers data analysis capabilities, which can be accessed by holding down the power button to scroll through pages until the "Data Analysis" page (Page 3/3) is reached.
To begin a new analysis, the user selects "Record" and holds down the power button until the record status changes to "on." If prompted to delete all existing data, the user selects "OK." After this, the user returns to page 3/3 and selects "Exit."
For measurement recording, the finger is inserted into the rubber opening. During measurement, battery and "rec" symbols appear on the display. A minimum measurement duration of 2 minutes is required, with a maximum recording time of 8 hours.
After measurement, to view results, the finger is removed, and the user waits 8 seconds for the oximeter to turn off. The oximeter is then turned back on, and the power button is pressed and held to enter the data analysis mode, navigating to page 3/3. The record status should be "off," and "Summary Graph" and "Statistics" should show "OK."
By pressing and holding the power button to select "Summary Graph," users can view a page displaying the SpO2 range, pulse rate (PR), and other relevant data in a graphical format.
Further analysis is available by selecting "Statistics" from the data analysis page, which brings up the "Analysis Results" screen. This screen provides the elapsed time in hours (H) for the measurement duration, along with minimum and maximum SpO2 and PR values. It's important to note that the "Summary Graph" and "Statistics" features cannot be accessed if no data has been recorded.
While the quick start guide primarily focuses on operation, it does mention a key maintenance step: cleaning. Before each use, it is recommended to clean the patient's finger and the rubber surface inside the fingertip oximeter with a rubbing alcohol-soaked pad or cotton ball. This practice ensures hygiene and helps maintain the accuracy of the measurements by preventing the buildup of dirt or oils on the sensor. The automatic shut-off feature after 8 seconds of inactivity also contributes to maintenance by conserving battery life, reducing the frequency of battery replacement. For more detailed maintenance instructions, the user is directed to refer to the comprehensive user's manual.
| SpO2 Measurement Range | 70% - 99% |
|---|---|
| SpO2 Accuracy | ±2% |
| Pulse Rate Accuracy | ±2 BPM or ±2% (whichever is greater) |
| Power Source | 2 AAA batteries |
| Automatic Power Off | Yes (after 8 seconds of inactivity) |
| Weight | 50g (including batteries) |
| Battery Life | Approximately 30 hours of normal operation |
| Operating Conditions | Temperature: 5°C to 40°C, Humidity: ≤80% RH |