!
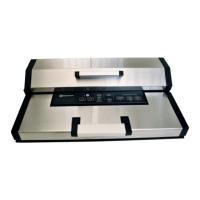
7. Press the ”Manual seal” button to start the !
sealing. Wait for the ”Manual seal” lamp!
goes off and the sealing is ready.!
!
!
!
!
!
!
!
!
!
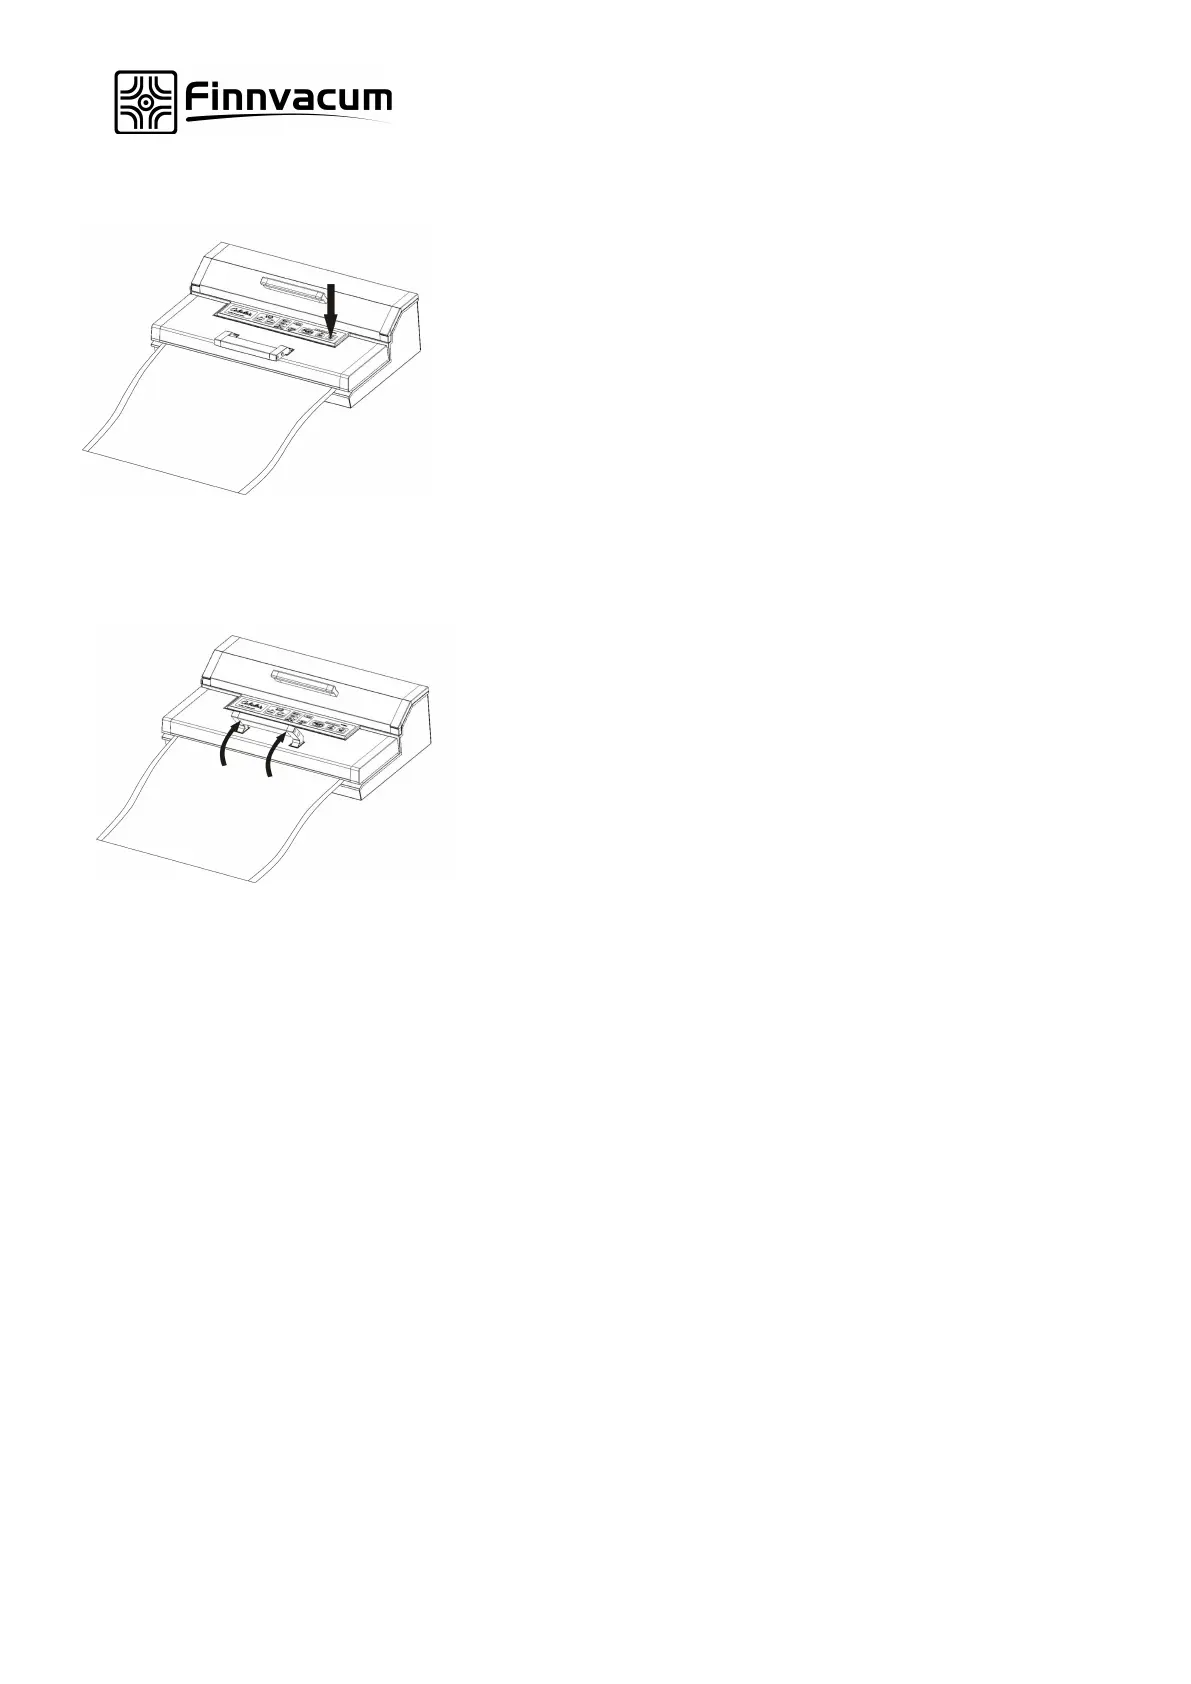
8. Lift the handle to open the lid.!
Remove the finished vacuum bag. !
The vacuum bag is now ready to be!
used for vacuum packing.!
!
Important advice as to vacuum sealing!
• Do not put too many ingredients in the vacuum bag/vacuum container. Leave at least 7 cm
between the contents of the vacuum bag and the bag opening. !
• Make sure that the opening of the vacuum bag is completely dry, as if not, !
the bag will not be correctly closed. !
• Stretch the bag opening before positioning it against the sealing strip in order to remove any
possible wrinkles and irregularities. !
• Do not put sharp objects such as fishbones or hard shells in the vacuum bag, as such objects may
penetrate the bag. Use vacuum containers for such objects. !
• During the vacuum sealing process liquids and other particles my inadvertently enter the vacuum
pump, which may cause the pump to stop and damage the appliance. In order to prevent this, we
recommend that you freeze liquid products in a freezer box prior to vacuum packing in a vacuum
bag or vacuum container. Note that if liquid is vacuum packed direct in a vacuum container without
having been frozen, the container may be damaged and crack when stored in the freezer. See the
section “Preparation of various raw materials”. !
• If you want to vacuum pack meat or other humid products, put some paper towel between the
contents and the bag opening. For vacuum packing!
of flour, cereals and other powdered products, you can put a coffee filter between the contents and
the bag opening. Make sure not to position the paper/filter in the sealing itself. !
 Loading...