7
1. OPTIONAL: This heater comes with a Weighted Base
to provide stability when assembled, but there are also
3 Grounding Brackets (N) that can be used to increase stability.
If you wish to use this feature, you will NOT attach the
Wheels to the Base. Instead, attach the Grounding Brackets (N)
to the holes on the sides of the Base (J) with the M6x10 Bolts
and M6 Nuts.
Hardware Used: 6 x M6x10 Bolt
6 x M6 Nut
2. Center Wheel (M) in Wheel Axle (L) and insert 1 - M8x42 Screw
through the center hole. Affix 1 - M8 Nut to the end of the screw.
Repeat with second Wheel and Wheel Axle.
Secure Wheel Axle (L) to the Wheel Bracket (K) with 4 - M6x15 Screws
and 4 - M6 Nuts. Repeat with second Wheel Axle and Wheel Bracket.
Align holes in Wheel Bracket (K) with corresponding holes in Base (J),
and insert 4 - M6x15 Screws through holes and secure with 4 - M6 Nuts.
Repeat with second Wheel Bracket.
.
Hardware Used: 16 x M6x15 Screw
16 x M6 Nut
2 x M8x42 Screw
2 x M8 Nut
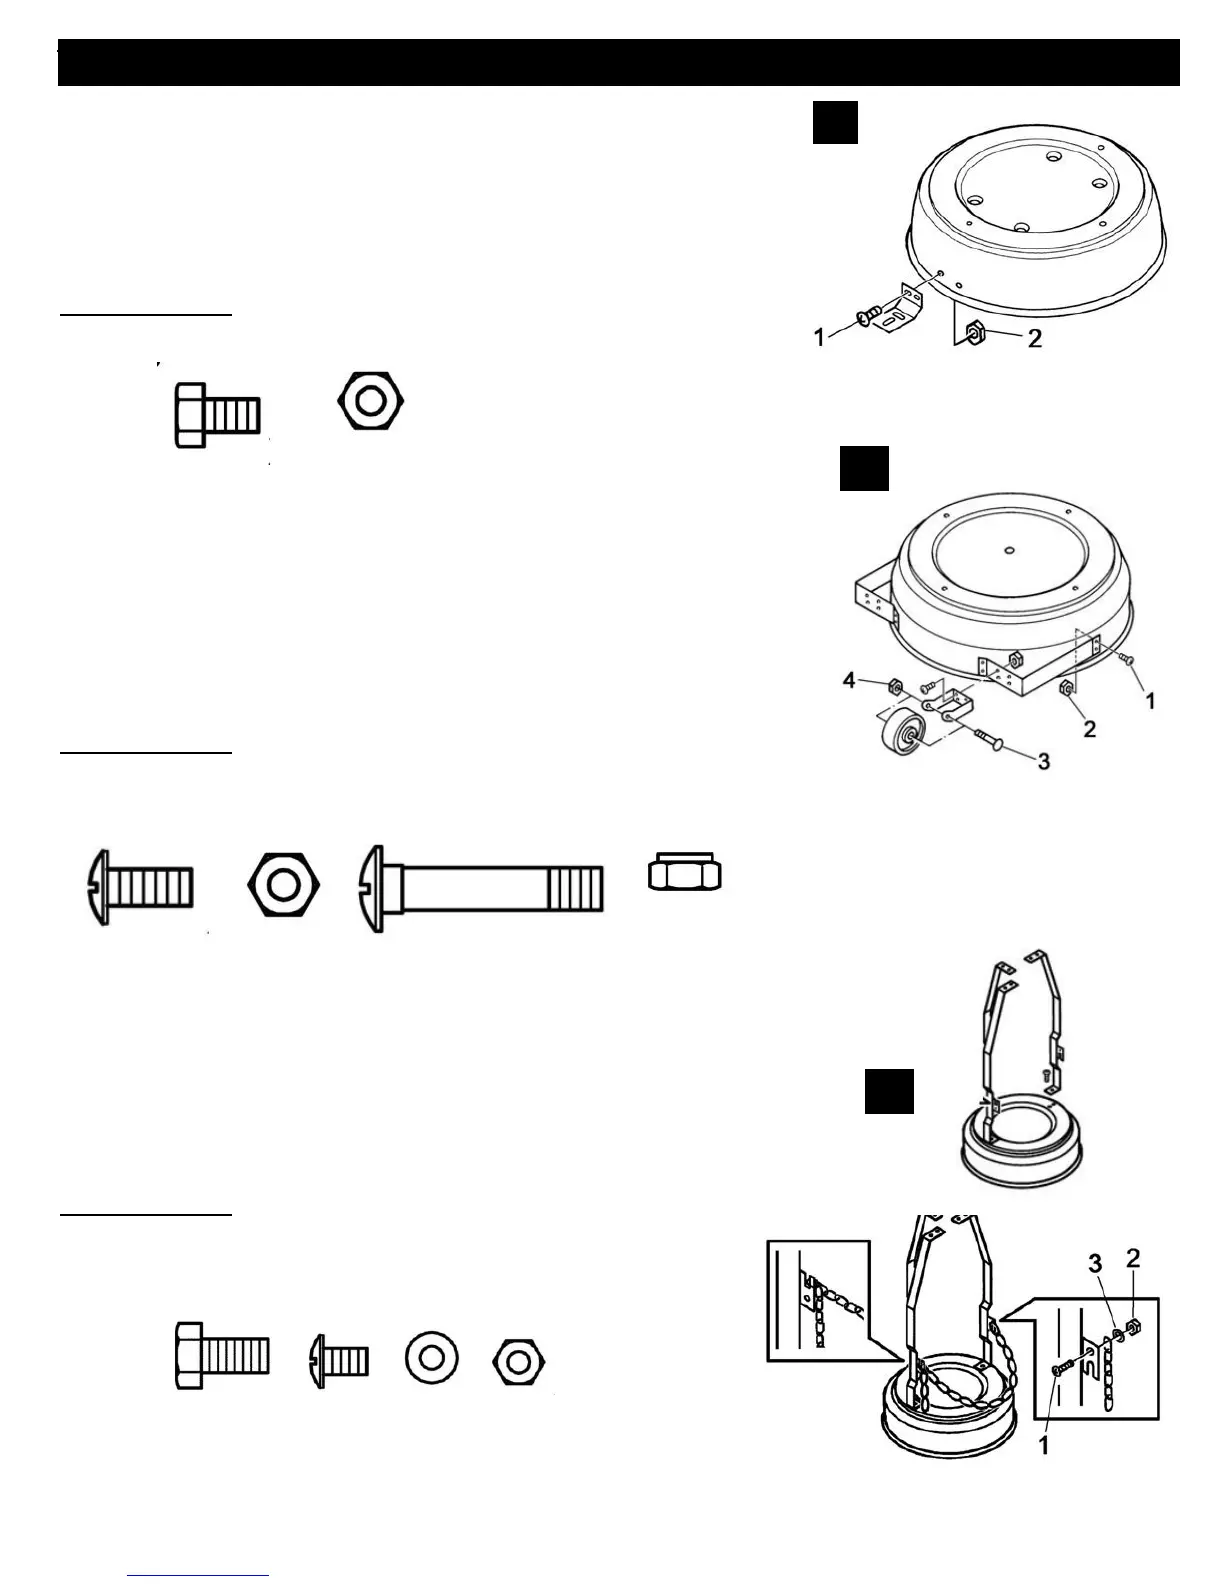
3. Attach the Post Supports (H) to the Base (J). Align the holes in the
bottom of each Post Support with the hole on the Base.
Insert 1 - M8x16 Bolt through the hole in the support and into the
Base and hand tighten. Repeat with the other 2 Post Supports and
then tighten all bolts with a wrench.
Then affix the Tank Chain (I) to the bracket located on one of the Post
Supports using a 3/16" x 5/8" Screw, 3/16" Washer and 3/16" Nut.
Once you have secured the Tank Chain to the Post Support, you will later
use it to secure the LPG tank by attaching it to the opposite side bracket.
Hardware Used: 3 x M8x16 Bolt
1 x 3/16" x 5/8" Screw
1 x 3/16" Washer
1 x 3/16" Nut