This document is an Operation & Installation Guide for First Alert® Fire Resistant Gun Safes, specifically models 7319DFB and 7334DFB. It provides comprehensive instructions for setting up, using, and maintaining the safe, along with important safety and warranty information.
Function Description:
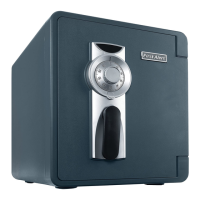
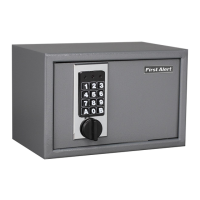
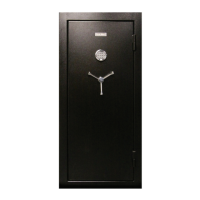
The First Alert® Gun Safe is designed to provide secure, fire-resistant protection for firearms, ammunition, and documents. It features an electronic lock for access and a robust construction to deter theft. The safe is intended for residential use and is built to high manufacturing standards to ensure user satisfaction and peace of mind.
Important Technical Specifications:
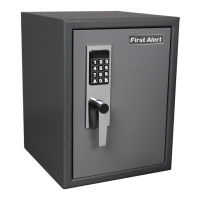
- Models: 7319DFB and 7334DFB.
- Security Rating: UL listed Residential Security Container. This rating indicates that the safe meets specific standards for resistance against common burglary attacks.
- California Code of Regulations: Verified to meet the standards set forth by section 4100 of the California Code of Regulations, which likely pertains to firearm storage requirements.
- Fire Rating: ETL verified fire resistance rating of 30 minutes at 1400°F. This means the safe is designed to protect its contents from fire damage for at least 30 minutes when exposed to temperatures up to 1400°F.
- Lock Type: Electronic lock.
- Power Source: Requires one (1) 9-Volt ALKALINE ENERGIZER or DURACELL battery for the electronic lock.
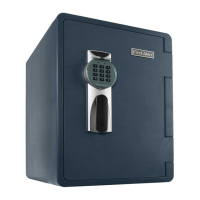
- Locking Mechanism: Features a handle with multiple spokes (3 spokes for both models) and multiple locking bolts (10 for 7319DFB, 14 for 7334DFB) for enhanced security.
- Construction: Includes heat expandable door seal to protect against fire, external hinges, and a door back panel.
- Interior Configuration:
- Model 7319DFB: Top shelf, safe interior walls, gun rack, three side shelves (varies based on model), one divider (varies based on model), and four bolt down hole caps.
- Model 7334DFB: Two top shelves, safe interior walls, gun rack, two side shelves (varies based on model), two dividers (varies based on model), and four bolt down hole caps.
- Anchoring: Designed to be bolted to the floor using four concrete bolts (included) for added security against removal.
Usage Features:
- Initial Setup:
- Safety Interlock Screw Removal: A crucial first step involves removing a "Door Lock Override Device" (safety interlock screw) that prevents the lock from engaging during shipping. This requires an Allen wrench (included) and a black plastic cap (included) to cover the hole after removal.
- Battery Installation: The electronic lock requires a 9V alkaline battery. Installation involves removing a Phillips head screw from the battery cover on the bottom of the keypad, connecting the battery, and re-securing the cover.
- Opening for the First Time: The safe comes with a factory preset passcode (1-2-3-4-5-6). Users must enter this code, turn the handle counter-clockwise to unlock, and then clockwise to open the door.
- Handle Spoke Installation: Two additional handle spokes are located inside the safe and must be screwed into the handle hub. Thread lock (not included) is an optional recommendation to prevent loosening.
- Programming the Lock:
- Users can change the factory preset passcode to a new six-digit code.
- The programming sequence involves entering "zero" six times to enter programming mode, then the existing passcode, followed by the new passcode entered twice.
- Lock-Out Penalty: Entering four consecutive incorrect passcodes initiates a five-minute lock-out period, indicated by a red LED flash. Additional incorrect passcodes will restart the lock-out period. The battery must remain connected during this period.
- Shelf Installation: Metal shelf clips are provided to customize the interior layout. Four clips are required per shelf, ensuring they are aligned before placing the shelf. Clips can be removed by squeezing them with a hand or pliers.
- Bolting to the Floor: The safe can be bolted to the floor for enhanced security. This involves marking and drilling holes in the floor (using a 5/8" masonry bit, not included), repositioning the safe, installing concrete bolts, and filling the holes with high-temperature silicone caulk (not included) for fire resistance.
- Low Battery Warning: Repeated LED flashing and beeping indicate a low battery, requiring immediate replacement.
Maintenance Features:
- Battery Maintenance:
- Always use the specified 9-Volt ALKALINE ENERGIZER or DURACELL battery.
- Replace all batteries at the same time, at least once a year, or sooner depending on usage.
- Clean battery contacts before installation.
- Ensure proper polarity (+ and -) when installing batteries.
- Remove batteries if the safe will not be used for an extended period.
- Promptly remove and properly discard used batteries.
- Cleaning:
- Keypad: Avoid operating the digital keypad with dirty, debris-covered, or liquid-exposed hands.
- Safe Surface: Use a mild cleaner (e.g., window cleaner) to clean the safe's surface to prevent scratching or discoloration. Always wipe dry and avoid abrasive cleansers.
- Moisture Control:
- Place delicate items (pictures, jewelry) in air-tight containers before storing them.
- Avoid placing the safe in areas of high humidity.
- For optimum performance, open and air out the safe for at least 20 minutes every two weeks.
- Documentation: Keep the Operation & Installation Guide in a secure area away from the safe for future reference. Record the safe's model number, serial number, and passcode in the provided "Safe Identification Record" section. It is strongly recommended not to remove the identification tags from the safe; if removed, attach them to the inside back cover of the manual.
Troubleshooting:
The guide includes a troubleshooting section for common issues such as:
- Lost combination (requires contacting Consumer Affairs with identification numbers).
- Incorrect battery type (emphasizes using 9-Volt ALKALINE ENERGIZER or DURACELL).
- How to remove the pallet (refers to FAQ on www.firstalert.com).
- Battery replacement (refers to Pg. 6 BATTERY INSTALLATION).
- Changing the combination (refers to Pg. 9 PROGRAMMING THE LOCK).
- Lock not opening after entering code (indicates incorrect code, suggests re-entering or contacting Consumer Affairs).
Warranty:
BRK Brands, Inc. provides a five-year limited warranty covering defects in material and workmanship from the date of purchase. The warranty is valid for the original retail purchaser and requires proof of purchase. It does not cover normal wear and tear, misuse, improper installation, or acts of God. BRK is not liable for incidental or consequential damages, costs associated with removal/installation, or issues arising from lost passcodes.