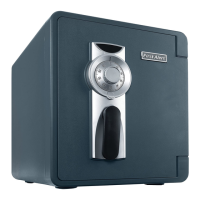
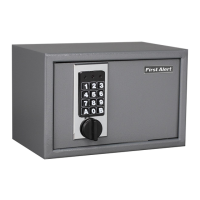
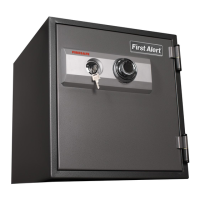
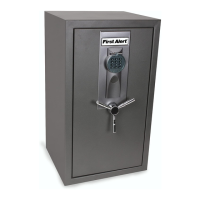
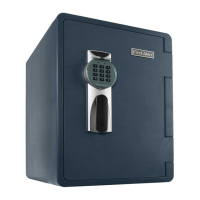
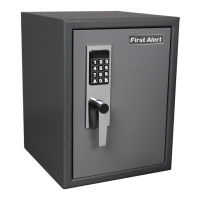
This document provides an operation and installation guide for First Alert Digital Safes, specifically models 4003DFB, 4005DFB, 4007DFB, and 4009DFB. These safes are designed to provide secure storage for valuables and important documents, built to high manufacturing standards to ensure user satisfaction and peace of mind.
Function Description:
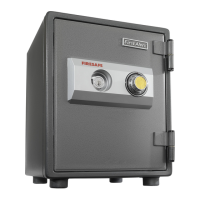
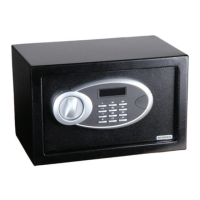
The First Alert Digital Safe is an electronic safe designed for securing personal belongings. It features a digital keypad for user code entry, an emergency key override, and a robust locking mechanism with bolts. The safe operates on AA batteries, which power the electronic keypad and internal LED light. It is equipped with an automatic lock feature that triggers warning beeps after multiple incorrect entries, disabling the keypad for a set period. The safe can be mounted to a wall or floor for added security, using either expansion bolts for concrete surfaces or clamping screws for wooden surfaces.
Usage Features:
- Opening the Safe for the First Time: Upon initial receipt, the safe must be opened using the emergency key. This involves removing the emergency lock cover, inserting the key, turning it counter-clockwise, and then turning the knob clockwise to open the door. The emergency key should be kept in a safe place, never inside the safe.
- Inserting Batteries: The safe requires 4 AA batteries, which are inserted into a dedicated battery compartment inside the door. It's crucial to align the batteries according to the "+" and "-" signs. If both red and green lights illuminate simultaneously when the keypad is activated, it indicates low battery voltage, and new batteries should be installed. If the safe is left without power for more than thirty minutes, the user code will need to be reset.
- Opening the Door with User Code: To open the safe using the user code, input the 3 to 8-digit code. Each key press will be accompanied by a buzzer beep and a yellow light flash. After entering the code, press either the "*" or "#" button. A green light will illuminate, indicating successful code entry. Within 5 seconds, rotate the knob clockwise and pull outwards to open the door. An interior LED light will turn on for 30 seconds after the door is opened. The factory preset user code is "159". If the yellow light flashes with three buzzer beeps after code entry, the code is incorrect, and you should re-enter it.
- Closing the Door: To close the door, simply turn the knob counter-clockwise.
- Setting the User Code: With the door open, press the reset button once. The yellow light will illuminate, signaling that the safe is ready to accept a new code. Input a new 3 to 8-digit code, then press "*" or "#" to confirm. Two buzzer beeps will confirm the acceptance and storage of the new code. If the yellow light flashes with three buzzer beeps, the code change was not effective, and you need to try again.
- Setting the Master Code: To set the master code, open the safe, input "0" twice, and then press the reset button. The yellow light will turn on. Input the new 3 to 8-digit master code, then press "*" or "#" to confirm. Two beeps and two yellow light flashes will confirm successful setting. If the yellow light flashes three times, the new code is invalid and needs to be reset.
- Opening with Emergency Key (Malfunction/Unknown Code): If the electronic circuit malfunctions or the user code is unknown, the emergency key can be used. Remove the emergency lock cover, insert the key, turn it counter-clockwise, and then turn the knob clockwise to open the door.
- Mounting the Safe: For enhanced security, the safe can be fixed in a location that is not easily moved. This involves drilling holes for expansion bolts (for concrete walls) or clamping screws (for wooden walls). The bolts/screws are then used to secure the safe to the wall or floor. Ensure the safe is mounted as required and all screws are tightened.
- Automatic Lock Feature: The safe incorporates an automatic lock feature to deter unauthorized access. Three consecutive wrong entries will activate a 20-second warning beep. Six consecutive wrong entries will activate a 5-minute warning beep. During the beeping period, the keypad is disabled. To stop the beeps, the safe must be opened with the emergency key, and the battery removed to power off the system.
- Moisture Warning: Delicate items like pictures or intricate jewelry should be placed in an air-tight container before storing them in the safe. Avoid placing the safe in areas of high humidity. For optimal performance, the safe should be opened and aired out for at least 20 minutes every two weeks.
- Firearms Warning: This safe is not designed to store medication, items with combustible content, guns, or other weapons.
Maintenance Features:
- Low Battery Indicator: The system automatically checks the battery level every time the keypad is activated. If the power falls below a certain level, the keypad will beep and flash yellow when a key is pressed, indicating that batteries need replacement.
- Battery Maintenance:
- Always purchase and use the specified batteries.
- Replace all 4 AA batteries at the same time. It is recommended to replace them at least once a year or sooner depending on usage frequency.
- Clean the battery contacts in the compartment and on the batteries before installing new ones.
- Ensure batteries match the polarity (+ and -) signs.
- If the safe will not be used for an extended period, remove the batteries.
- Promptly remove and properly discard used batteries.
- Do not mix old and new batteries, or alkaline, standard, and rechargeable batteries.
- Cleaning: To clean the safe's surface, use a mild cleaner (e.g., window cleaner) to avoid scratching or discoloring. Always wipe dry and never use abrasive cleansers on the safe or digital keypad.
- Clean Hands: Avoid operating the digital keypad if your hands have excessive dirt, debris, or liquids.
- Safe Identification Record: It is crucial to record the safe's model number, key number (engraved on the keys and around the lock cylinder), and digital passcode. This information is essential for obtaining warranty service or ordering replacement keys. This manual should be saved and never kept inside the safe.
- Ordering Replacement Entry Keys: If keys are lost or additional keys are desired, they can be purchased from First Alert, Inc. This requires providing your name, address, telephone number, safe model number, serial number, key number, a notarized statement of ownership, the number of keys requested, and the preferred method of receiving them.
- Warranty Service: If service is required, do not return the product to the retailer. Contact Consumer Affairs at 1-800-323-9005, providing the model number and date of purchase. Do not return the safe to the store for questions pertaining to proper use.