TRINITY EASY SETUP GUIDE
5
TRINITY OUT-OF-BOX EASY SETUP GUIDE
STEP 2: Installing Your Trinity T650c Terminal
•
Turn on terminal by pushing the on/off
button on the left side of the unit (as shown
in figure 6) until you see the Verifone
Screen
. Press for 3-4 seconds to power on and
1-2 seconds to shut down.
•
You will be taken to the Welcome Screen and
asked to select your preferred Language and
then press the blue, Next Button.
• Ethernet connected devices can skip Step
3.
STEP 3: Setting up a Wi-Fi Connection
• Wi-Fi gives you untethered payment processing—Allowing you the freedom for
easier terminal placement. If you wish to connect via an Ethernet cord, return to
Step 1.
• On the next screen (figure 8), the Trinity T650c will scan for available Wi-Fi
Networks. This may take a few moments.
TRINITY OUT-OF-BOX EASY SETUP GUIDE
STEP 2:
Installing Your Trinity T650c Terminal
•
Turn on terminal by pushing the on/off
button on the left side of the unit (as shown
in figure 6) until you see the Verifone
Screen
. Press for 3-4 seconds to power on and
1-2 seconds to shut down.
•
You will be taken to the Welcome Screen and
asked to select your preferred Language and
then press the blue, Next Button.
• Ethernet connected devices can skip Step
3.
STEP 3: Setting up a Wi-Fi Connection
• Wi-Fi gives you untethered payment processing—Allowing you the freedom for
easier terminal placement. If you wish to connect via an Ethernet cord, return to
Step 1.
• On the next screen (figure 8), the Trinity T650c will scan for available Wi-Fi
Networks. This may take a few moments.
TRINITY OUT-OF-BOX EASY SETUP GUIDE
STEP 2: Installing Your Trinity T650c Terminal
•
Turn on terminal by pushing the on/off
button on the left side of the unit (as shown
in figure 6) until you see the Verifone
Screen
. Press for 3-4 seconds to power on and
1-2 seconds to shut down.
•
You will be taken to the Welcome Screen and
asked to select your preferred Language and
then press the blue, Next Button.
• Ethernet connected devices can skip Step
3.
STEP 3: Setting up a Wi-Fi Connection
• Wi-Fi gives you untethered payment processing—Allowing you the freedom for
easier terminal placement. If you wish to connect via an Ethernet cord, return to
Step 1.
• On the next screen (figure 8), the Trinity T650c will scan for available Wi-Fi
Networks. This may take a few moments.
TRINITY OUT-OF-BOX EASY SETUP GUIDE
STEP 2: Installing Your Trinity T650c Terminal
•
Turn on terminal by pushing the on/off
button on the left side of the unit (as shown
in figure 6) until you see the Verifone
Screen
. Press for 3-4 seconds to power on and
1-2 seconds to shut down.
•
You will be taken to the Welcome Screen and
asked to select your preferred Language and
then press the blue, Next Button.
• Ethernet connected devices can skip Step
3.
STEP 3: Setting up a Wi-Fi Connection
• Wi-Fi gives you untethered payment processing—Allowing you the freedom for
easier terminal placement. If you wish to connect via an Ethernet cord, return to
Step 1.
• On the next screen (figure 8), the Trinity T650c will scan for available Wi-Fi
Networks. This may take a few moments.
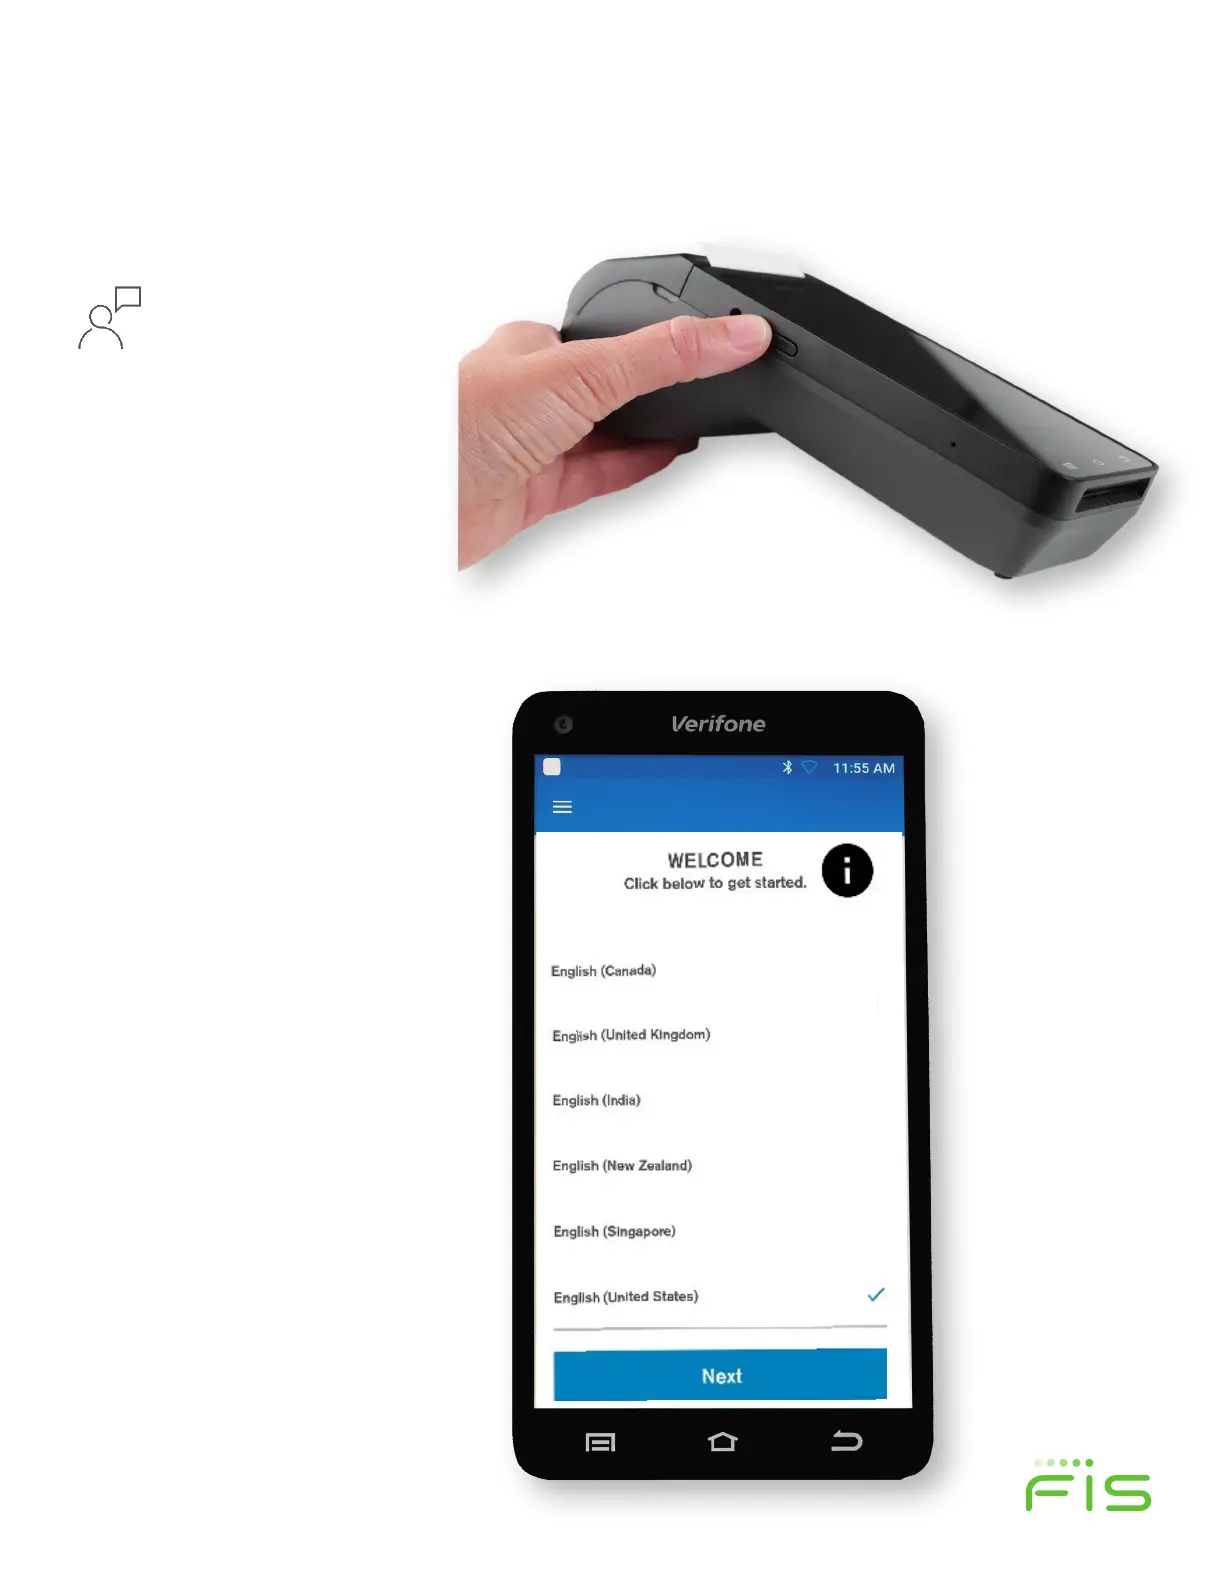
STEP 2:
Installing Your Trinity T650c Terminal
Figure 6
Figure 7
Turn on your terminal
by pushing the on/o
power button on the
le side of the unit (as
shown in figure 6) until
you see the Verifone
screen. Press for 3-4
seconds to power on.
At the Welcome screen
(as shown in figure 7),
select your preferred
Language and then press
the blue, Next button.
 Loading...