TRINITY EASY SETUP GUIDE
6
STEP 3:
Setting up your Connection
You can connect your T650c to either an Ethernet
connection (wired) or Wi-Fi.
3a. Setting up an Ethernet Connection using Dynamic IP
addresses (most common)
NOTE: If your company requires static IP (not common),
then skip to 3b.
• If the Ethernet cord was properly connected in the ETH
port in Step 1, you will see the option for Ethernet Setting
above the blue Next button as shown in Figure 8.
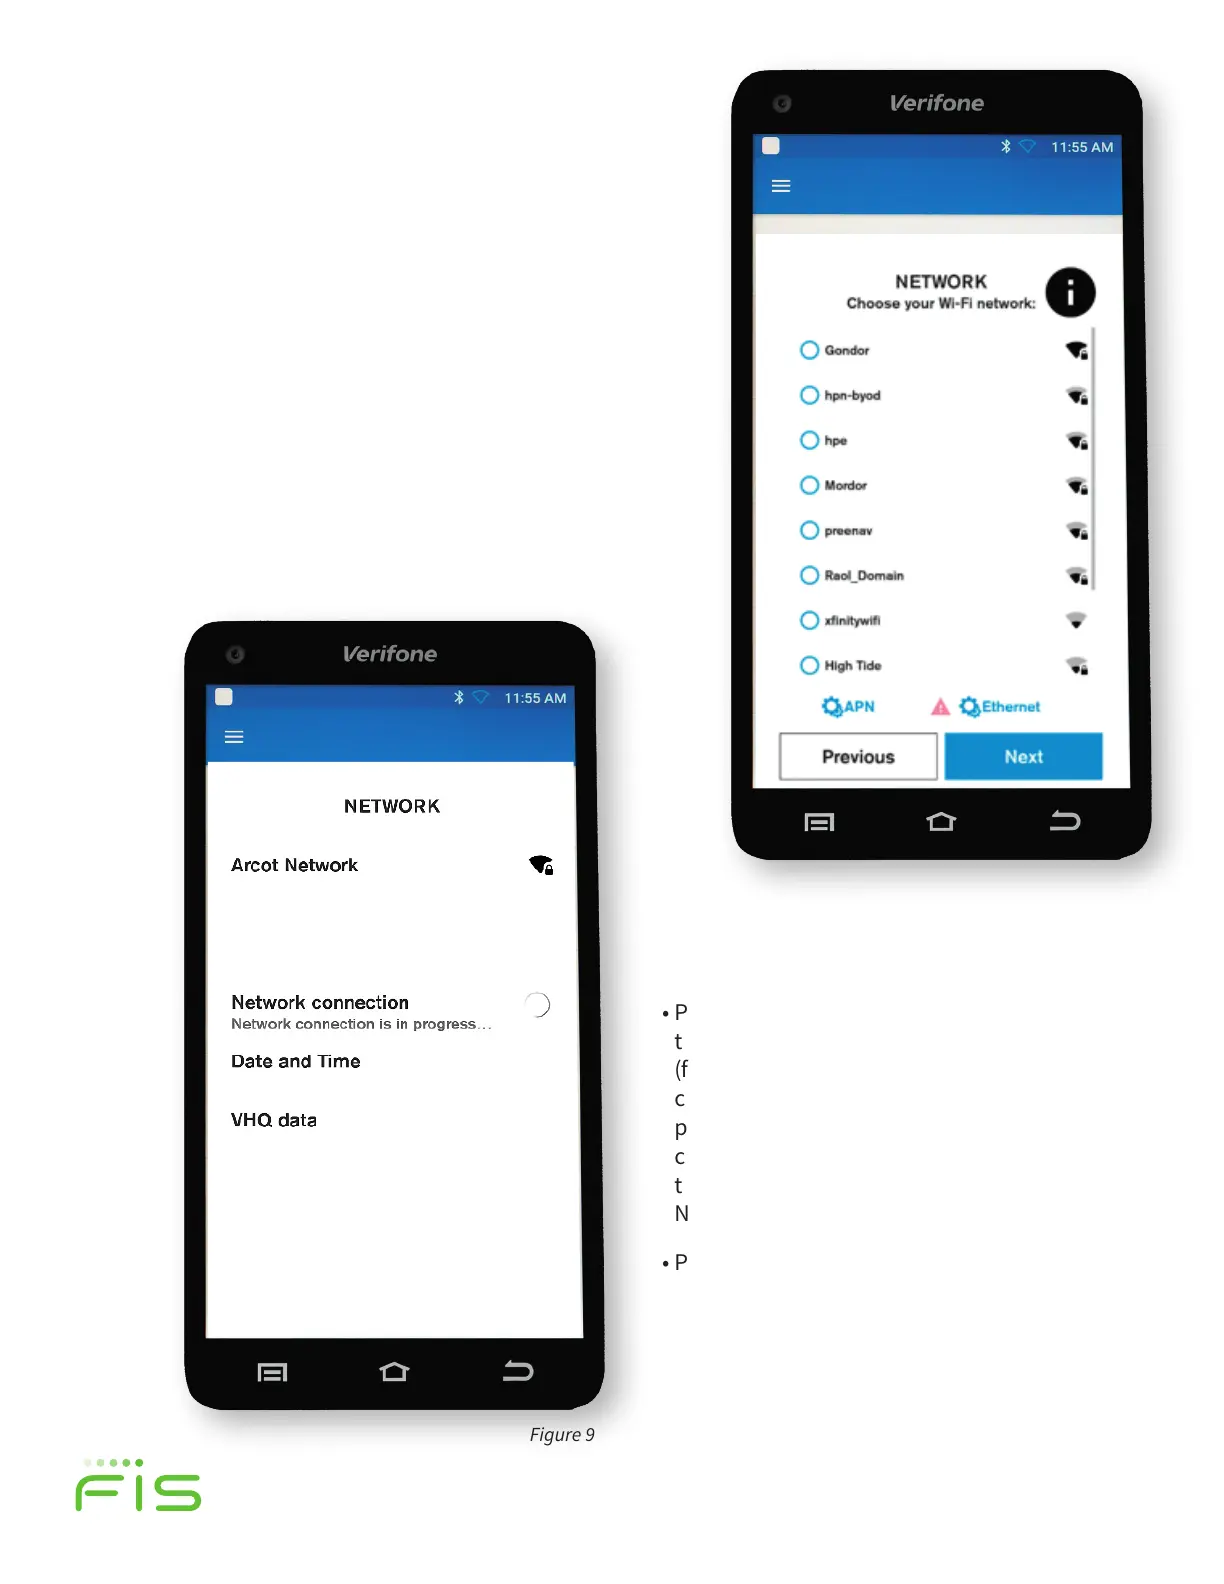
Figure 9
• Press the blue, Next button and once
the Network connection is established
(figure 9), the T650c will automatically
configure the date and time. A screen
prompt will confirm the internet
connection, date and time and link to
the VHQ data (Verifone Headquarters
Network).
• Proceed to Step 4.
Figure 8
TRINITY OUT-OF-BOX EASY SETUP GUIDE
• Select your Wi-Fi Network from the options listed
by selecting a radial button on the touch screen.
Press the blue, Next button. You will need a secure
Wi-Fi Network and will be prompted to enter your
password on the next screen.
• Once the Network Connection is established (figure
9), the T650c will automatically configure the Date
and Time. A screen prompt will confirm the
internet connection, Date and Time and link to the
VHQ data—or the Verifone Headquarters Network.
 Loading...