Do you have a question about the Fisher & Paykel ED55 and is the answer not in the manual?
Provides detailed measurements for dryer width, depth, and height.
Specifies the weight of the dryer when packaged for transport.
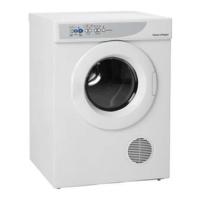
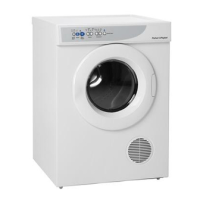
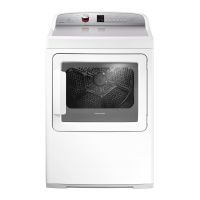
Details the control types for AD55 (Timer) and ED55/56 (Electronic).
States the maximum dry weight capacity of the dryer.
Lists electrical requirements including voltage, frequency, heater, and motor wattage.
Outlines thermostat cut-out and reset temperatures for the heater plate.
Specifies exhaust duct cut-out temperature and reset type for AD55.
Details various installation methods for the dryer to suit different requirements.
Describes the dryer standing on the floor and its mobility.
Details plinth for matching with existing washers, reducing bending.
Explains mounting above a washer or tub using a kit and inverted panel.
Covers wall mounting at any height to minimize bending and stretching.
Step-by-step guide for mounting the dryer on an outside wall.
Details the available venting options for optimal dryer performance.
Details advantages of external venting like efficiency, condensation prevention, and lint reduction.
Describes venting via a metal pipe through a wall, suitable for floor/wall mounts.
Uses a flexible hose for slight dryer movement, suitable for floor-mounted dryers.
Utilizes a flexible hose to vent the dryer through a window.
Discusses using a vent deflector when external venting is not possible.
Details a vent system up to 5 meters with specific bend restrictions.
Guidance on sorting clothes by drying time for efficiency and lint separation.
Tips for loading clothes to ensure even drying, prevent snagging, and allow airflow.
Advice for electronic models on drying small loads to avoid premature cycle stops.
Explains the Dualcare dryer's low-temperature design and two cycle options.
Step-by-step guide for operating the Dualcare AD55 dryer.
Provides estimated drying times for various load comparisons.
Crucial safety warning against drying items with flammable solutions or materials.
Guide on operating the ED55/56 electronic dryer, including controls and settings.
Explanation of the five dryness levels indicated by LEDs for ED55/56.
Details the manual 60-minute cycle that does not auto-sense dryness.
Describes the Regular, Low, and Cold temperature settings available on the ED56 model.
Explains the 10-minute cool air cycle to reduce creasing after drying.
How to pause the dryer cycle by opening the door or pressing the START/PAUSE button.
Details how to activate and use the key lock to prevent accidental changes or operation.
Instructions on setting a delayed start for the drying cycle on the ED56 model.
Explains the Crease Guard function to minimize creasing by periodic tumbling.
Information about the dryer rack for drying items that should not be tumbled.
Step-by-step guide on how to install and use the dryer rack.
Tips for drying shoes and hats using the dryer rack and specific settings.
Description of the LED flashing feature for shop displays and how to activate/stop it.
Information on identifying and initial troubleshooting steps for fault modes.
Essential precautions for handling electronic components sensitive to static electricity.
Procedure for removing the timer knob on AD55 models.
Steps for safely removing the control panel from the dryer.
Instructions for removing the top trim of the dryer.
Detailed steps for removing the rear panel of the dryer.
Procedure for removing the top cabinet panel.
Comprehensive guide on how to remove the dryer drum.
Steps for replacing the front drum bearings, only possible with the drum removed.
Instructions for removing the front bearing holder, air duct assembly, and felt seal.
Procedure for removing the motor from the dryer.
Steps for removing the fan from the motor shaft.
Guide on removing the motor driving pulley.
Instructions for removing the jockey pulley arms and rollers.
Procedure for removing the timer on AD55 models.
Steps for removing the electronic module, including ESD precautions.
Instructions for removing the door assembly from the dryer.
Procedure for removing the door switch.
Guidelines for handling electronic components to prevent Electrostatic Discharge damage.
Instructions for proper packaging and transportation of PCB assemblies.
Description of the three types of connectors used on the dryer and their removal.
Procedure to test the functionality of LEDs and buttons on the control panel.
Tests to verify drum rotation and heater element operation.
Tests for the exhaust sensor and door switch functionality.
Identifies fault code 0101/1001 for a faulty exhaust sensor and troubleshooting steps.
Describes fault code 1101 for exhaust air temperature exceeding 90°C and its causes.
Refers to other fault codes related to PCB assembly issues.
Procedure for testing the resistance of the exhaust sensor thermistor.
Instructions for adjusting the door switch for proper pause activation.
Explains what a brown out is and how the dryer handles voltage drops.
Steps to start the dryer for temperature measurement mode.
Procedure to show ambient sensor temperature using < DRYNESS button.
Procedure to show exhaust sensor temperature using > DRYNESS button.
How to exit temperature measurement mode and return to normal dryer operation.
Illustrates how to calculate temperature from LED indications (1+2+8=11 C).
Shows how to calculate temperature from LED indications (0.5+2+4+8+16=30.5 C).
| Brand | Fisher & Paykel |
|---|---|
| Model | ED55 |
| Category | Dryer |
| Language | English |