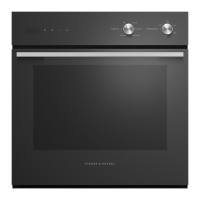
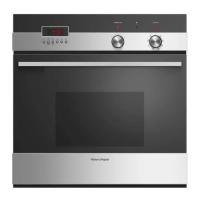
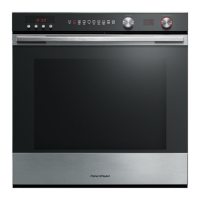
This document is a user guide for an Elba built-in oven, specifically OB90 models, manufactured by Fisher & Paykel. It provides comprehensive instructions for safe operation, cooking, and maintenance of the appliance.
Function Description
The Elba built-in oven is designed for various cooking and baking tasks. It features multiple cooking functions, including:
- Oven Lamp: Illuminates the oven cavity, remaining on during all cooking functions.
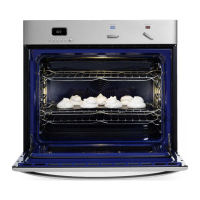
- Bake: This is the traditional method for baking, ideal for single shelves and dishes that require longer baking times, such as large cakes.
- Fan Bake: Suitable for dishes needing a browned top, like lasagne, or for baking multiple trays of smaller items like cakes or biscuits that cook in under an hour.
- Fan Grill: Used with the oven door closed and temperature set no higher than 225°C. It's ideal for roasting tender cuts of meat and poultry, with lower shelf positions recommended for larger items like whole chickens.
- Grill: Also used with the oven door closed and temperature set no higher than 225°C. For quick browning, such as toast, shelf position 4 is recommended.
The oven also includes a timer and automatic cooking features, allowing users to program cooking durations and start/stop times.
Usage Features
The oven's controls consist of a clock display, control buttons, a function knob, and a temperature knob.
Setting the Clock:
- When power is first supplied or restored after an outage, the display will show "0.00" and an "A" flashing.
- To set the clock, press the "STOP" and "L" buttons simultaneously.
- Then, use the "-" and "+" buttons to adjust the time of day.
Using the Oven:
- Shelf Positioning: Shelves should be slid in between the two wires of a shelf position, with stop notches pointing down and the guard rail at the back. The grill tray should be positioned similarly.
- Selecting a Function: Turn the function knob to select the desired cooking mode. The oven lights and the function indicator light will illuminate.
- Setting the Temperature: Turn the temperature knob to set the desired temperature. The temperature indicator light will come on and go out once the oven reaches the set temperature.
- During Cooking: The temperature indicator light may cycle on and off to maintain the set temperature. A cooling fan may operate to cool the oven and will continue to run even after the oven is turned off.
- Finishing Cooking: Turn both the function and temperature knobs to the off (O) position.
Using the Timer:
- The timer can be used independently of oven operation.
- Setting the Timer: Press the "L" button; "0.00" and a flashing timer symbol will appear. Use "-" and "+" to set the desired time (up to 23 hours and 59 minutes). The clock will then display the time of day with the timer symbol steadily lit.
- Checking Remaining Time: Press the "L" button.
- Cancelling the Timer: Press "-" and "+" simultaneously.
- When Time is Up: The timer will beep and the timer symbol will flash. Press "+" to stop the beeping and turn off the timer.
- Adjusting Beep Volume: Press "-" to cycle through volume levels.
Automatic Cooking:
- This feature allows the oven to turn on, cook, and turn off automatically.
- Setting Up:
- Set the oven function and temperature.
- Set the cooking time: Press the "L" button (an "A" will flash), then use "-" and "+" to set the cooking duration.
- Set the stop time: Press the "STOP" button (an "A" will flash), then use "-" and "+" to set the desired finish time.
- The oven will turn off until the programmed start time, then turn on, cook, and turn off at the set stop time.
- Cancelling Automatic Cooking: Press the "STOP" and "L" buttons simultaneously, then turn the function and temperature knobs to off.
Maintenance Features
Regular care and cleaning are essential for maintaining the oven. Always disconnect the oven from the power supply and ensure all parts have cooled before cleaning. Abrasive cleaners, harsh scrapers, and steam cleaners should not be used.
General Advice:
- Wipe out the oven after every use and clean spills as soon as the oven is cool enough to touch.
- Avoid alkaline or acidic substances on oven surfaces.
Control Panel:
- Wipe with a cloth using mild household detergent or stainless steel cleaner.
- Dry the surface and use a suitable stainless steel polish.
- Ensure knobs are turned OFF and the cloth is not too wet when cleaning. Avoid getting stainless steel cleaner on the knobs.
Oven Door Glass:
- Clean with a soft cloth, mild detergent or baking soda solution, and hot water, then wipe dry.
- Use a glass cleaner and a soft, lint-free cloth.
- The inner pane of glass can be removed for easier cleaning.
Oven Cavity (Enamel):
- Remove the oven door and side racks for easier access.
- Wipe the inside with household detergent, ammonia-based cleaner, or an oven cleaner (following manufacturer instructions).
- Wipe with a clean damp cloth and dry completely.
- To prevent baked-on soiling, remove spills and grease stains after each use.
- The grill element can be lowered for easier cleaning of the oven ceiling.
Side Racks, Oven Shelf, Trays:
- Clean with a solution of detergent and hot water. They are dishwasher safe.
- For heavy soiling, soak in hot water and biological clothes washing powder.
Oven Vent Louvres:
- Wipe with a damp cloth. Avoid liquid running down the louvres.
Oven Door Frame and Plastic Corner Clips:
- Clean with a solution of mild detergent and hot water, then wipe dry.
Rubber Seal:
- Wipe very gently with a damp cloth and mild detergent.
- Do not unhook or displace the seal. Avoid spraying oven cleaner or caustic cleaners on the seal.
Knobs and Door Handle:
- Wipe with a damp cloth and mild detergent.
- Dry thoroughly with a soft cloth. Do not use stainless steel or oven cleaner on these parts as it may damage their coating.
Removing and Replacing Side Racks:
- Use a flat-head screwdriver or small coin to loosen fixing screws. Tighten securely when replacing.
Drop-down Grill Element:
- Loosen fixing screws with a flat-head screwdriver or small coin to lower the element for cleaning the oven ceiling.
- Raise the element and tighten screws securely after cleaning. The grill element itself is self-cleaning.
Removing and Refitting the Oven Door:
- The oven door is heavy; ensure it has cooled down.
- Open the door fully.
- Open the levers on both hinges to their full extent.
- Gently close the door until hinge levers are hooked.
- Hold the door firmly and lift to disengage hinges, resting it on a soft surface with the handle side down.
- To refit, insert hinge tongues into slots, ensuring notches drop into place.
- Open the door fully, then fully close the levers on both hinges.
- Close the door and check it sits squarely.
Removing and Replacing the Inner Glass Pane:
- Exercise extreme care as the glass is fragile. Avoid bumping edges.
- Do not use harsh cleaners or scrapers on the glass.
- If damaged, do not use the oven and contact service.
- Remove the oven door and lay it handle-down on a protected surface.
- Press down on both tabs to release the glass retainer.
- Lift the inner pane slightly and gently slide it out. Place it on a soft, protected surface.
- To replace, orient the pane so the wording is readable and in the correct position. Insert it into the uppermost grooves, push slightly, and gently lower into place.
- Position the glass retainer on the bottom edge of the outer glass, ensuring clamps are not deformed.
- Gently push the glass retainer back into place until tabs click. Ensure it is secure.
- Refit the oven door.
Replacing Oven Light Bulb(s):
- Bulb replacement is not covered by warranty.
- Allow the oven cavity and grill element to cool.
- Disconnect the oven from the power supply.
- Twist off the lamp cover.
- Unscrew and replace the bulb with a new one suitable for high temperatures (300°C), 220-240V, E14, and the same wattage as the original.
- Twist the lamp cover back on.
- Turn power back on and set the clock.