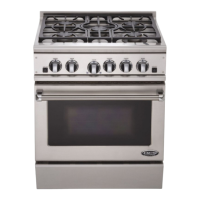
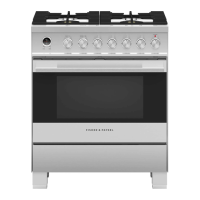
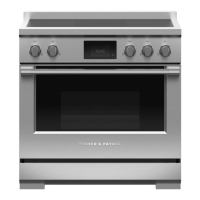
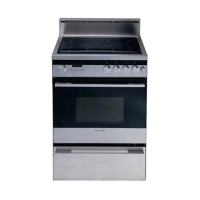
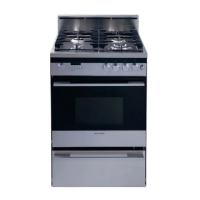
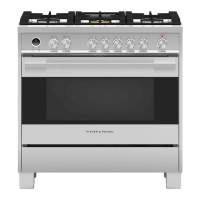
This document is a user and care manual for the Fisher & Paykel Freestander Ranges, specifically the 6102 Series, which includes models named 'Thyme', 'Tamarind', 'Paprika', and 'Sage'.
The Fisher & Paykel Freestander Range is a kitchen appliance designed for cooking, baking, grilling, and warming food. It combines an oven and a cooktop into a single unit, offering a versatile cooking solution for households.
Function Description
Oven Functions:
The oven offers a variety of cooking functions to cater to different culinary needs:
- Bake: This is the traditional method for cooking baked food, utilizing heat from both the top and bottom elements. For optimal results, pre-heating the oven is recommended, especially for baked products. It's preferable to cook one tray of food at a time in this mode. The elements are controlled by a thermostat that cycles on and off to maintain the set temperature.
- Grill: This function uses heat from an upper element to cook a large area of food. It's suitable for tender cuts of meat, toasted snack foods, and crisping toppings on various dishes. For best results when grilling, the oven door should be left open at the first stop position. The grill temperature can be set using the Temperature knob, with 'Hi' being the hottest setting, recommended for grilling meats.
- Fan Forced: This function is designed for multi-level cooking, circulating heat from an element around the fan throughout the oven. It's particularly effective for multi-tray cooking, reheating cooked foods, and preparing complete oven meals. Fan Forced mode is also suitable for casseroles and baked vegetables, and for cooking more than one tray of baking simultaneously.
- Fan Grill: In this mode, the fan circulates heat from the grill element around the oven. This style of grilling is an alternative to rotisserie cooking and is suitable for foods typically fried, such as sausages, chops, and meatballs. Fan grilling is carried out with the oven door closed, and preheating the oven is not necessary for this function.
Cooktop Functions:
The cooktop features radiant coil elements, which are tubular heating elements. These elements are designed to lift and rotate, providing easy access to the element bowls for cleaning.
- Control: The heat output of the radiant elements is controlled by variable energy regulators, offering infinite temperature control. Turning the control knob from 'Lo' to 'Hi' increases the heat output. It's recommended to start cooking by turning the control knob to 'Hi' and then adjusting as necessary.
- Temperature Settings:
- Low Setting: Ideal for delicate warming tasks like melting chocolate or keeping milk warm at very low temperatures.
- High Setting: Perfect for boiling, simmering, or frying. Once the pan is hot, the temperature should be reduced to maintain a steady heat for thorough cooking.
- Cooking Efficiency: The efficiency of cooking on the radiant cooktop is influenced by the type of cooking utensils used, such as heavy-based saucepans, and the quality and size of the pot. It is crucial that the pot size matches the diameter of the cooking zone to ensure optimal heat transfer. Incorrect pot size usage can lead to low heat or slow cooking.
Warmer Drawer:
Some models include a warmer drawer, which has a low-powered element. This drawer is useful for keeping hot food warm or for warming plates and serving dishes. The knob is rotated to turn the warmer drawer on and off.
Storage Drawer:
Other models may feature a storage drawer instead of a warmer drawer. Storage drawers do not have an element and therefore cannot keep food warm.
Usage Features
Clocks & Timers:
The range includes different clock and timer models to assist with cooking and scheduling.
-
Ringer Timer Model:
- Function: This is a manual timer that can be set for up to 55 minutes. It can be used at any time, even when the oven is not in use.
- Usage: To set the timer, turn the timer control knob clockwise to the 55-minute mark, then turn it back to the desired number of minutes. The timer will count down and ring when the set time is reached. Note that this timer does not turn the oven off if it is in use.
-
Analogue Clock Model:
- Function: This clock features an analogue display and an automatic cooking function.
- Setting the Analogue Clock: To set the clock, push in the Cook Time knob and turn it anti-clockwise until the clock displays the correct time, ensuring the manual mode symbol is shown. Then, press and turn the Start Time knob anti-clockwise until the red triangle aligns with the hour hand.
- Setting the Minute Timer: This timer can be used at any time. If the oven is in use, it will turn the oven off when the set time has elapsed. To set the timer, turn the Cook Time knob anti-clockwise until the desired number of minutes is displayed in the centre of the window. When the time is finished, the timer will ring, and the oven will turn off if it was on. To turn off the timer bell, turn the left-hand knob to the bell symbol. The timer will continue to ring until turned off. To return the oven to manual mode, turn the Cook Time knob until the manual mode symbol is shown.
Automatic Cooking Using the Analogue Clock:
This feature allows for delayed start and automatic shut-off of the oven.
- Check Time: Ensure the clock shows the correct time.
- Select Function & Temperature: Choose the desired oven function and temperature. The oven indicator light will glow, and the elements will activate.
- Set Cook Time: Decide when you want the oven to turn off, minus the cooking time you have set. Turn the Cook Time knob anti-clockwise until the desired cooking duration is displayed in the centre of the window.
- Set Start Time: Press and turn the Start Time knob anti-clockwise until the red triangle points to the time you want cooking to begin. The indicator light will turn off, indicating the oven is set for automatic cooking.
- To Turn Off/Cancel Automatic Cooking: To cancel automatic cooking or turn the oven off, turn the Cook Time knob until the manual mode symbol is shown in the display window. Then, turn the oven to manual mode. Press and turn the Start Time knob until the triangle clicks into alignment with the hour hand. Finally, turn the temperature and function knobs to off.
Using Your Oven (Manual Operation):
To operate the oven manually, simply turn it on by selecting the required temperature. The oven light will come on automatically. The oven indicator light will glow until the set temperature is reached. For grilling, set the temperature to 'grill'. Remember to turn the oven off when cooking is finished.
Roasting Guide:
The manual provides a roasting guide with recommended temperatures and times for various meats (Beef, Mutton, Hogget/Lamb, Pork, Chicken, Cervena). These are general guidelines and may need adjustment based on preferences, meat shape, and size. A larger piece of meat requires fewer minutes per 500g than a smaller piece. Meat with a bone cooks quicker than a rolled roast. Adding water to a roast is not advised as it creates a steaming effect. Using a meat thermometer is recommended for accurate results, considering that the internal temperature of the meat will continue to rise during standing.
Cooking Guide (Baking):
A baking guide is provided with recommended times, temperatures, and shelf positions for various baked products (Light Fruit Cake, Banana Cake, Biscuits, Scones, Slices, Meringues, Sponge, Whole Chicken, Custard Tart). These are guides only and are based on a pre-heated oven. Shelf positions are numbered from top down.
Cooktop Utensils:
- Recommendations: For best results, preheat cookware on the cooktop before adding food. Cookware with a stainless steel sandwich base or enamelled cast iron is recommended.
- Heat Adjustment: Once food comes to a boil, reduce the temperature setting.
- Avoid: Never use plastic or aluminium dishes on the cooktop.
- Pot Size: Pans should be the same size or slightly larger than the element. A flat base ensures better contact with the element, leading to shorter cooking times.
- Metallic Residue: Aluminium and copper cookware can leave metallic residue on the cooktop, which can be difficult to remove if left.
- Damage Prevention: Jagged edges on saucepans or heavy frypans can scratch the element. Round-based woks should NOT be used on radiant elements as they can damage the element bowls.
Side Mounted Power Outlets (New Zealand Only):
The range includes two side-mounted power outlets, internally fused with one 10 amp fuse each. Care should be taken not to overload them.
Accessories:
The range is supplied with various accessories depending on the model, which may include:
- 1 Roast Dish
- 1 or 2 Non Stick Bake Trays
- 2 Oven Racks
- 1 Grill Rack
- Warmer Drawer or Storage Drawer
Using the provided accessories is recommended for best cooking results. Shiny/aluminium trays can affect performance, particularly browning and cooking time.
Maintenance Features
First Use:
Before using the oven for the first time, remove all accessories and condition the oven by running it at bake, 200°C for one hour. A distinctive smell is normal during this period, so ensure the kitchen is well ventilated.
Cleaning Your Cooktop:
- Element Bowls: Clean regularly to prevent food residue from burning onto the enamel. Wipe with warm water and detergent or an ammonia-containing liquid cleaner. The element bowls have an acid-resistant finish, but acidic food spills should be wiped up immediately to avoid damage to the enamel.
- Aluminium Liners: The aluminium liners supplied for the element bowls will deteriorate over time and are available as spare parts.
Cleaning Your Range (Exterior Surfaces):
All exterior surfaces can be wiped with a damp cloth and liquid detergent or a non-abrasive cleaner. Frequent wiping with warm water and a household detergent or a spray-on, wipe-off cleaner is recommended.
Oven Door Cleaning:
For easier cleaning, the oven door can be removed:
- Open the door to its first stop position.
- Lift the door to disengage the hinges by holding the handle only. Avoid lifting near the hinges as they are spring-loaded and can snap back.
- To replace, position the hinge arms in the slots, lift the door by the handle, and push from the bottom to engage the hinges.
Warmer Drawer Cleaning:
The warmer drawer can be removed for cleaning. Pull it out until it stops, then lift it clear of the range. It's recommended to remove the warmer drawer or place paper towels under it when cleaning the oven to prevent accidental spills of oven cleaner onto the warmer drawer.
Oven and Oven Racks Cleaning:
Clean the inside of the oven while it is still warm, using household detergents or an ammonia-based cleaner (e.g., Handy Andy). "Off the shelf" oven cleaners can be used, provided the manufacturer's instructions are followed carefully. Failure to follow these instructions could stain or damage the enamel.
Oven Lamp Maintenance:
Turn off the oven at the wall before touching the oven lamp. The glass cover can be removed for cleaning. Always replace the glass cover before using the oven. Ensure the appliance is switched off before replacing the oven lamp to avoid the possibility of electric shock.
Fuse Replacement (Side Mounted Power Outlets - New Zealand Only):
If a fuse needs replacement:
- Turn off the power to the oven at the wall. Exercise extreme caution to ensure no power is supplied.
- Pull the oven out from the wall to access the fuse cover on the right-hand side.
- Using a Phillips screwdriver, remove the screw holding the fuse cover and then remove the cover itself.
- Remove the fuse carrier from its base and replace the blown fuse wire with a new 10 amp fuse wire. 10 amps is the maximum allowable fuse wire.
- Refit the fuse and the fuse cover.
Safety Instructions:
- Household appliances are not intended to be played with by children.
- Children or persons with disabilities should be instructed by a competent person on safe use.
- The appliance must be connected to a circuit with an isolating switch for full power disconnection.
- If the range is placed on a base, measures must be taken to prevent it from slipping.
- The appliance becomes hot during use; avoid touching heating elements inside the oven.
- Accessible parts may become hot when the grill is in use; keep children away.
- Do not place aluminium foil or dishes with reflective qualities on the oven bottom, as this can cause heat build-up and irreversible damage to the enamel.