Lit. No. 43069, Rev. 05 12 May 1, 2019
86000, 86000-1, 86100(CH), 86100-1(CH), 86200, 86205, 86205-1, 86300, 86400
86600-3, 86610-3(CH), 87000, 87000-1, 87100, 87200, 87300, 87400, 87600-3
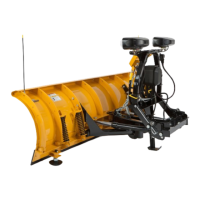
Lift Chain
1. Adjust the length of the lift chain on the
driver's side (with attached spring) so the T-frame
hits the T-frame stop when the lift ram is fully
raised (10").
2. Remove and retain the U-bolt and locknuts
securing the lift chain on the passenger's side of
the T-frame. Reposition the U-bolt in the chain so
the chain is the same length as the chain on the
driver's side.
3. Reinstall the U-bolt in the T-frame and tighten
the locknuts. The chain link will pivot freely in the
U-bolt.
4. Raise and lower the snowplow in the fully
retracted (vee) position to verify that the hydraulic
hoses bow outward and do not interfere with
snowplow components.
NOTE: Ensure that the base-end angle ram hoses
are wrapped over the diagonal brace. Adjust
hoses, fi ttings, and wraps as necessary to prevent
any hoses from being pinched.
FINAL ADJUSTMENTS
Leveling the T-Frame: 7.5'/8.5'/9.5' Blades
1. With snowplow attached to the properly ballasted
vehicle and blade lowered to ground, the T-frame
should be parallel with the ground.
If it is not, place the snowplow in
the scoop position.
Front
Fasteners
Rear Fasteners
T-Frame
Push
Beam
Select the hole best
aligned with rear holes
in push assembly.
WARNING
Keep 8' clear of the blade when it is being
raised, lowered, or angled. Do not stand
between the vehicle and blade or directly in
front of the blade. If the blade hits or drops on
you, you could be seriously injured.
2. Loosen the front fasteners for the push assembly
to T-frame connection, but do not remove them.
Next, remove the rear fasteners from the push
beam to T-frame connection. Level the T-frame.
3. Select the hole in the rear of the T-frame
that is aligned closest to the rear holes in the
push assembly. Lubricate and reassemble the
previously removed fasteners into the rear holes.
Tighten fasteners according to the torque chart.
10"
7.5'/8.5'/9.5' XV2™ T-frame Shown
 Loading...