Lit. No. 43069, Rev. 05 5 May 1, 2019
86000, 86000-1, 86100(CH), 86100-1(CH), 86200, 86205, 86205-1, 86300, 86400
86600-3, 86610-3(CH), 87000, 87000-1, 87100, 87200, 87300, 87400, 87600-3
1/4-20 109 154
1/4-28 121 171
5/16-18 150 212
5/16-24 170 240
3/8-16 269 376
3/8-24
297 420
7/16-14
429 606
7/16-20
9/16-12
9/16-18
5/8-11
5/8-18
3/4-10
3/4-16
7/8-9
7/8-14 474 669
644 9091-8
1-12 704 995
1/2-13
1/2-20
11.9
13.7
24.6
27.3
43.6
26.9
53.3
93
148
49.4
69.8
77.9
106.4
120.0
8.4
9.7
17.4
19.2
30.8
35.0
49.4
55.2
75.3
85.0
M6 x 1.00
M12 x 1.75
M8 x 1.25
M14 x 2.00
M10 x 1.50
M27 x 3.00
M22 x 2.50
M30 x 3.50
M24 x 3.00
M20 x 2.5011.1
19.5
38.5
67
107
7.7
613
778
1139
1545
450
428
562
796
1117
M33 x 3.50
M36 x 4.00
2101
2701
1468
1952
325
M16 x 2.00
231
167
M18 x 2.50 318222
Recommended Fastener Torque Chart
Size Size
Torque (f t- lb)
Grade
5
Grade
8
Metric Fasteners Class 8.8 and 10.9
These torque values apply to fasteners
except those noted in the instructions.
Torque (f t- lb)
Grade
5
Grade
8
Size Size
Torque (f t- lb)
Class
8.8
Class
10.9
Torque (f t- lb)
Class
8.8
Class
10.9
Inch Fasteners Grade 5 and Grade 8
CAUTION
Read instructions before assembling.
Fasteners should be fi nger tight until
instructed to tighten according to the torque
chart. Use standard methods and practices
when attaching snowplow, including proper
personal protective safety equipment.
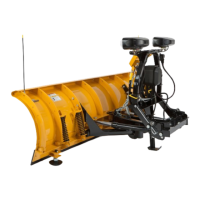
HEADGEAR TO T-FRAME ASSEMBLY
NOTE: For easier assembly and installation, the
vehicle and all snowplow components should
be on a smooth, level, hard surface, such as
concrete.
1. With the vehicle parked on a solid, level surface,
measure the distance from the center of the
connecting pin hole to the ground. Using this
measurement, refer to the hole selection chart
below to determine which hole should be used to
attach the headgear to the push assembly.
Pushplate Height
(hole center to ground)
Rear
Hole
17" to 19" Top
15" to 17" (typical) Middle
13" to 15" Bottom
2. If the vehicle is unavailable, use the middle holes
and reposition the headgear later, if necessary.
3. Set aside the pivot pin, parts bags, and blade
guides. The vehicle electrical harnesses and
Owner's Manual packet are in the bag with the
headlamp box.
Measure
this distance.
Center of
Connecting
Pin Hole
TORQUE CHART
 Loading...