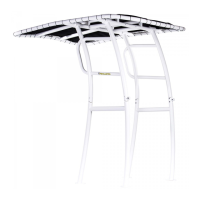
Step 3 - Apply a small amount of grease to fourteen (14) of the Item 7 bolts. Install the bolts
into the canopy frame. Only hand tighten the bolts until every bolt is in place and then go
back and tighten every bolt.
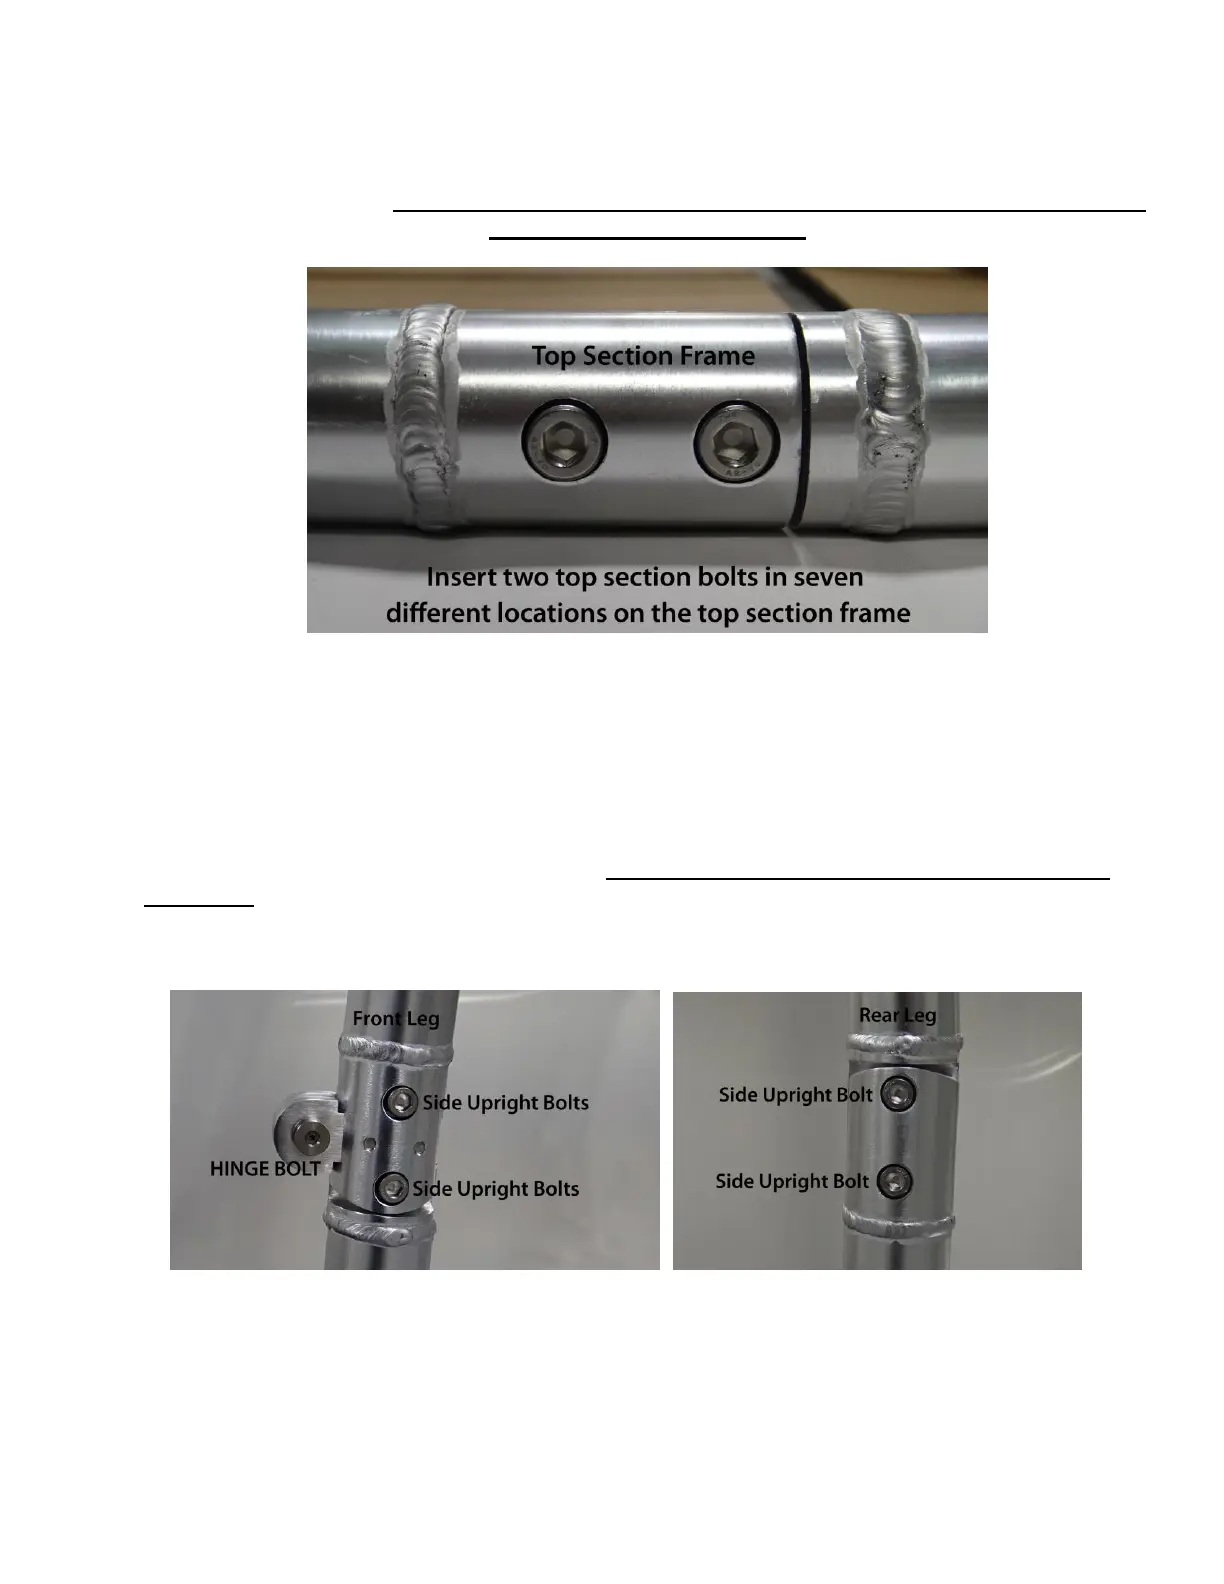
Side Leg Assemblies: Apply a small amount of grease to eight (8) of the Item 6 bolts (side
section bolts). Lay the top section side upright onto the lower section side upright, insert the
bolts and hand tighten. Once all four bolts and the hinge bolt are all installed into the side
upright then you will go back and tighten all the bolts. Apply a very thin film of grease on Item
10 (Nylon Washer) and insert the nylon washer into the hinge. Install the Item 4 (Hinge Bolts)
into the hinges and tighten the nut & bolts. Assemble the upper and lower legs together for
each side. . NOTE: There is a port and starboard (Left & Right) side upright. The
Fishmaster Logo will always be to the outside. The hinge is on the front of each side
upright. The hinge will always be on the front which allows the t-top to fold forward.