The Vector sequencer has 8 Parts, each of which has a main
note-based sequencer and two sub-sequencers for modulation. All of
the sequencers for all Parts start and stop with the Run button (or
external sync), and they all share a common tempo, but are otherwise
independent. They can have independent run rates, lengths, directions,
etc. Each Part also has its own set of Presets and Playlist settings.
Parts 5-8 can be configured as polyphonic Chord or Drum sequences.
For an overview of how all this fits together, look at the diagram on the
back cover of this manual.
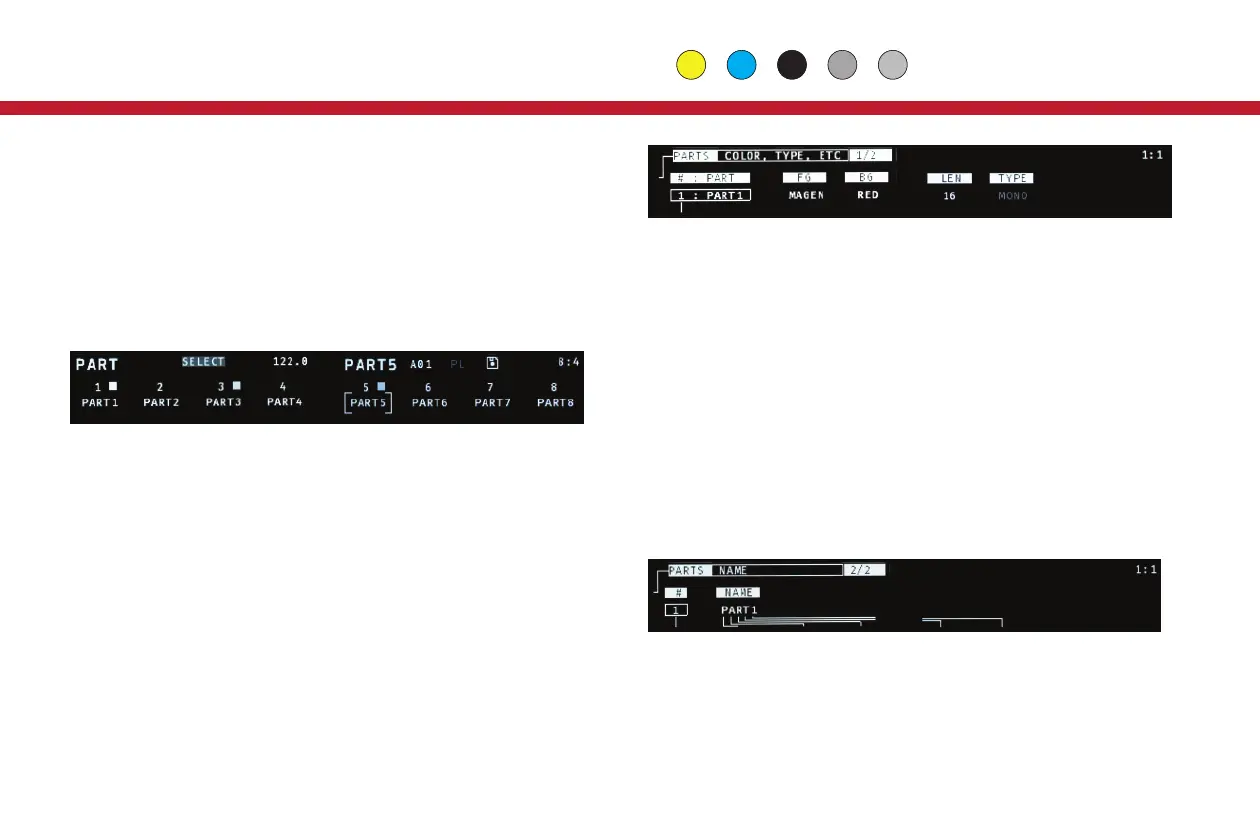
Use the Part button to view the names and activity for all 8 Parts on the
Vector at once. On this page, the white keys of the mini-keyboard can
be used to SELECT which Part you are currently editing. The PART page
can also run in MUTE or SOLO sub-modes. Use the gray buttons
between steps 4-7 to select which of the three modes to use.
TIP: From any sequence edit page, hold down the Part button and
press one of the white mini-keyboard keys to directly jump to the other
Part.
PART SETUP
To edit the name, colors, maximum length or type of a Part, look in
GLOBALS: Press Global and use Next/Prev to find the 2nd page,
titled PARTS. There are two sub-pages here, use the encoder 9 to
move between them.
On the first PARTS page, use encoder 1 to select the Part you want to
modify. Using encoders 3 & 4 you can set the LED colors for the
foreground (current step) and background (other steps).
The main sequence for each Part has a maximum length of 16, 32 or 64
steps, but longer sequences mean fewer Presets. To change the max
length, use encoder 5. Parts 5-8, can also be set to chord or drum types
(encoder 6). When you change the max length or type of a Part, you will
be prompted to use Shift+Clear to initiate the change, and then the
Next button to confirm. Warning: this process will erase ALL existing
Presets for that Part!
To rename a Part, use encoder 9 to move to the second PARTS sub-sec-
tion in GLOBAL. On this page, use encoder 1 to select the Part you want
to rename, and encoders 2-6 to edit the name.
PARTS & ROUTING
The routing options for CV and MIDI outputs are very flexible. For details
on setting up Part assignments for outputs, see Routing on page 8.
14
Global Part
Parts
 Loading...