ENG
CHANGING FROM ‘MANUAL FILL’TO ‘PLUMBED’
Step 1
Make sure that the water reservoir has been drained. See section headed DRAINING THE COLD
WATER RESERVOIR.
Step 2
Remove the FLAVIA badge from the right hand
side of the Brewer.
Step 3
Pull the red rubber switch towards
you and replace. This will reset the
overflow switch enabling a plumbed
water supply to be connected.
Step 4
Replace the FLAVIA badge.
Step 5
At the rear of the Brewer remove the protective cap from ‘mains
water inlet’ and connect to the water supply using the
recommended inlet hose.
Refer to the ‘Plumbed Systems’ instructions under INSTALLATION
OF YOUR FLAVIA® BREWER (page 17).
Step 6
Turn on the water supply, and ensure that all connections are
watertight.
Step 7
Turn on the mains electricity supply
MAKE SURE YOUR APPLIANCE IS SWITCHED OFF.
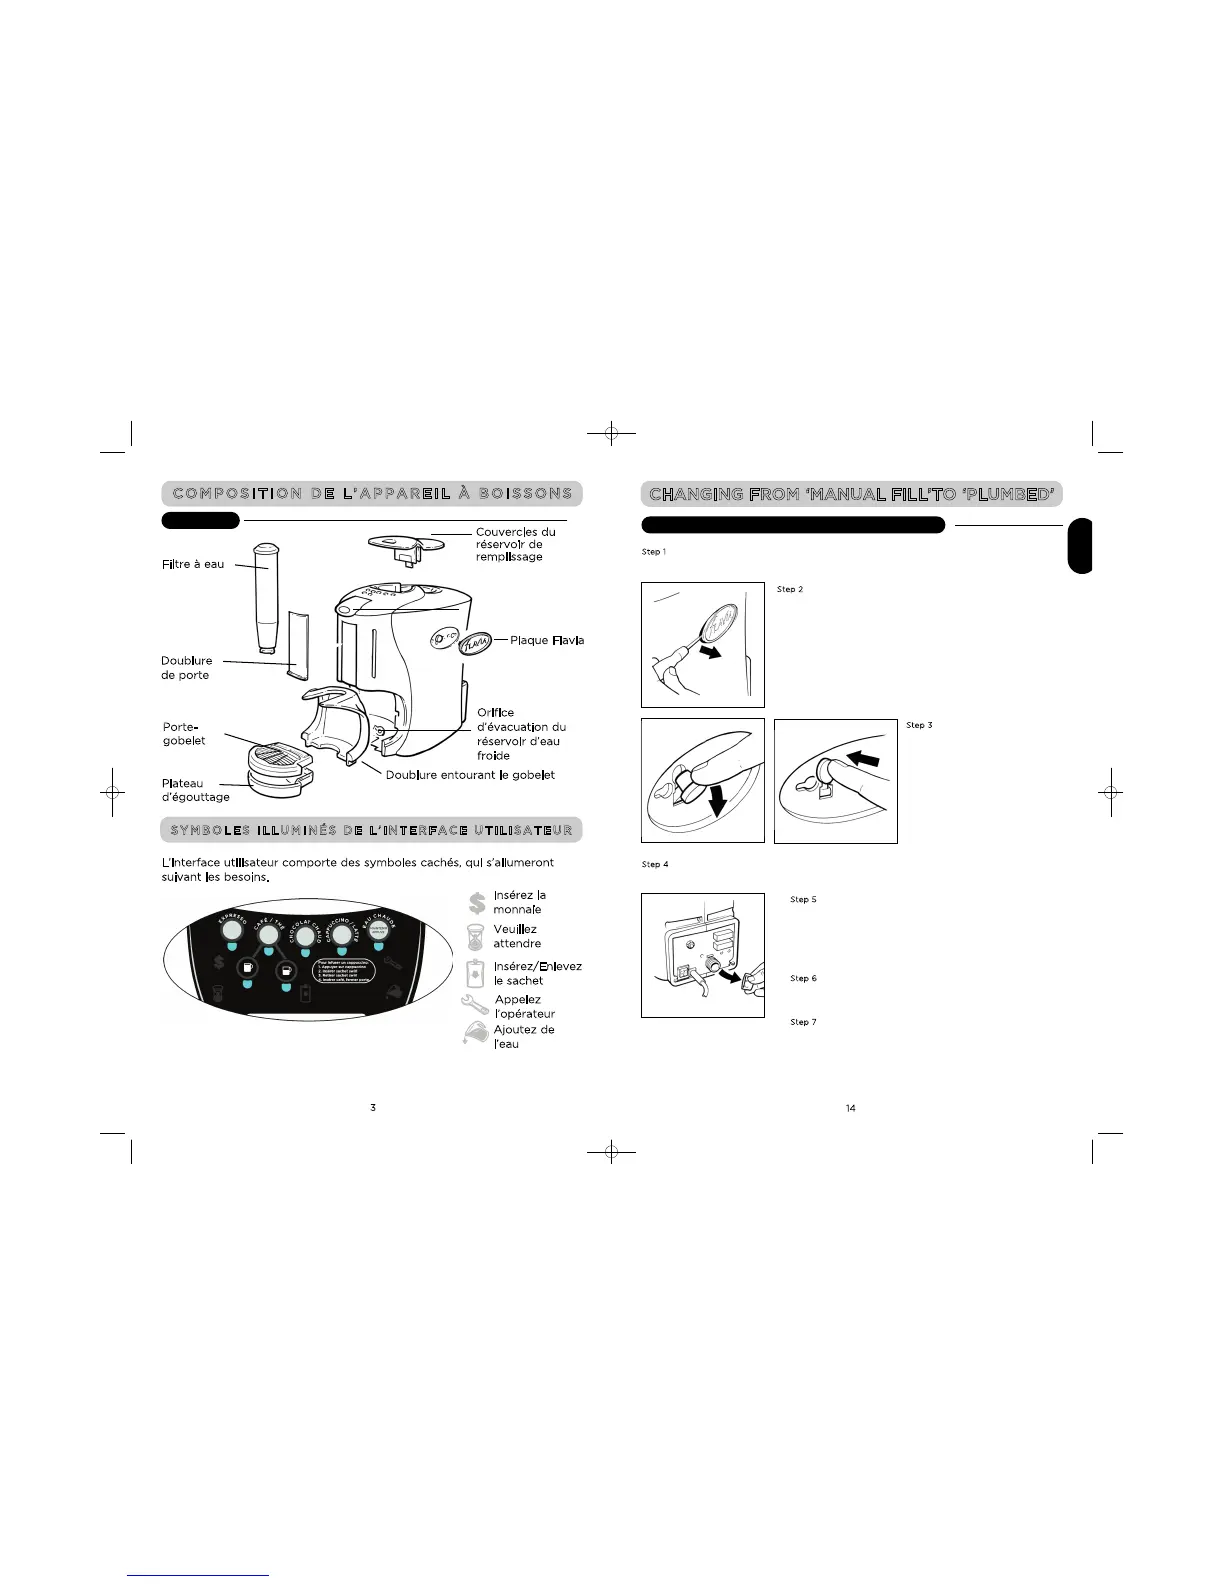
EXTÉRIEUR
Plaque Flavia
Orifice
d’évacuation du
réservoir d’eau
froide
Doublure entourant le gobelet
Insérez la
monnaie
Veuillez
attendre
Insérez/Enlevez
le sachet
Appelez
l’opérateur
Ajoutez de
l’eau
L’interface utilisateur comporte des symboles cachés, qui s’allumeront
suivant les besoins.
C
ouvercles du
réservoir de
remplissage
Doublure
d
e porte
Filtre à eau
Porte-
gobelet
Plateau
d’égouttage