L 26-6 230
22
Screw the clamping nut with flange face
up, onto the spindle.
Press and hold down the spindle lock.
Tighten the clamping nut with the face
spanner.
Carry out a test run to check that the tool
is clamped in the centre.
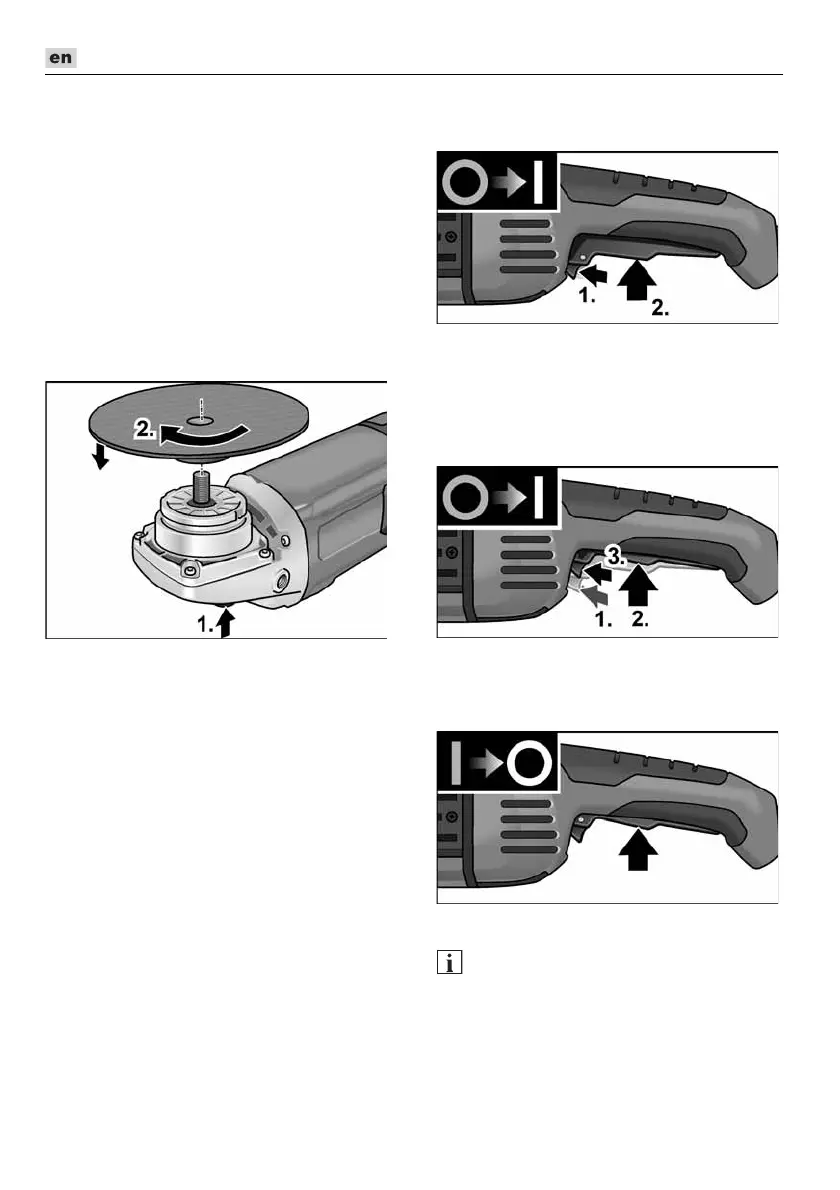
Attaching the Velcro pad
Remove the guard.
Press and hold down the spindle lock (1.).
Using the face spanner, loosen the
clamping nut on the spindle in an anti-
clockwise direction and remove.
Remove clamping flange.
Screw Velcro pad clockwise onto the
spindle and tighten hand-tight (2.).
Place the sanding tool in the centre of the
Velcro pad and press on.
Carry out a test run to check that the tool
is clamped in the centre.
Test run
Insert the mains plug into the socket.
Switch on the angle grinder with the
switch (without engaging it) and run the
angle grinder for approx. 30 seconds.
Check for imbalances and vibrations.
Switch off the angle grinder.
Switching on and off
Brief operation without engaged switch
Press and hold down the starting
lockout (1.).
Press the switch (2.).
To switch off, release the switch.
Continuous operation with engaged
switch
Press and hold down the starting
lockout (1.).
Press and hold down the switch (2.).
Press the locking button (3.).
To switch off, briefly press and release
the switch.
NOTE
Following a power failure, the switched on
power tool does not restart.

 Loading...