10/29/2020 REV. 003 16
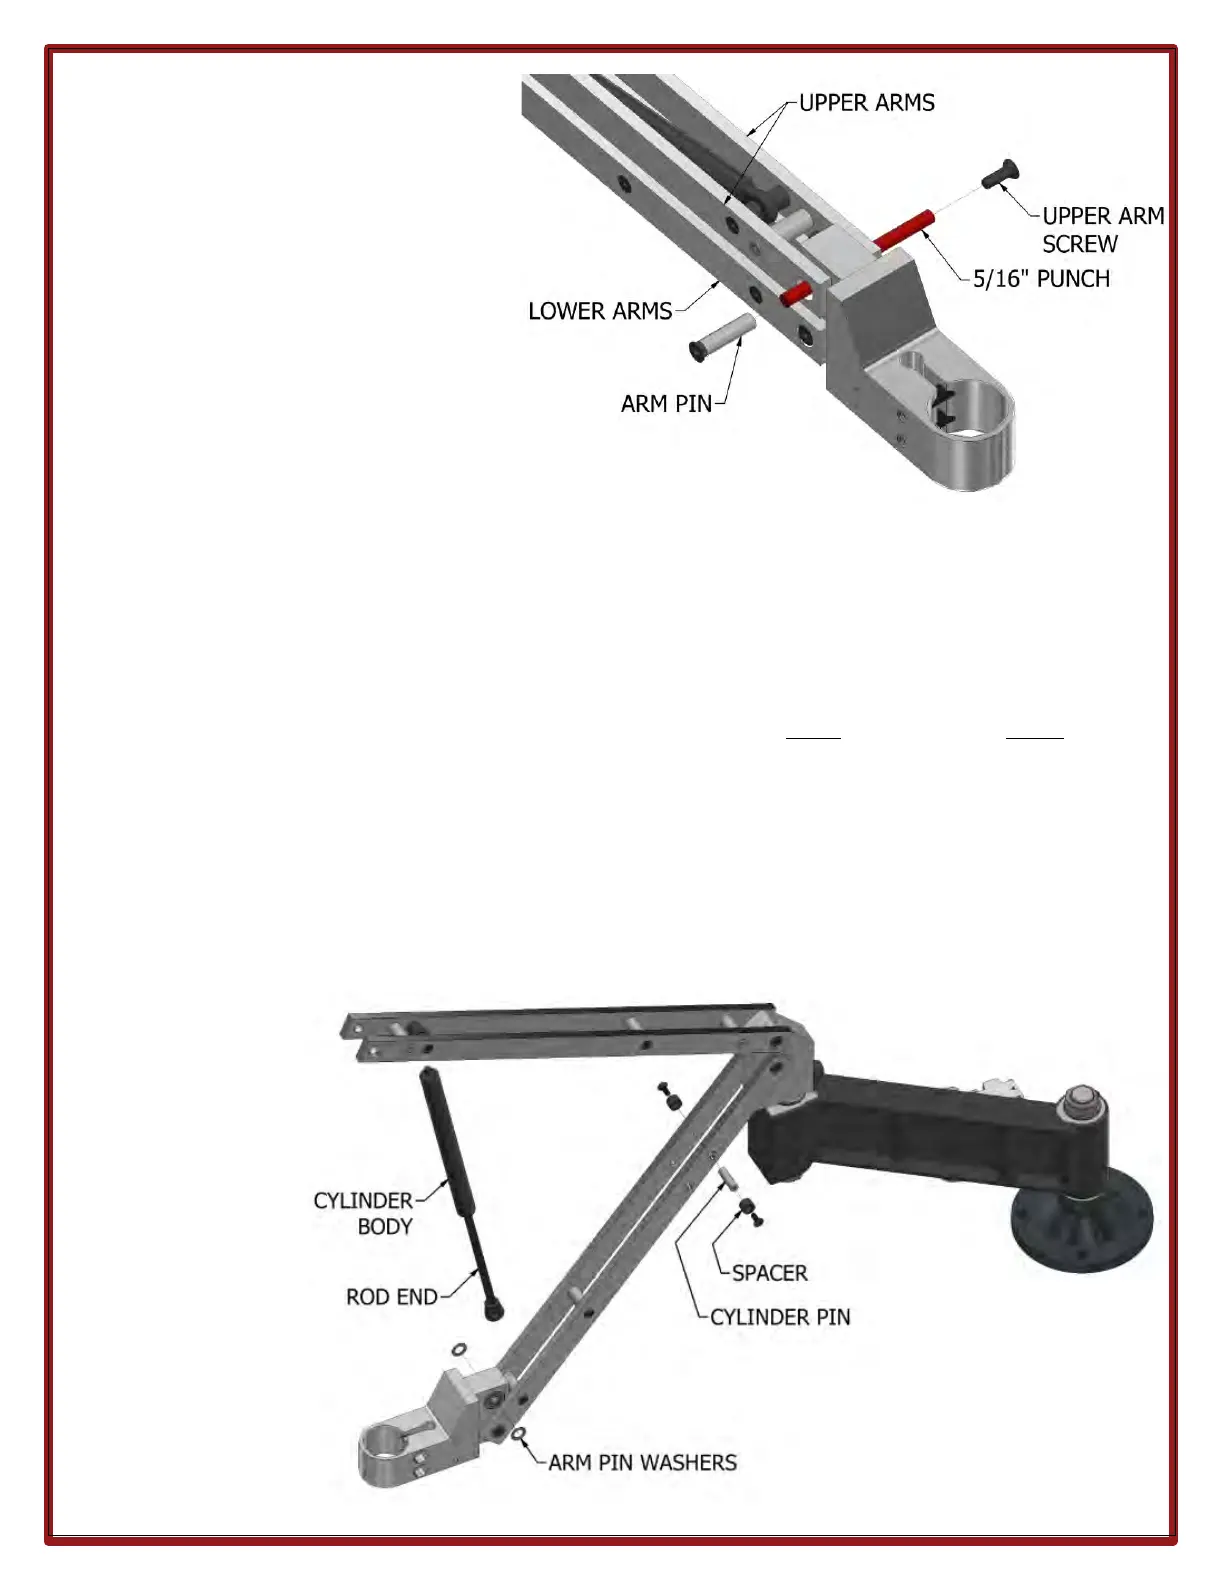
6. Remove the upper arm screw as shown
in Figure 10. Only remove 1 screw (does
not matter which side). Using an Allen
wrench or pin punch, push the arm pin
completely out, leaving the wrench or
punch in place.
CAUTION: Make sure not to damage the
arm pin threads. Also, the cylinder may
still have some pressure. The unit will
shift once the pin is out and the wrench
or punch will be held tightly in the
location where the arm pin used to be.
7. Squeeze the upper and lower arms
together with both hands. This will take any pressure off the wrench or punch and allow you to remove it.
CAUTION: Slowly let the arms spread apart. The upper arms will raise to their highest point. The bottom
arms should be guided gently downward to the work surface (see Figure 11).
NOTE: The arm pin washers will fall out during this operation. Make sure not to lose them. Reassembly
without these washers will result in the arm binding during operation. There must be one washer for each
end of the arm pin.
8. Remove the 10-32 flat head screws (2) holding the cylinder pin in the lower arm. Rotate the upper arms
upward so the cylinder can hang freely. Grab the body of the cylinder and rotate it (by hand)
counterclockwise to remove it from the clevis. See Figure 11.
9. On the new cylinder, remove the clevis on the body end and tighten it by hand to the existing clevis on the
arm. The cylinder only needs to be snug; do not overtighten.
10. Install the cylinder pin and nylon spacers onto the new cylinder. With the upper arms in the highest
position, reinstall the new cylinder to the bottom arms by aligning the cylinder pin with the holes in the
bottom arm. Fasten the 10-32 flat head screws to secure the cylinder to the bottom arms. See Figure 11.
NOTE: The new
cylinder should be
installed in the
same orientation
as the original
cylinder. The rod
end of the cylinder
should be
connected to the
bottom arms and
the body end of
the cylinder
should be
connected to the
top arms.