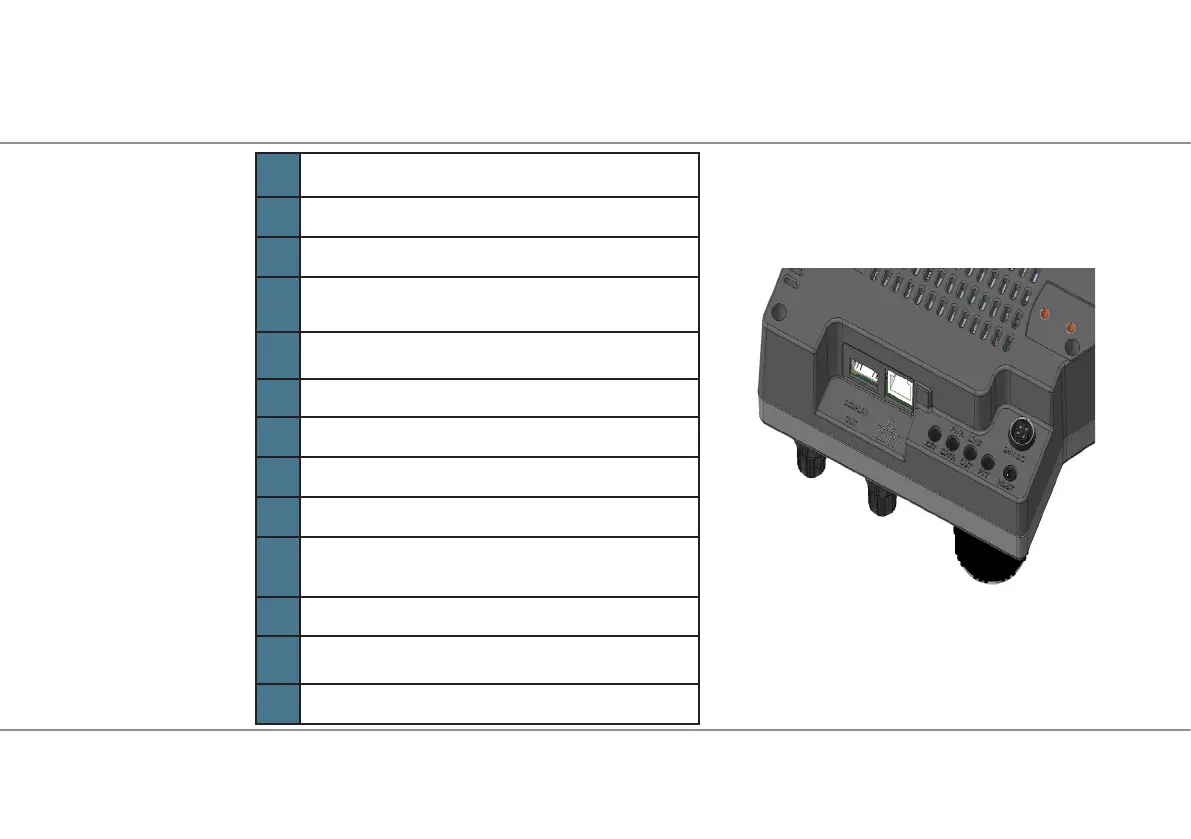
1 Ethernet port, RJ-45, 100/1000 twisted pair
2 External Display Port
3 Battery Compartment Release Tab
4 Battery Compartment
5 Morse (CW) Key socket, 1/8" TRS connector
6 Powered Speakers, 1/8" inch TRS connector
7 Line Out, 1/8" inch TRS connector
8 Push-To-Talk, 1/8" TS or TRS plug wired as TS
9 Microphone & Headphone socket, 1/8" TRRS connector
10 DC Power Input, 24VDC
11 Tilt feet mounting points (2 positions, 4 screws)
12 Fixed Foot Mounting Points (3 screws), or
12 Optional VESA mounting points (4 screws) - when xed foot is not used
Maestro Rear & Side Panel
 Loading...