Do you have a question about the FlexRadio Maestro and is the answer not in the manual?
Details Maestro's power supply needs, including wall adapter and battery options.
Explains wired Ethernet and Wi-Fi connection methods for Maestro.
Connects microphone or key to Maestro for transmitter operation.
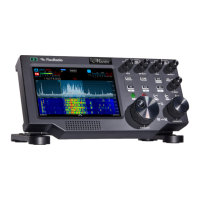
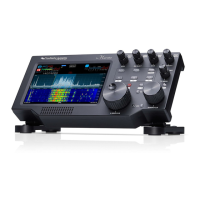
Details connections for various ports on the Maestro back panel.
Procedure for powering the Maestro on and off.
Configuring the Maestro to connect to a Wi-Fi network.
Download and install the desired SmartSDR software version and radio firmware.
Information on licensing requirements for SmartSDR Version 2.
Steps to configure SmartLink for remote radio access.
Creating an online user account for SmartLink credentials and radio authorization.
Registering the radio with your SmartLink account for remote access.
Testing the SmartLink connection to the radio for proper configuration.
Explains how Slice Receivers process SCU data for manageable signal output.
Visual spectrum display of RF frequencies, showing signal levels.
Time-based visual representation of RF data, showing signal intensity by color.
Managing Slice Receivers A and B within Panadapters.
Methods for adjusting receiver frequency using knobs or touch.
Selecting different receiver modes like USB, LSB, CW, etc.
Adjusting receiver filter bandwidth and position.
Managing the number of Panadapters displayed on the Maestro.
Adjusting the frequency range displayed on the Panadapter.
Adjusting the zoom level of the Panadapter display.
Adjusting AGC threshold for optimal performance in noisy or quiet environments.
Overview of Noise Blanker, Noise Reduction, and Notch Filter controls.
Combating fast rise time pulse-type noise with WNB.
Mitigating impulse noise on an individual Slice Receiver basis.
Creating and adjusting a Tracking Notch Filter on the Panadapter or Waterfall.
Automatically applies a Tracking Notch Filter to remove constant tones.
Adjusting microphone, processor, and other audio settings.
Assigning a specific transmit antenna to each Slice Receiver.
Adjusting receiver RF gain and preamplifier settings.
Selecting RF gain levels for different radio models and bands.
Adjusting transmitter parameters like power, timings, and ALC.
Managing microphone, CW keyer interfaces, and bias/preamp settings.
Accessing and using controls for receiver mode, band, frequency, and filters.
Maestro's capability to display one or two Panadapters simultaneously.
Activating and deactivating Slice Receivers using front panel buttons.
Using knobs and buttons to tune Slice Receivers and set step size.
Managing audio levels, AGC threshold, and solo channel operation.
Adjusting receive filters using High/Low or Center/Width modes.
Controls for microphone level, keyer speed, power, and TX Menu.
Metering and controls for optimal RF transmission.
Troubleshooting network issues preventing FLEX-6000 detection.
Restoring Maestro operation by power cycling the unit.
Resolving radio boot failures or incomplete SmartSDR loading.
Diagnosing spectrum display and audio stuttering problems.
Diagnosing and resolving SmartLink connection problems.
Diagnosing connection failures after radio appears in Select Radio screen.
| Brand | FlexRadio |
|---|---|
| Model | Maestro |
| Category | Control Unit |
| Language | English |