Document Title Document No. Revision
Date Section
Supplement S3 to the AMM CTLS-LSA –
CTLS-LSA with ROTAX 912iS
AF 0480 0011 00 05-Aug-12 28-00-10
Approval Ref.: Approved on the Basis of Manufacturer Self Declaration
14
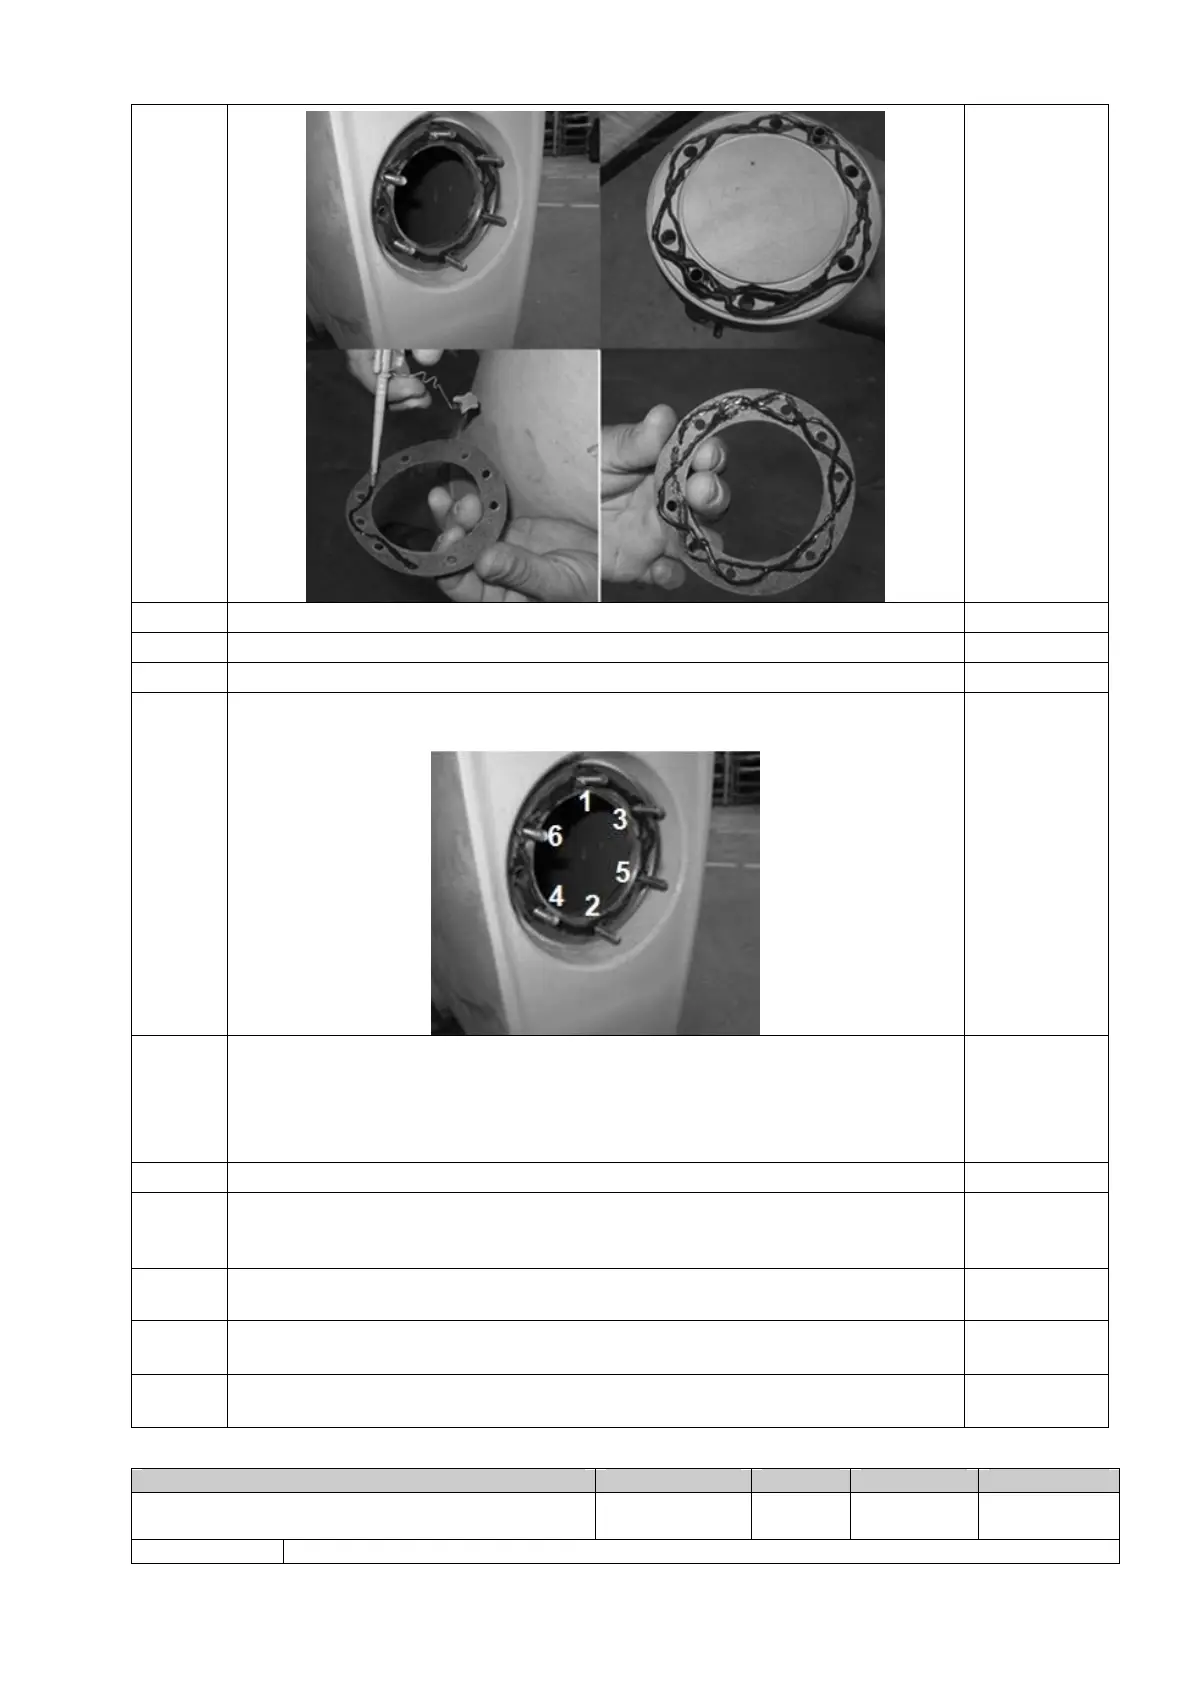
15 Install the rubber seal ring and press it to the root rib ring.
16 Install the cap plate and press it.
17 Install the washers and the self-locking nuts M6.
18
Do pre-tightening of the nuts, in a sequence shown on picture below, thus the
cap plate is not askew.
19
Tighten the nuts in the following sequence:
• Apply the tightening torque 2 Nm for each nut.
• Apply the tightening torque 6 Nm for each nut.
• Apply the tightening torque 9 Nm for each nut.
20 Carefully remove excessive Hylomar Universal Blue.
21
When the Hylomar Universal Blue is fully hardened, close the fuel outlet with the
suitable cap, for example – with the clamped fuel hose. Place the wing on the
support so that the root rib is lower than the wing tip.
22
Fill the fuel tank with 30…35L (8…9 U.S. gallons) of the fuel. Check that the fuel
sight gage is filled with fuel.
23
In 12 hours do visual inspection of the repaired area of the root rib for the fuel
leaks.
24
Drain all fuel from the wing through the fuel outlet. Check that the fuel sight gage
empties with fuel level going down.
 Loading...