RADIO USE
Normal radio use is unaffected by proper installation of the intercom, and passengers will now be able to hear each other, the aircraft radio,
and sidetone, (if radio generated). To transmit on the radio, push the yoke PTT switch associated with your headset, (pilot or copilot). There is
no need for the passengers to stop talking while the pilot is transmitting. Only the person whose push-to-talk switch is depressed will be heard
over the radio. An instructor can talk to a student pilot over the intercom, while the student is transmitting over the radio without the instructor’s
voice also being broadcast. Music will never be transmitted. If your push-to-talk switch fails, you can use an existing handheld mic to talk on the
radio while listening over the intercom.
2
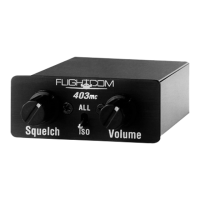
ALL
ISO
Squelch Volume
Intercom Front Panel
Pilot Isolate
Toggle Switch
Fig. 3 Pilot Isolate Switch Location
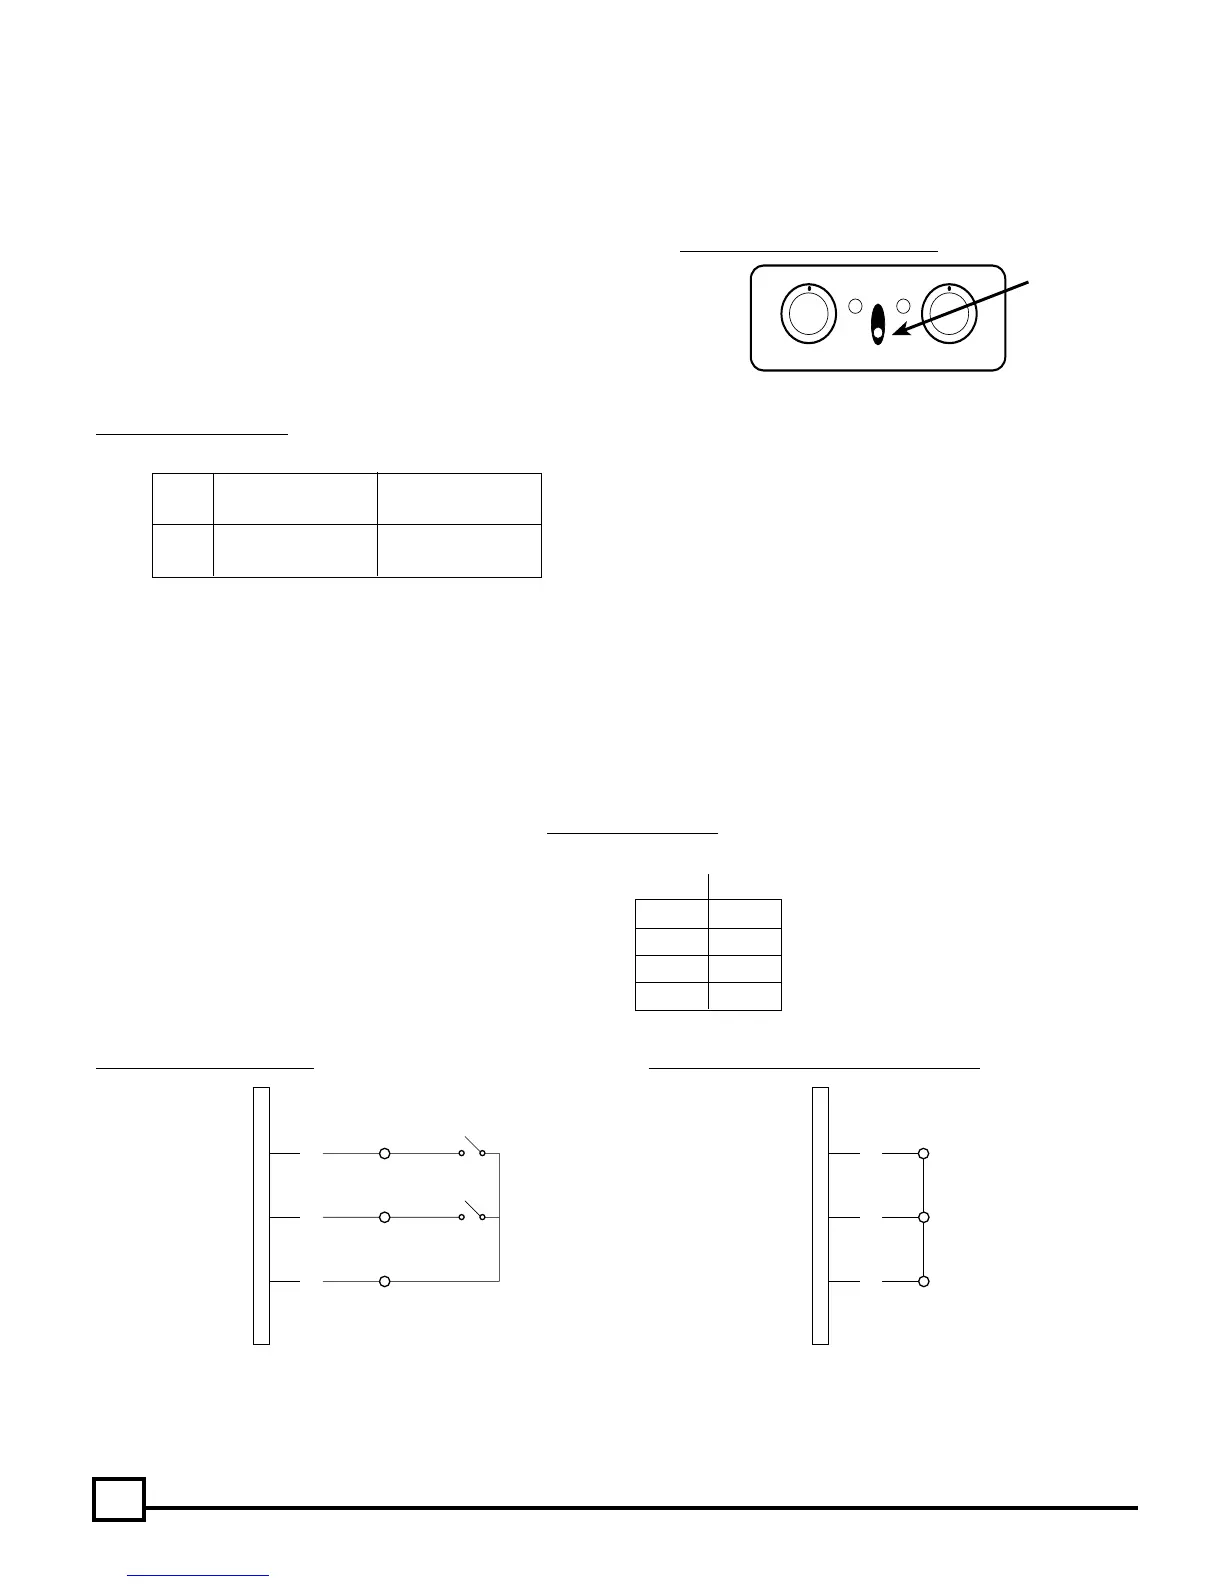
Fig. 5 Intercom Muting
Pin 25 (common) connected to: (indicated with “x”)
Pin 23 Pin 24
No Muting
x Radio Mutes Intercom only
x Radio Mutes Music Only
x x Radio Mutes Intercom Audio and Music
(CONNECTOR PRE-WIRED FOR COMPLETE RADIO PRIORITY)
Complete Radio Priority: Connecting pins #23, #24 and #25 on the DB25 connector will give the radio complete priority and the radio will
override all other audio in the model 403mc. Note:
The DB25 connector shipped with the model 403mc intercom is pre-wired for complete
radio priority. (See Figure 6b)
Pilot Hears: All Others Hear:
ALL Intercom Intercom
Radio, Music Radio, Music
ISO Radio Only No pilot, but
Intercom, Music
Intercom Failsafe Feature: The integral failsafe relays in the intercom will connect the pilot’s headset directly to the aircraft radio in the event
of a power supply interruption to the intercom.
Music Muting: When music or other input is being played via the auxiliary input, an instant muting feature will prevent interference with critical
voice communications.
(See Figure 6a below)
Note:
This feature must be wired into the wiring harness when the intercom is installed into the aircraft. (See Figure 12 CONNECTION
SCHEMATIC). (Connect pin #24 on the DB25 connector to pin #25 to permanently install this feature. A switch installed between these pins
would give the option of using or not using this muting feature.) (See Figure 6a below)
Intercom Muting: This instant muting feature will allow
the incoming radio communications to have priority over
the intercom feature and will mute the intercom audio.
Note:
This feature must be wired into the wiring harness
when the intercom is installed into the aircraft. (See Figure
12 CONNECTION SCHEMATIC) Connect pin #23 on the
DB25 connector to pin #25 to permanently install this fea-
ture. A switch installed between these pins would give the
option of using or not using this muting feature.
Fig. 4 Pilot Isolate Switch
Fig. 6a Selectable Auto Mute Fig. 6b Factory Shipped Muting Configuration
23
24
25
ENABLE
ENABLE
DISABLE
DISABLE
INTERCOM MUTE
MUSIC MUTE
23
24
25
DB25
CONNECTOR
DB25
CONNECTOR
Pilot Isolate Switch: For normal intercom and transmit operations place the
PILOT ISOLATE switch in the ALL position. Selecting the ISO setting will
isolate the pilot from the intercom conversation (and music) and connect the
pilot directly to the aircraft radio. Placing the PILOT ISOLATE switch in the
ISOLATE position will prevent the passengers from hearing the aircraft radio
receptions as well as the pilot’s transmissions to ATC. Passengers can con-
tinue to use the intercom, including a music source.
 Loading...