EN-USEN-US English
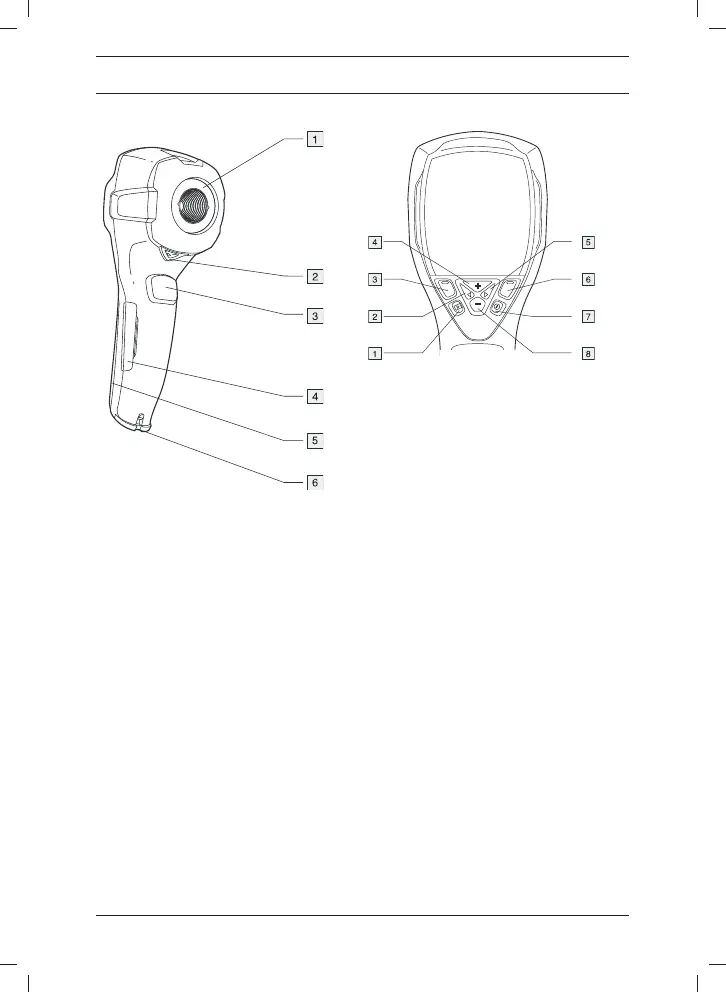
Camera parts Keypad buttons
1. Archive button
2. Left arrow button (on the navigation
pad)
3. Left selection button. This button is
context-sensitive, and the current
function is displayed above the but-
ton on the screen.
4. + button (on the navigation pad)
1. Infrared lens
5. Right arrow button (on navigation
2. Lever to open and close the lens cap
pad)
3. Trigger to save images
6. Right selection button. This button is
4. Cover for the connectors and the
context-sensitive, and the current
miniSD™ memory card slot
function is displayed above the but-
5. Cover for the battery compartment
ton on the screen.
6. Attachment point for the hand strap
7. On/off button
8. – button (on the navigation pad)
Note: See the User Documentation CD-
ROM for a complete description of button
functionality.
© 2011, FLIR Systems, Inc. All rights reserved worldwide.
19
Publ. no. T559526, rev. 001

 Loading...