EN-US English
8. In Windows
®
Explorer, move the im-
age from the card or camera using a
drag-and-drop operation.
To keep in mind
• Blank objects may appear warm or
cold to the camera due to reflections of
other objects.
• Avoid direct sunlight on the details that
you are inspecting.
• Different types of faults, such as those
in a building’s construction, may result
in the same type of infrared images.
• Correctly analyzing an infrared image
5. Aim the camera toward your target of
requires professional knowledge about
interest.
the application.
6. Pull the save trigger to save the
image.
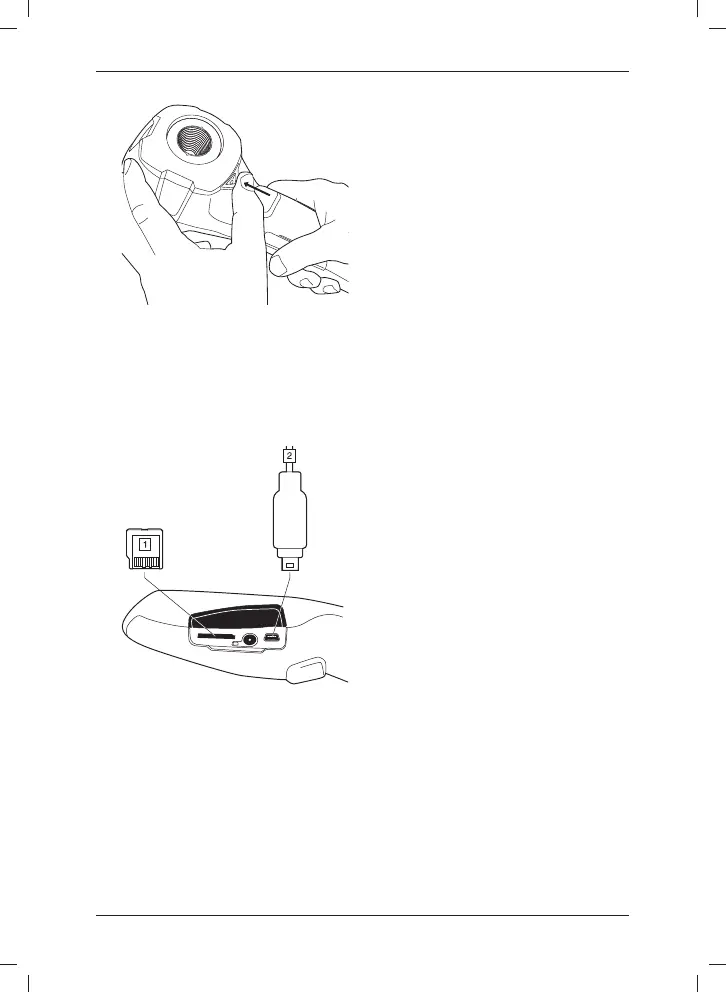
7. To move the image to a computer, do
one of the following:
• (Fig. 1 above) Remove the
miniSD™ Memory Card and insert
it into a card reader connected to
a computer. A miniSD™ card
adapter is included with your cam-
era.
• (Fig. 2 above) Connect a com-
puter to the camera using a USB
Mini-B cable.
© 2011, FLIR Systems, Inc. All rights reserved worldwide.
21
Publ. no. T559526, rev. 001

 Loading...