en-US
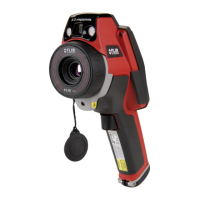
햷 Button to activate the laser pointer.
Note: The laser pointer may not be en-
abled in all camera models.
햸 Power indicator.
햹 Right selection button. This button is
context-sensitive.
햺 On/off button.
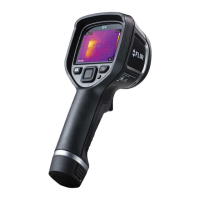
Screen elements
Note: Some of these screen elements are
mutually exclusive.
햲 Menu system.
햳 Results table, including information
about the emissivity value.
햴 Power indicator. When the camera is
powered using a battery, a battery indi-
cator is displayed.
햵 USB™ indicator. This indicator is dis-
played when the camera is connected
to a computer using a USB™ cable.
햶 Laser pointer indicator. This indicator is
displayed when the laser pointer is ac-
tivated.
햷 Date and time.
햸 Measurement spot.
햹 Measurement area.
햺 Limit value for an isotherm in the tem-
perature scale.
햻 Limit value for the temperature scale.
햽 Span indicator.
햾 Indicator for automatic or manual
mode (A/M).
햿 Current function for the right selection
button.
헀 Tool to change the maximum tempera-
ture.
헁 Temperature scale.
헂 Tool to change the maximum and min-
imum temperature at the same time.
헃 Tool to change the minimum tempera-
ture.
헄 Tool to set an isotherm.
헅 Tool to resize the Picture-in-Picture
area.
헆 Current function for the left selection
button.
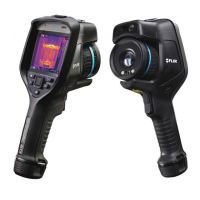
Quick Start Guide
Follow this procedure to start immediately:
햲 Charge the battery for four hours be-
fore you start the camera for the first
time.
• You can charge the battery in the
stand-alone battery charger, or by
connecting the power supply cable
directly to the battery.
• When the green light of the battery
condition indicator is continuous,
the battery is fully charged.
햳 Insert the battery into the battery com-
partment.
햴 Insert a memory card into the memory
card slot.
햵 Push the on/off button to turn on the
camera.
햶 Remove the lens cap.
햷 Aim the camera toward your target of
interest.
햸 Focus the camera by rotating the focus
ring.
햹 Pull the trigger to save the image.
햺 To move the image to a computer, do
one of the following:
• Remove the memory card and insert
it into a card reader connected to a
computer. An adapter is included
with your camera.
• Connect a computer to the camera
using a USB™ Mini-B cable.
햻 In Windows® Explorer, move the image
from the card or camera, using a drag-
and-drop operation.
To keep in mind
• Reflective objects may appear warmer
or colder to the camera than they actu-
T559048-A.book Page 31 Tuesday, July 22, 2008 1:58 PM
 Loading...