Operating Instructions
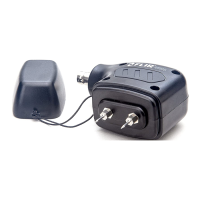
• Carefully remove the probe and pins from the packaging (extra
pins are provided).
• Screw the pins into the probe and use the supplied wrench to se-
curely tighten.
• Connect the probe to the moisture meter using the supplied
BNC/RJ45 cable (BNC connection on probe and RJ45 connec-
tion on FLIR moisture meters).
• Position the pins on the material under test.
• Drive the pins into the material under test using the sliding ham-
mer action force to assist (MR07 & MR08). For the MR06 use a
hammer or other tool to drive the probe pins.
• Operate the FLIR moisture meter as described in the user man-
ual supplied with the meter.
Specifications
Cable Length 2.45 m (8 ft.) cable length
Pin lengths 50, 101, or 152 mm (2, 4, or 6 in.)
Replacement pin part
numbers
MR-PINS2, 4, or 6 (2, 4, or 6 in.)
MR-PINS2-10 (2 in. 10-pack)
Customer Support
Customer support and documentation downloads are available at
the link below.
https://support.flir.com
Limited 3–Year Warranty
This product is protected by FLIR’s Limited 3-Year Warranty. Visit
www.flir.com/testwarranty to read the warranty document.
#NAS100211; r. AB/96871/96890; en-GB
2