24
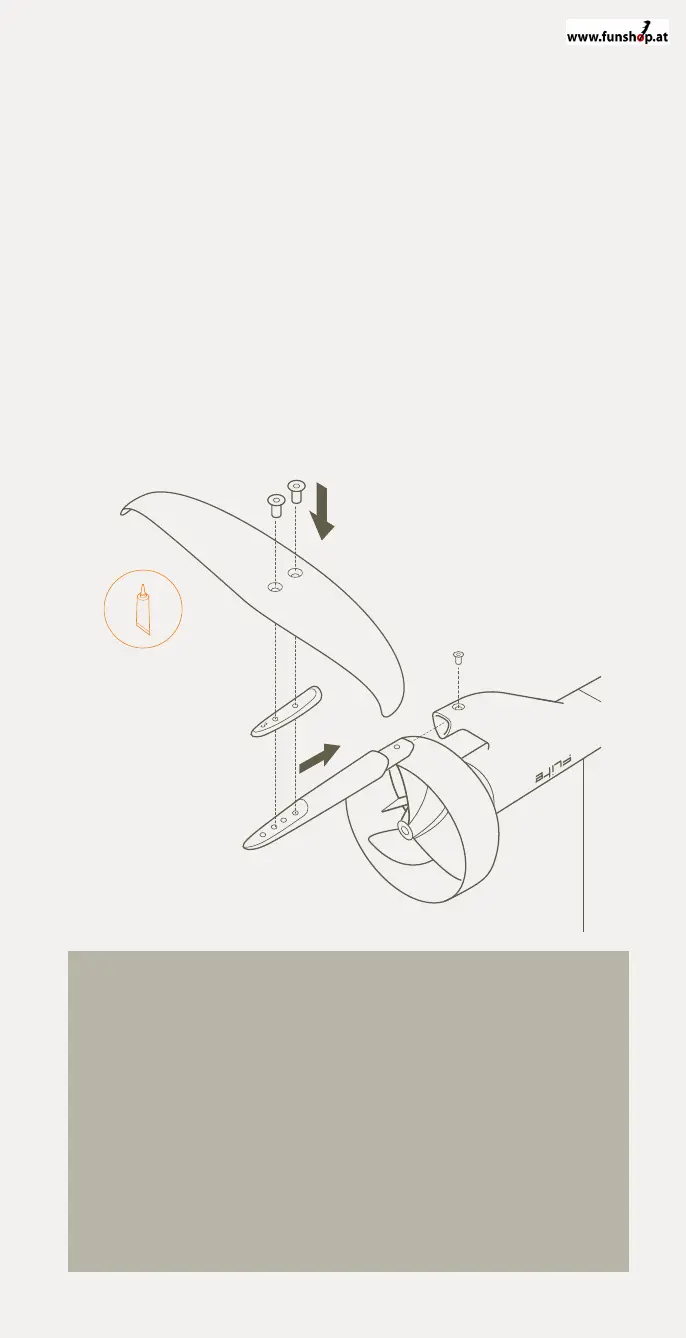
Connect the Stabiliser Wing
1 Take the Stabiliser Wing from the travel bag and remove the wing
cover.
2 Take the correct Stabiliser Wing shim from the accessories pouch
and fit between the Stabiliser Wing and the fuselage tail.
3 Connect the orange power cable to the orange power connector in
Flitecell. You will feel a secure click when properly engaged.
4 To ensure correct mounting, direction and placement, the wing when
installed correctly should have the wings tips facing away from you
(the countersunk thread is an indication of this). The correct direction,
is that of the rounded, curved leading edge facing the front wing.
ALWAYS ADD TEF-GEL TO THE STAINLESS STEEL FASTENERS THAT ARE
BEING INSERTED INTO THE ALUMINIUM. IF LEAVING WINGS ATTACHED
FOR EXTENDED PERIODS, ENSURE THAT YOU LOOSEN FASTENERS AND
RE-APPLY TEF-GEL EVERY FEW WEEKS. FAILURE TO DO SO MAY RESULT IN
CORROSION AND DAMAGE TO YOUR EFOIL FASTENER INSERTS.
PRO TIP We have supplied 0, 1, 2, 3, 4 and 5 degree shims for you to
experiment with to customise your ride. Which shim suits best depends
on many aspects such as: preferred riding style, preferred riding speed,
riding conditions, skill level and personal preference. We recommend
heavier riders use a higher number shim. Beginners can start off with a
number 1 and adjust accordingly. Higher shim numbers such as 3 and
up, provide early lift at slower speed. However this then requires more
front pressure and/or to move feet forward to counter balance. 3 is
recommended for “slow” speed turning, less suitable for higher speed,
great for longer distance rides. Too high a number will cause the foil to
breach the surface. A low shim number such as 0, provides less lift, more
agility, easier to achieve higher speeds, and better for tight turns and
faster riding, but less stable. However this is for advanced riders, and
requires more back foot pressure. It is more difficult to initiate foiling
when selecting too low a number.
TEF-GEL