8. Insert the cables through the PS227 port, and then connect the cables:
Brown, 1142P to TB1-9
Blue, 1160N to TB1-10
Black 2270 to TB1-11
9. Fill the silo with abrasive, and then turn on the ADS.
1
0. Use the small flat-tip screwdriver to adjust the switch:
a. Turn the adjustment screw counterclockwise until it stops.
b. Turn the adjustment screw clockwise until the light on the switch comes
on.
c. Turn the adjustment screw counterclockwise until the light goes off.
d. Slowly turn the adjustment screw clockwise until the light comes on.
11. Connect the air supply to the ADS.
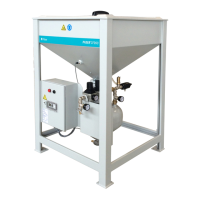
Replace the vessel low abrasive switch
PARTS
8620
0023, Proximity switch
TOOLS
6
in. adjustable wrench
Small flat-tip screwdriver
TASK
1. Remove all abrasive from the vessel.
2. Do the Lockout/Tagout
procedure.
WARNING! Failure to do the lockout tagout procedure can result in
equipment damage or injury to personnel.
3. Open the control panel, and then disconnect the cables from TB1-6, TB1-7, and
TB1-8.
© 2016–2017 Flow International Corporation