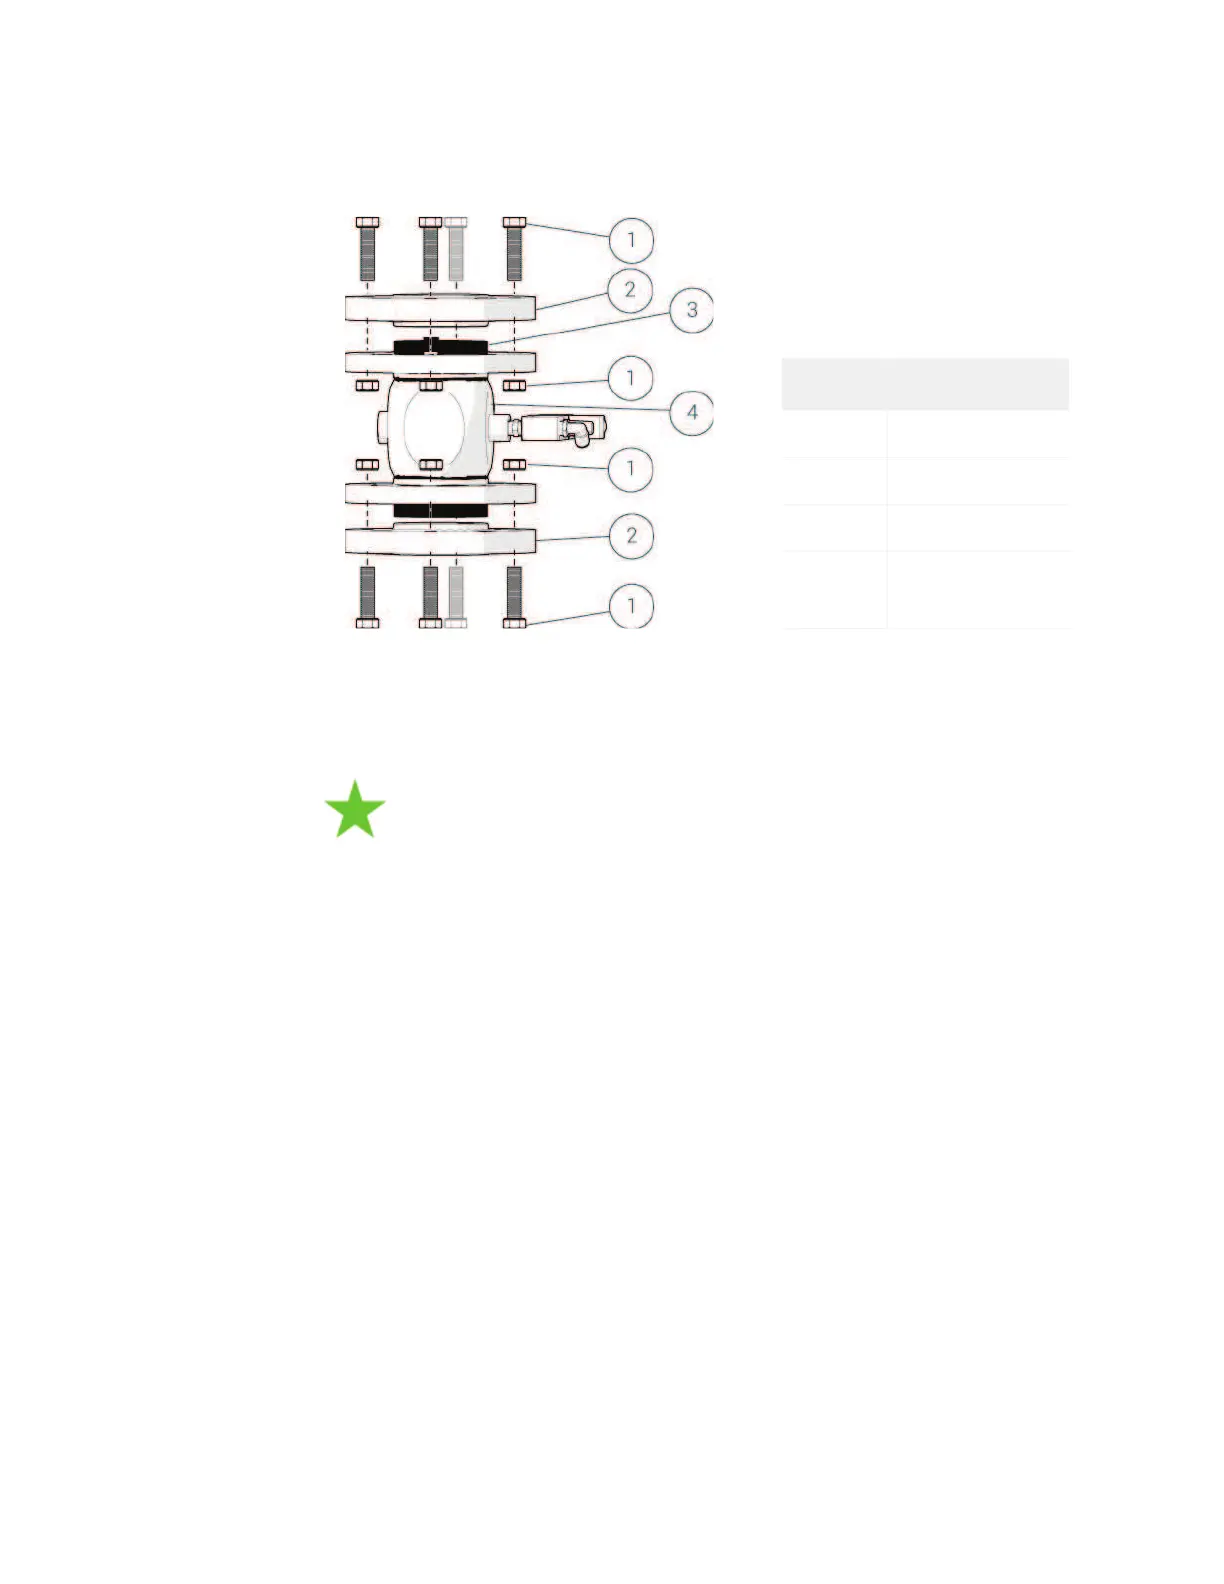
20. Push the pinch valve seal into the pinch valve housing. Adjust the pinch valve seal
so that both ends extend equally from the pinch valve housing.
Item Description
1 M12 screw & nut
2 Flange
3 Pinch valve seal
4 Pinch valve
housing
21. For each flange, apply a small amount of tension to the flanges with two opposing
M12 screws and nuts. Guide the tapered surfaces of the flanges to the interior of
the pinch valve seal. Do not allow the pinch valve seal to twist during tensioning.
If the screws cannot engage the flange threads, use longer grade 8.8
M12 screws to seat the flanges.
22. Loosely install the remaining M12 screws and nuts. Evenly tighten them in a
circular pattern until they are tight. The gap between the tapered flanges and the
pinch valve housing flanges must be even.
23. Loosely attach the pinch valve to the silo with three of the four M16 screws and
nuts. Position the pinch valve so that the solenoid points away from the manifold
and towards the corner of the silo where the pressure valve muffler is.
24. Install the gasket between the silo and the top of the pinch valve through the gap
caused by the missing screw.
25. Loosely install the last M16 screw and nut.
26. Position the gasket around the center of the inner raised surface of the pinch
valve, and then evenly tighten the four M16 screws and nuts. The gap between the
silo flange and the upper pinch valve flange must be even after all of the screws
are tight.
© 2016–2017 Flow International Corporation