20
Schmidt Armaturen
AI - FlowTop
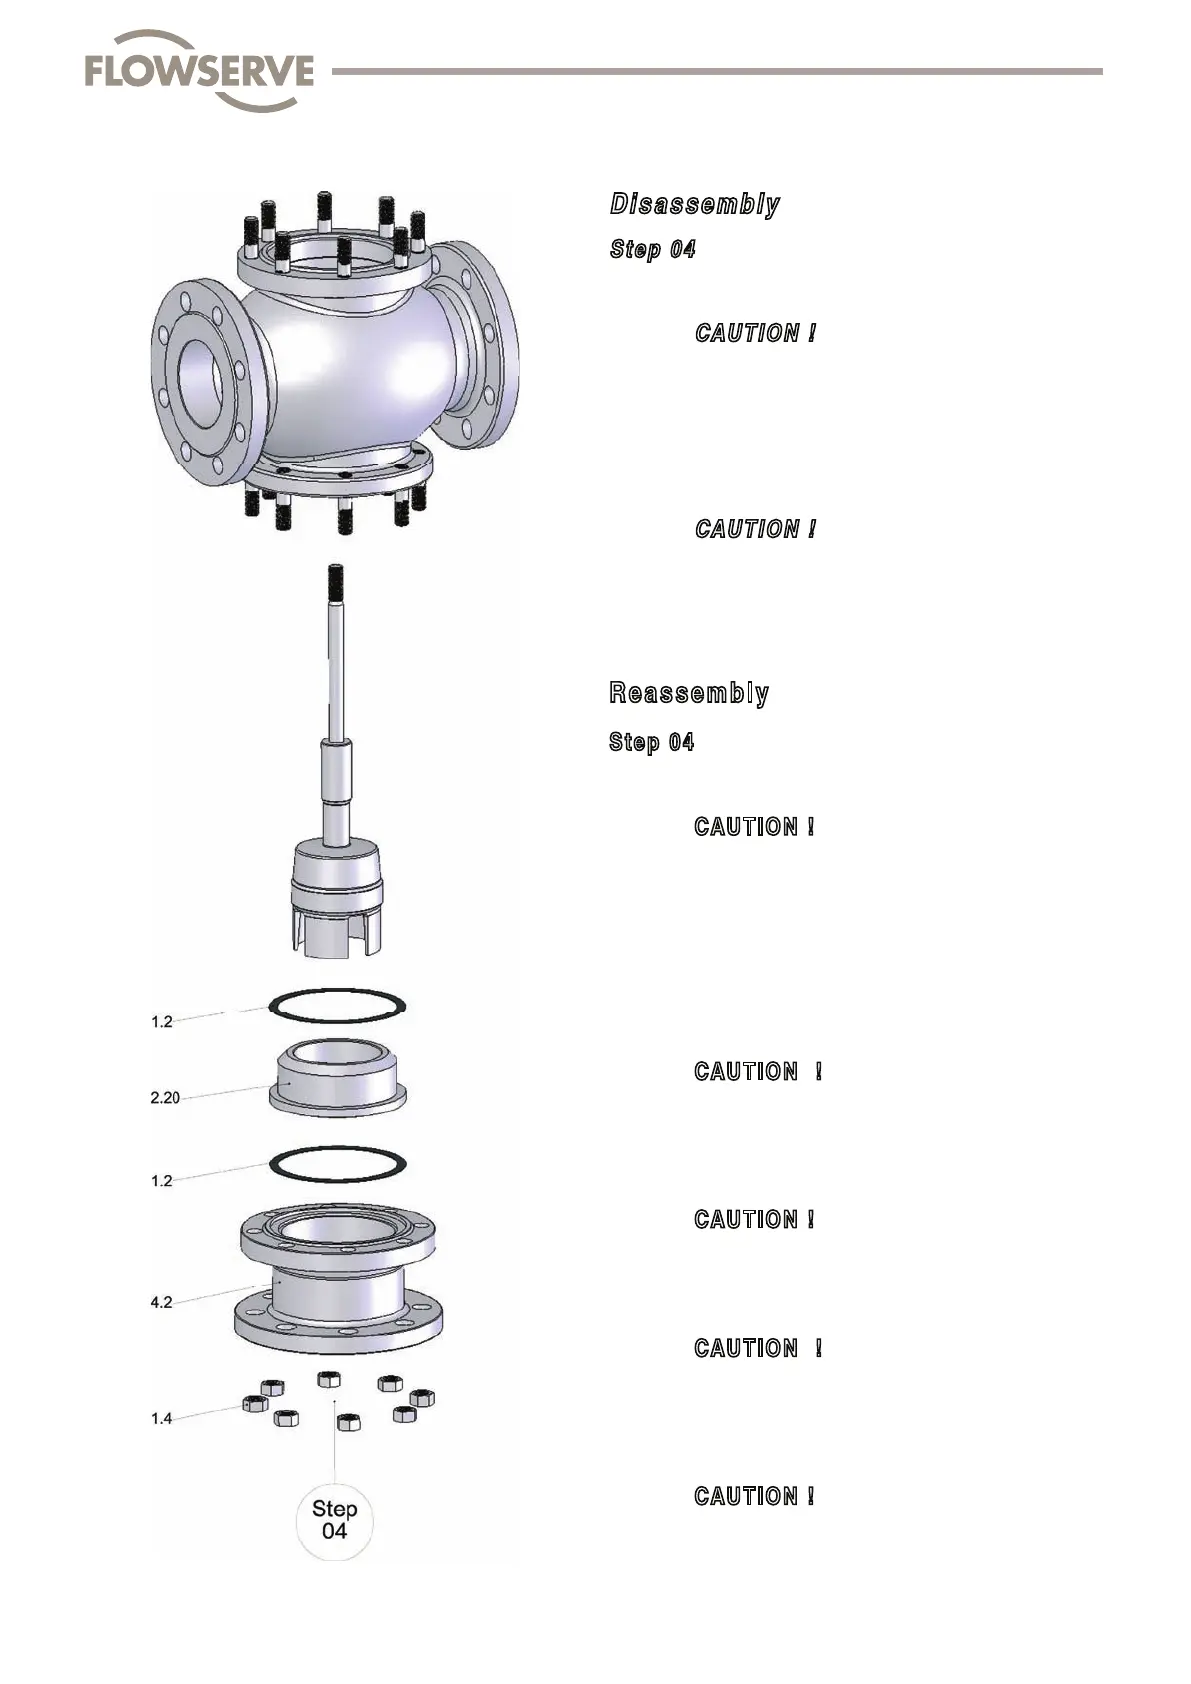
Disassembly
Step 04
• Unscrew hexagon nuts (1.4), lift body off
CAU TION !
Ensure it hangs vertically !
• Remove fl at gasket (1.2)
• Remove plug unit
• Lift seat ring (2.20) off the connection piece (4.2)
• Remove fl at gasket (1.2)
CAU TION !
Remove remains of fl at gasket (1.2)
in the body, seat ring and connection piece.
Do not damage sealing surface !
Reassembly
Step 04
Reassembly takes place in reverse order.
CAUTI ON !
Clean parts and check sealing surfaces for damage.
Usenewatgasket(1.2)!
• Lay at gasket (1.2) on the connection piece (4.2)
• Insert seat ring (2.20)
• Lay at gasket (1.2) on the seat ring (2.20)
• Grease plug shaft and plug guides lightly
CAUTI ON !
Lubrication as per Table 06 (Page 65)
• Insert plug unit in the seat ring (2.20)
• Lift body on the connection piece (4.2)
CAUTI ON !
Ensure it hangs vertically !
• grease stud screws
CAUTI ON !
Lubrication as per Table 06 (Page 65)
• Screw hexagon nuts in place (1.4) and tighten in a
diagonally opposite sequence using the torque wrench
CAUTION !
Nut tightening moment (1.4)
as per Table 01 (Page 64)