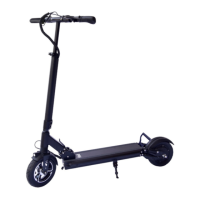
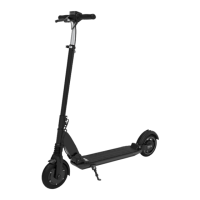
The Fluid Horizon V2 Electric Scooter is a personal electric vehicle designed for urban commuting and recreational riding. It is equipped with a display throttle combination that controls its operation, offering various features to enhance the user experience.
Function Description
The scooter is powered by an electric motor and battery system, providing an eco-friendly and efficient mode of transportation. It features a folding mechanism for portability and storage, allowing users to easily collapse the scooter when not in use or for transport. The display panel provides essential information to the rider, including speed, battery level, and mileage. It also allows for adjustments to riding modes and other advanced settings. The scooter is designed for single riders and has a weight limit that should not be exceeded.
Usage Features
- Power On/Off: To turn the scooter on or off, the user needs to press and hold the POWER button.
- Lighting: The scooter is equipped with a headlight and rear light for visibility. These can be turned on or off by pressing and holding the INFO button for 1 second.
- Gear Change: The scooter offers three different speed gears (1=slow, 2=medium, 3=fast), which can be toggled by a short press of the INFO button. This allows riders to adapt their speed to different environments and preferences.
- Display Information: The display shows various metrics. A short press on the POWER button cycles through odometer (total mileage), trip mileage, and battery voltage. The trip mileage can be reset to zero by pressing the INFO button for 3 seconds when 'TRIP' is displayed.
- Riding: Before riding, it is crucial to ensure sufficient clear space. The user should place both hands on the handlebar, step one foot onto the scooter, and give a light kick with the other foot to initiate motion. Once the scooter is slightly in motion, the second foot can be placed on the board, and the throttle can be pressed to accelerate.
- Braking: The Horizon V2 features a rear drum brake, engaged by using the front brake lever. Users are advised to exercise caution when braking due to the drum brake's sensitivity. It is explicitly warned not to step on the rear mudguard to brake, as this is for emergency use only.
- Advanced Display Settings (P-Settings): For more advanced customization, the scooter offers P-settings. These settings are accessed by simultaneously pressing the POWER and INFO buttons. Users can cycle through the settings using the POWER button and make changes with the INFO button. To exit P-settings, one can wait 10 seconds or press POWER and INFO together.
- P01 (Display brightness): Adjusts screen brightness from 1 (low) to 3 (bright).
- P02 (Display Kilometers or Miles): Toggles between displaying distance in kilometers (0) or miles (1).
- P03 (System Voltage level): This setting should generally not be changed.
- P04 (Sleep timer): Sets the time in minutes before the scooter enters sleep mode.
- P05: This setting should not be changed.
- P06 (Wheel diameter): Affects the accuracy of the odometer.
- P07 (Number of magnets on motor): This setting should not be changed.
- P08 (Speed limit): Allows setting a speed limit as a percentage (0-100%) of the scooter's top speed. For example, 80% of a 25mph top speed would set the limit to 20mph.
- P09 (Zero start or Non-zero start): An important safety feature. Non-zero start (1) requires the user to kick the scooter to initiate movement before the accelerator becomes active, preventing accidental acceleration. Zero start (0) allows immediate acceleration from a standstill.
- P10: This setting should not be changed.
- P11 (Electric Braking Strength): Adjusts the strength of electric braking from low (1) to high (24). The effect of electric braking is more noticeable at higher speeds.
- P12 (Initial Acceleration): Controls the acceleration response from soft (1) to strong (5).
- P13: This setting should not be changed.
- P14 (Current amperage limit): This setting should not be changed.
- P15 (Controller cutoff voltage): This setting should not be changed.
- P16 (Set odometer to 0): Resets the total mileage.
- P17 (Cruise control): Turns cruise control on (1) or off (0). When on, the scooter automatically maintains its speed after the accelerator has been held for a few seconds. It deactivates upon accelerator touch or brake. This feature is recommended for advanced users only, and caution is advised to ensure immediate access to the brake.
- P18, P19, P20: These settings should not be changed.
- Battery Voltage and Charging Status: The battery voltage display provides a more accurate understanding of battery health and charge status compared to just the battery bars. It can be accessed by short pressing the power button, appearing as a "V" (or "U") above the battery symbol. The voltage fluctuates during riding (down when accelerating, up when idling). A fully charged battery with the 54.6V charger will show approximately 54.6V. The scooter will shut down at 39V, and 42V indicates a very low charge. The relationship between charge and voltage is not linear.
Maintenance Features
- Pre-Ride Checks: Before each ride, users should inspect the scooter for loose parts, screws, flat tires, or signs of damage/excessive wear. Any issues should be addressed immediately by contacting the place of purchase.
- Wheel Nuts: The main lateral wheel nuts should be checked regularly for firmness, especially after the first 50 miles of riding, and re-tightened if necessary.
- Throttle: The throttle should sit firmly on the handlebar and return to its original position when released.
- Brakes: The rear drum brake's tension and effectiveness should be checked regularly and before the first use.
- Folding Mechanism: Ensure the folding mechanism is locked into place with an audible click. The main bolt must sit firmly in its slot. If the mechanism feels too soft or too hard, its sensitivity can be adjusted by manipulating three screws located in front of the board facing the wheel. Loosening the screws makes it less tight, and tightening them makes it tighter. The ideal setup involves loosening all three screws, folding the scooter into place, and then lightly tightening the screws until the handlebar requires a light push forward to open the lever or snap the bolt into place.
- Charging: The scooter should be turned off before charging. The charger connects to a wall outlet, and then to the scooter's charging port (after opening the cover). The charger's LED indicates charging status (red for charging, green for full). Charging times are 4-6 hours for the 10.4Ah battery and 6-8 hours for the 13Ah battery.
- Battery Maintenance: It is recommended to charge the scooter after every use, though not strictly required. Li-ion batteries are consumable and should be replaced when capacity drops below 50%. The battery should be charged and the scooter turned off before extended storage. Store the scooter in a dry, cool place, away from extreme temperatures, sunlight, and moisture. The battery should be charged at least every 3 months to prevent it from running completely empty, which could necessitate replacement.
- Cleaning: Stains on the scooter's body can be cleaned with a damp cloth. Avoid using alcohol, gasoline, kerosene, or other corrosive chemicals, and do not use high-pressure cleaners. Ensure the scooter is off and unplugged during cleaning, preventing moisture from entering the charging port.
- Brake Adjustment: The drum brake can be adjusted by tightening (clockwise) or loosening (counter-clockwise) a nut to compress or release a spring, thereby increasing or decreasing braking power.
- General Maintenance Safety: Never perform maintenance while the scooter is powered on or charging. Always power off first. Do not attempt repairs or modifications yourself; contact the place of purchase or a professional repair facility.
- Battery Disposal: Do not dispose of batteries in landfills, incinerators, or household trash. Dispose of them through local recycling programs suitable for lithium-ion batteries, adhering to local laws and regulations.
- Charging and Battery Safety Warnings: Use caution with outlets to prevent electric shock. Do not leave the charger plugged in for more than 24 hours. Charge in a safe, clean, dry environment, away from flammable materials. Use only original battery packs and chargers. Avoid touching charging prongs and keep them away from metal objects to prevent short circuits. Do not expose the battery to direct heat, high temperatures, or direct sunlight, and do not leave the scooter in a hot car. Do not pierce the battery or subject it to impact. Stop charging if the battery fails to recharge within the expected time to prevent overheating or rupturing. Do not charge in extreme temperatures (below 32°F/0°C or above 104°F/40°C). Do not charge if the charging port is damaged or wet, or if the battery shows signs of excessive heat, odor, or leakage. If battery liquid leaks and comes into contact with skin, rinse thoroughly and seek medical care. Never disassemble, modify, or repair the battery yourself. Mishandling can lead to reduced performance, shorter lifespan, or safety incidents. Do not discharge the battery with any product other than the scooter.