QuickStart: FLUKE Ti40, Ti45, Ti50, Ti55, TiR2, TiR3, TiR4
© 2011 The Snell Group / 322 N. Main St. / Suite 8 / Barre, VT 05641 / 800.636.9820 / www.thesnellgroup.com
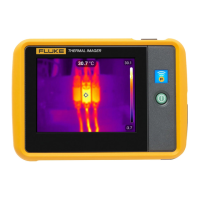
FLUKE Ti40 – Ti55 Page 1
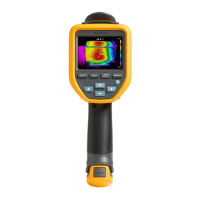
Fig 1 Fig2
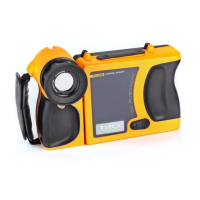
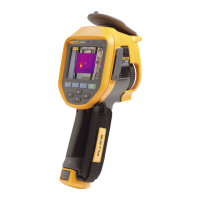
1. MEMORY: Insert the Compact Flash memory card into the slot under the black rubber cover on the top of the
camera. To remove the memory card push down on the small eject key next to the card slot.
2. POWER: Install a fully charged battery by pushing it into the Battery Compartment until it locks into position. To
remove the battery push the Battery Eject slider to the left and the battery will pop out.
The camera can also be powered with the included AC power adapter.
3. START: To turn the camera on push the Power button and a start up sequence will begin lasting approximately
20 seconds. You should then see a live infrared image in the LCD.
To turn the camera off push and hold the Power button for approximately 3 seconds.
While the camera is powered up the camera can also be put into a hibernation mode to save battery life by
tapping the Power button momentarily. When in the hibernation mode the Power button will blink every two
seconds. To return to full power, once again give the Power button a tap.
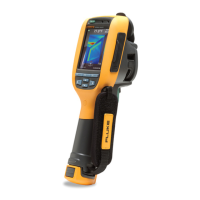
4. FOCUS: Focus is achieved by rotating the Manual Focus Ring on the front of the lens.
5. AUTO ADJUST: To let the camera automatically determine the level and span settings,
press the and release Auto button.
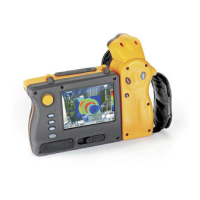
6. MANUAL ADJUST: To manually adjust span and level use the Cursor
Control Joystick to place the arrow cursor on the temperature indicator you wish to adjust on
the right side if the LCD (Fig1). This can be either the upper span temperature limit, the lower
limit or the level temperature in the middle, now push the Select button. You will notice that
when the number to be adjusted is selected highlighted with a box around the number (Fig 2).
You now move the Joystick up or down to increase or decrease it’s value,
If you prefer (on all models except the Ti40) to adjust the values of the upper and
lower span limits at the same time, allowing one to increase as the other decreases
CF Memory Card Slo
Cursor Control Joystick
(Up/down, left/right)
Power
(on/off)
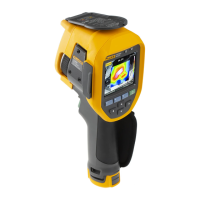
Programmable
Function Keys
(F1 F2 F3)
Menu Button
Selec
Auto
Battery Ejec
(Slide Left)
Manual
Focus Ring
Trigger Button
(Freeze / Store
OK / Escape)
Camera Front
External Power & Data Ports
Digital Camera
Battery Compartment
(Bottom of camera)