0.25" / 1 cm
9
10
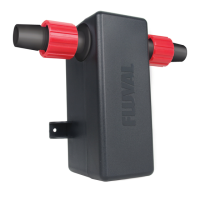
7. Slide metal clamp over one end of
5/8" / 16 mm vinyl hosing (sold
separately). Ensure clamp is positioned
approx. 0.25" / 1 cm from end and
attach to UVC connector.
8. Attach other end of connection hose
tolteroutputvalve.IMPORTANT:
For optimal performance, ensure all
hosing follows a straight path with
no loops and very little slack.
9. Doublecheckallmetalclampsare
positioned approx. 0.25" / 1 cm from
ends and are tightly secured with a
screwdriver to ensure watertight seal.
10.Openlterinputandoutputvalves
(ifequipped)andwait15minutesto
ensure connections are watertight.
11.Pluginltertoelectricaloutlet.
12.Ensurewaterisowingoutfrom
lter.Oncecompleted,connectpower
supply to UVC unit and plug into
electrical outlet. A light indicator
(visible through the semi-transparent
lamp cover) will show that the UVC
unit is operating.
12
7
8
Ver.: 35/23-INT
6

 Loading...