
W
William MeyerSep 23, 2025
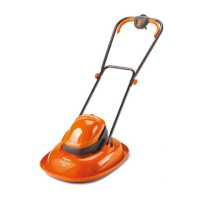
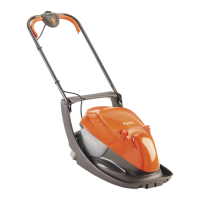
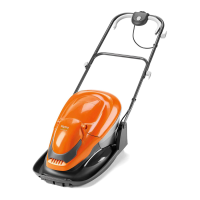
Why does my Flymo Lawn Mower run, but the blade disc doesn't rotate?
- EElizabeth GonzalezSep 23, 2025
The product searches for the charging station, or is driving to the starting point. No action is required.
Why does my Flymo Lawn Mower run, but the blade disc doesn't rotate?
The product searches for the charging station, or is driving to the starting point. No action is required.
What to do if my Flymo EasiLife 350 has an empty battery?
If your Flymo Lawn Mower's battery is empty, there are several potential reasons. Ensure the charging station and guide wire are correctly installed. Check if the indicator lamp in the charging station is flashing yellow, which could indicate a broken or disconnected guide wire. If the battery is spent, it will need to be replaced. Also, check if the indicator lamp in the charging station flashes red, which indicates a defective charging station antenna.
Why is my Flymo EasiLife 350 Lawn Mower going outside of the working area?
If your Flymo Lawn Mower is operating outside the designated working area, check the boundary wire connections to the charging station to ensure they are correctly connected. Verify that the boundary wire is laid according to the instructions. Try moving the boundary wire if there are disturbances from metal objects or buried cables nearby. If there is another product installation nearby, place the product in the charging station and generate a new loop signal.
How to fix a Flymo EasiLife 350 Lawn Mower cutting system that is blocked?
If the cutting system of your Flymo Lawn Mower is blocked, it may be due to several reasons. Check the blade disc and remove any grass or other objects that may have wrapped around it. If the blade disc is in a pool of water, move the product and prevent water from collecting in the work area. If the grass is too high, cut it before installing the product, ensuring it is no more than 4 cm / 1.6 in.
Why does my Flymo EasiLife 350 Lawn Mower run at the wrong time?
If your Flymo Lawn Mower is running at the wrong time, the clock or date in the product may be incorrect; set the clock or date. Alternatively, the start and stop times for mowing might be incorrect; in that case, change the schedule settings.
What does it mean if my Flymo EasiLife 350 says 'Safety function faulty'?
If your Flymo Lawn Mower displays 'Safety function faulty', it indicates a temporary electronic or firmware related issue in the product. Restart the product.
Why is my Flymo EasiLife 350 Lawn Mower stuck in the charging station?
If your Flymo Lawn Mower is stuck in the charging station, there may be an object in the way of the product preventing it from leaving the charging station. Remove the object.
What does it mean when my Flymo Lawn Mower has a temporary battery problem?
If your Flymo Lawn Mower indicates a temporary battery problem, this may be due to a temporary battery or firmware related issue in the product. Restart the product and disconnect and reconnect the battery.
Why am I getting uneven mowing results with my Flymo EasiLife 350 Lawn Mower?
If you are experiencing uneven mowing results with your Flymo Lawn Mower, it could be due to several reasons. The product may not be working enough hours per day, so increase the mowing time. If the shape of the work area requires it, steer the product to a remote area. Check that the correct 'How often?' value is selected. Finally, dull blades can cause uneven cutting, so replace all the blades.
Why does my Flymo EasiLife 350 have no drive?
If your Flymo Lawn Mower has no drive, it may be caught on something; free the product and rectify the reason for the lack of drive. If the work area includes a steep slope, these slopes should be isolated. If the guide wire is laid on a slope, it must be laid at an angle across the slope.
Crucial safety information that must be read and understood before operating the product.
Guidelines for safe operation, including handling, usage, and environmental considerations.
Guide to configuring product settings via the control panel for optimal performance.
Instructions for setting up the automatic mowing schedule based on lawn needs.
Detailed steps for safely replacing the cutting blades for optimal performance.
Table listing product error messages, their causes, and recommended actions.
Methods for locating and repairing breaks in the boundary or guide wire.
| Type | Robotic lawn mower |
|---|---|
| Noise level | 58 dB |
| Display type | LCD |
| Cutting width | 150 mm |
| Grass catcher | - |
| Product color | Black, Orange |
| Number of blades | 3 |
| Number of wheels | 3 wheel(s) |
| Maximum lawn area | 350 m² |
| Maximum cutting height | 50 mm |
| Minimum cutting height | 20 mm |
| Cutting clearance adjustment | Yes |
| Power source | Battery |
| Depth | 550 mm |
|---|---|
| Width | 380 mm |
| Height | 230 mm |
| Weight | 7300 g |